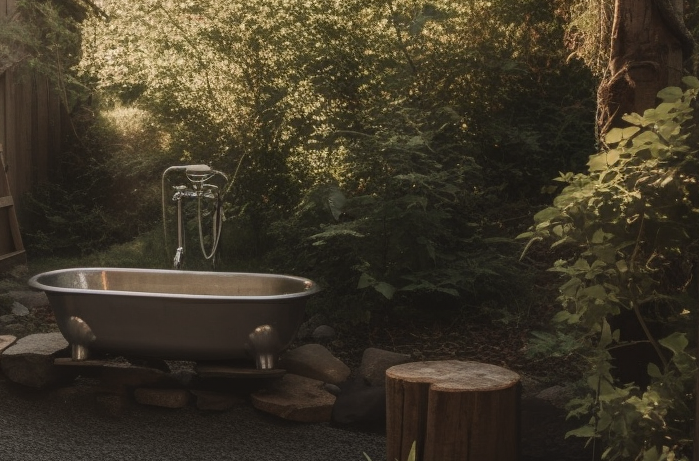
Living off the grid, especially when SHTF, requires innovative thinking and creative solutions to everyday challenges.
One such challenge is maintaining hygiene, which is absolutely crucial for overall well-being and disease prevention.
If you’re thinking about setting up your off grid restroom, you’re in the right place!
So whether you’re planning a full-time shift to an off grid lifestyle, planning a camping trip or simply want to be prepared for any eventuality, you’re in the right place.
Read on to explore our list of different off grid bathroom ideas that will meet your needs and maintain your comfort when SHTF.
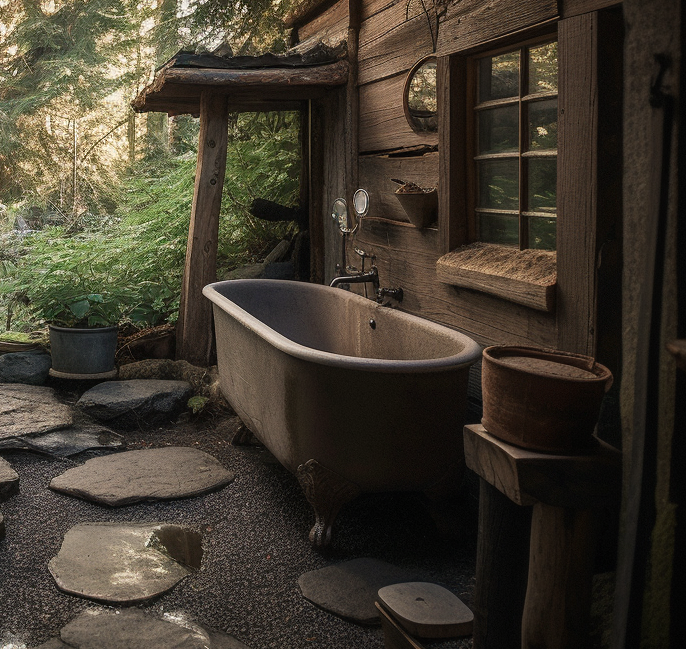
Living off grid doesn’t mean you have to sacrifice comfort or functionality in your bathroom.
There are several eco-friendly toilet options that can help you maintain hygiene while minimizing your environmental footprint. Here are some eco-friendly options:
1. Composting Toilets
Composting toilets are an excellent option for a tiny house bathroom, or if you’re simply looking for a waste management system that’s both environmentally friendly and sustainable.
These innovative toilets work by breaking down human waste into compost, which can then be used to fertilize soil.
Plus, they require no water, so you’ll save valuable resources and reduce your wastewater output.
However, they need regular emptying and maintenance, which involves handling fecal matter.
Pros:
No water needed
Creates compost that can be used as fertilizer
Low-maintenance and odor-free when properly managed
Reduces the need for sewage disposal
Cons:
Requires regular emptying and maintenance
More expensive upfront cost compared to traditional toilets
May not be suitable for large families or heavy use
Here’s a video that shows you how to make one:
H/T @IMEEMADE
2. Humanure Toilets
The humanure bucket toilet, as the name suggests, is a type of bucket toilet system that focuses on turning human waste into compost or “humanure.”
Its process is straightforward. You start with a basic five-gallon bucket fitted with a toilet seat for comfort.
After each use, you cover the waste with a layer of carbon material, such as sawdust, peat moss, or straw, which helps control odors and kickstart the composting process.
Once the bucket is full, it’s emptied into a dedicated outdoor compost pile and left to decompose, eventually turning into nutrient-rich compost that can be safely used in gardening. The bucket is then cleaned and reused.
Pros:
Excellent way to recycle waste
Inexpensive to set up
Easy to maintain
Cons:
Requires a dedicated outdoor space
Can take up to a year to produce usable compost
Here’s a guide on hope to use a humanure toilet:
H/T @twitchysquatch2262
If you want to know more about humanure composting, check out this handbook:
Incinerating toilets are another off grid solution that offers convenience and minimal environmental impact.
These units use propane or electricity to burn waste, reducing it to a small amount of ash. They’re especially useful in areas where it’s not feasible to install a septic system.
Pros:
No water or plumbing required
Compact and easy to install
Reduces waste to a small amount of ash
No need for a septic system or sewage disposal
Cons:
Requires a power source (propane or electricity)
Requires using a liner every time you use it (bought separately)
Ash needs to be disposed of periodically
The most popular incinerator toilet comes from the Cinderella company.
Here’s a review by @sonicsteelcontainerhomes8938:
4. Cassette Toilets
The cassette toilet is a popular choice due to its portability and compact design. You’ll likely find these types in camper vans.
This unique toilet system is divided into two main parts: the top section, which features the toilet seat, bowl, and flushing system, and the bottom part, which is essentially a removable cassette designed for waste storage.
You operate the toilet in a typical way, but when the waste tank fills up, it’s removed, transported, and manually emptied at an appropriate dump station.
Pros:
Manageable and straightforward approach
Compact size is ideal for use in small spaces
Removable cassette is usually wheeled and comes with a handle, making it easy to transport and empty
Uses a minimal amount of water for flushing
Cons:
Requires frequent emptying
You have to physically remove and empty the cassette
Requires the regular addition of specific toilet chemicals
Check out this review of using a cassette toilet from the @Weretherussos:
Portable and DIY Toilet Ideas
Now if you’re planning an outdoor adventure or hosting an event where traditional bathroom facilities may not be available, portable and DIY toilets might just be the solution you need.
These self-contained and easy-to-assemble options come in a variety of styles and sizes, from simple bucket toilets to more complex composting models.
5. Portable Toilets
For those who want a temporary or mobile off grid toilet option, portable toilets are the way to go.
They’re typically lightweight, easy to use, and can be transported as needed.
Many models feature chemical additives to control odors and help break down waste.
Pros:
Convenient and easily transportable
Affordable upfront cost
Suitable for temporary or remote locations
Requires minimal maintenance
Cons:
Requires regular emptying and cleaning
Chemical additives may not be environmentally friendly
Limited capacity compared to other toilet options
Check out these different types of portable toilets:
A separating tank toilet, also known as a urine-diverting dry toilet (UDDT), is a unique off grid sanitation solution designed to separate solid and liquid waste at the source.
It’s a type of composting toilet that has two separate compartments for urine and feces to facilitate easier waste management and prevent unpleasant odors.
The toilet features a special bowl design that diverts urine into a separate front tank while directing solid waste into the rear compartment.
Urine can be either collected for safe disposal or repurposed as a nitrogen-rich fertilizer.
Meanwhile, solid waste dries out and decomposes over time into a safe, odorless compost that can be used in non-edible plant cultivation.
Pros:
Minimizes the production of foul smells usually associated with mixed human waste
Separated waste is easier to manage
Uses no water for flushing
Recycles waste into useful resources
Cons:
Regular emptying and cleaning of both tanks is necessary
Initial cost of a separating tank toilet can be higher than that of traditional or basic composting toilets
Here’s a video on how to make one:
H/T @dennislittlefield
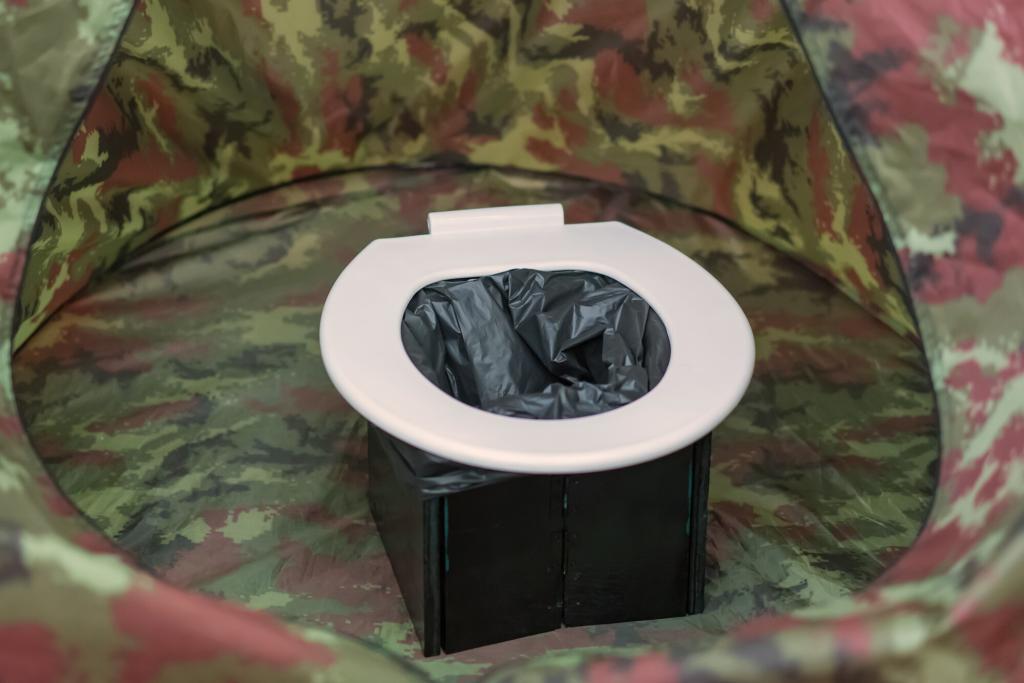
8. Bucket Toilets
A bucket toilet, also known as a honey bucket, is among the simplest forms of off grid bathroom ideas.
Essentially, it’s a versatile bucket that can hold up to five gallons, fitted with a toilet seat and lid for added comfort and ease.
To use a bucket toilet, one just needs to position oneself on the seat and go about their business as usual.
To manage waste, it’s typical to line the bucket with a compostable bag for easy disposal.
Post-use, it’s advisable to cover the waste with a layer of absorbent material like sawdust, peat moss, or even shredded newspaper. This method helps in reducing odors and accelerating the composting process.
The full bag can then be safely composted in a dedicated area, while the bucket is cleaned and prepared for the next use with a fresh compostable bag and a layer of bulking material.
Pros:
Simple design makes it easy to use, clean, and maintain
Lightweight and compact
Inexpensive solution, making them accessible for most budgets
Cons:
Bucket’s size limits its capacity, requiring frequent emptying and disposal of waste
Bucket toilets can produce noticeable odors if not maintained properly
These waterless toilets are a great option for those who want to reduce their water usage or live in areas where water is scarce.
These innovative toilets use little to no water, instead relying on natural processes like composting or evaporation to break down waste.
9. Dry Toilets
Dry toilets, also known as composting or waterless toilets work by separating liquid and solid waste, often using a urine diverter.
The solid waste is then mixed with a carbon-rich material such as sawdust, peat moss, or coconut coir, which aids in the composting process and reduces odors.
The liquid waste is usually diverted into a separate container and can be diluted and safely used as a fertilizer.
The solid waste is left to compost, often in a separate compartment or container. Over time, the composted waste can also be used as a nutrient-rich soil amendment, completing the waste-to-resource cycle.
Pros:
Use little to no water
Don’t require plumbing or a septic system, which means they can be installed virtually anywhere
Environmental-friendly solution
Cons:
Regular maintenance is necessary for effective operation
Can take several months to a year for human waste to safely compost, requiring a secondary composting area or storage system
The most popular Dry Toilet is the Laveo Dry Flush Toilet. Learn how it works by watching this video:
H/T @SmokeyHills
10. Septic Systems
A septic system is a decentralized wastewater treatment structure often used in rural or off grid settings.
It’s essentially a self-contained underground waste disposal system that functions without the need for any connections to the main sewer lines.
In an off grid bathroom scenario, the septic system typically consists of two main parts: a septic tank and a drain field. The waste from the bathroom is routed into the septic tank, where solids settle at the bottom, forming sludge.
At the same time, oil and grease float to the top, creating a layer of scum. Bacteria in the septic tank then work to break down these solids.
The wastewater, now with fewer solids, flows from the tank to the drain field. Here, it is further treated as it percolates down through the soil, which acts as a natural filter.
Pros:
Entirely self-contained
With proper care and maintenance, a septic system can last for many years
Eco-friendly way of treating wastewater naturally
Cons:
Quite expensive; with costs depending on the size and complexity of the system
Requires significant space for both the tank and the drain field
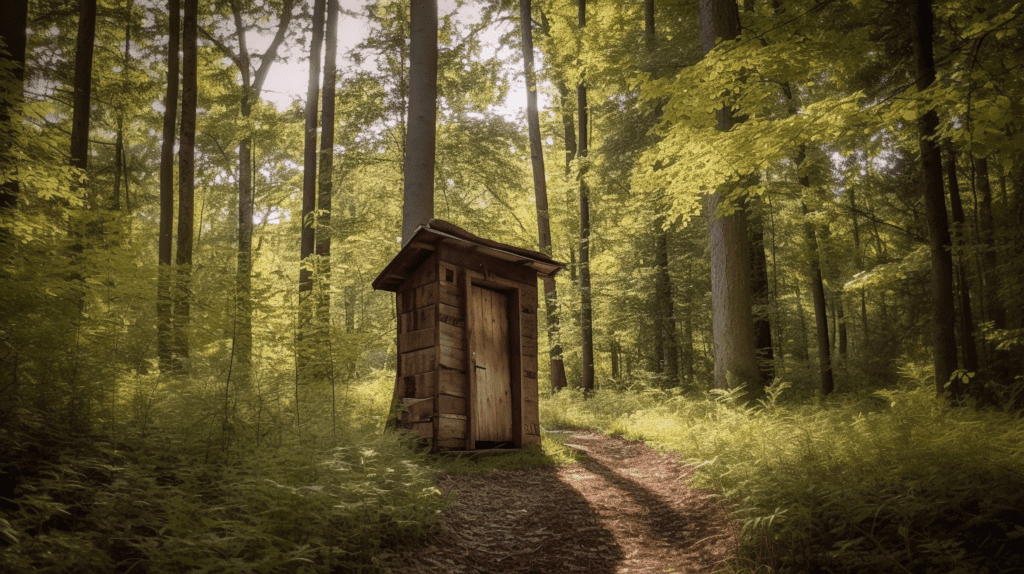
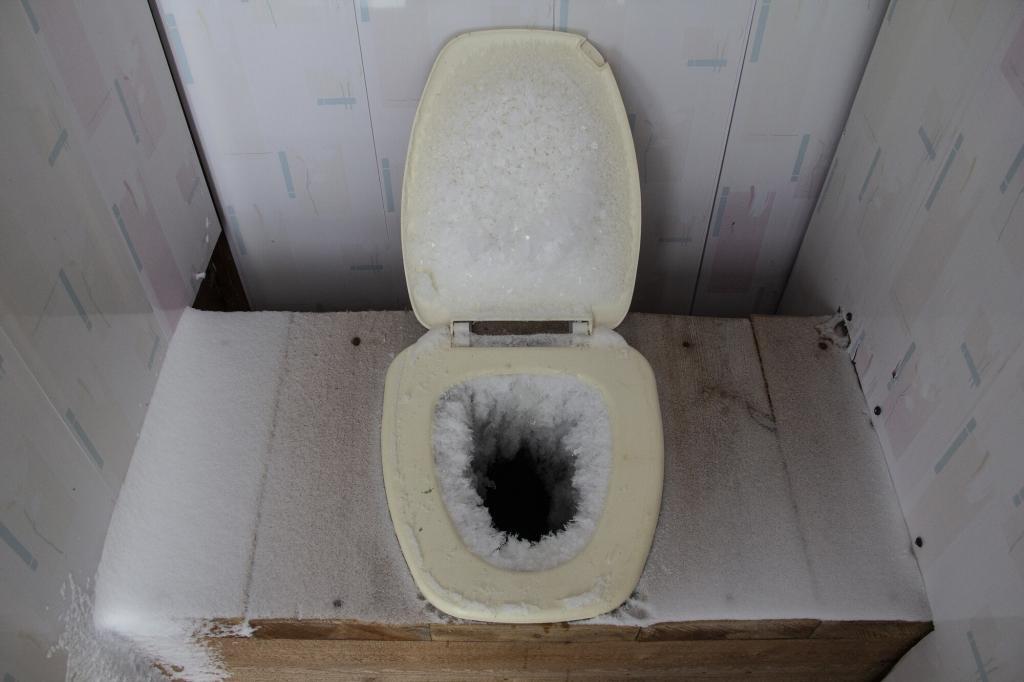
11. Outhouses/ Latrines
An outhouse, also known as a latrine, is one of the simplest off grid bathroom ideas, harking back to a simpler time.
Fundamentally, it’s a small structure covering a hole or pit dug into the ground, used for the disposal of human waste.
Using an outhouse is quite straightforward. The user sits or squats over the hole and does their business. Some modern outhouses may include a wooden or plastic seat for added comfort.
After use, it’s common practice to sprinkle a layer of soil, sawdust, or lime to cover the waste, helping to reduce odors and flies.
Outhouses can be designed with varying levels of complexity, from a rudimentary shelter over a pit to a more comfortable structure with improved ventilation, a door for privacy, and even decorative elements.
Pros:
Simple to build and use, requiring minimal materials and technical expertise
Functions without water
Quite affordable, especially when compared to other off grid bathroom ideas
Cons:
Require regular maintenance as the pit will eventually fill up and need to be emptied or a new one dug
Usually built a fair distance away from the main dwelling, which can be inconvenient, particularly in bad weather or at night.
Portable Shower Ideas
12. Bucket Showers
The bucket shower, true to its name, is a rudimentary form of an off grid shower.
The principle is simple; you fill a bucket with water, which is equipped with a shower head or a spout at its base. The bucket is then lifted overhead, allowing gravity to force the water out.
Pros:
Very budget-friendly and requires minimal setup
It does not need electricity or sophisticated plumbing systems
Highly portable and can be set up practically anywhere
Easy to repair and maintain due to its simplicity
Cons:
Limited water capacity can mean a short shower time
Continually refilling and lifting the bucket can be physically demanding
13. Gravity-Fed Solar Showers
A gravity-fed solar shower typically incorporates a bag or container filled with water and left in the sun for warming.
Once adequately heated, the bag is elevated, and a small shower head releases the water. This option is ideal for those who want to enjoy hot showers, especially if you’re living in a cold area.
Pros:
Utilizes solar power for water heating
Gives the luxury of a warm shower without needing an external heat source
No need for electricity or complex installation
Portable and ideal for camping or outdoor activities
Cons:
The water’s temperature and quantity rely on the sunlight and the size of the bag
Requires time for the water to heat up, limiting spontaneity
If you’re planning to add a solar shower, here’s a great example:
Pressurized off grid showers are simple systems where a water container is pressurized, often using a foot or hand pump, driving the water out through a shower head.
Some variants can also heat the water through a heat exchanger or solar energy.
Pros:
Creates a steady water flow, similar to standard showers
Can provide heated water depending on the model
Allows for adjustment of water pressure
Can be set up in various locations
Cons:
Tends to be more costly and complicated to install compared to more straightforward options
Regular manual effort is needed to create pressure
With a few innovative waterless bathroom solutions, you can maintain a high level of personal care even without plumbing or running water.
Let’s explore three popular options.
16. Navy Showers
A Navy shower, popularized by sailors or military personnel living in confined spaces, can be your go-to solution for water conservation. They’re especially well-suited for tiny houses and off grid living because they use very little water.
Here’s how it works:
Turn on the water and quickly get wet.
Turn off the water and lather up with soap and shampoo.
Turn on the water again to rinse off.
This simple process reduces water usage to just a few gallons per shower while still getting clean. The only downside? They might feel less luxurious than a regular shower, but that’s a small trade-off for sustainability.
Pros:
Reduces water and energy consumption
Effective solution for areas where water is scarce
Cons:
Feels rushed
Can be chilly
17. Wet Wipes
Wet wipes are an excellent alternative for cleaning your body without relying on running water.
Originally designed for baby care, they’ve become increasingly popular in a variety of contexts, including camping and off grid living.
They’re a handy tool to have in your off grid bathroom arsenal. Just remember to dispose of them responsibly.
While wet wipes are a handy solution for maintaining hygiene in off grid situations or emergencies, nothing beats a good old-fashioned shower.
So it’s important to also incorporate regular bathing into your routine whenever possible.
These energy-saving showerheads are designed to use less water and energy, but they don’t compromise your shower experience.
You can still enjoy a satisfying shower with the same water pressure and comfort as traditional shower heads while also reducing your environmental impact.
19. Solar Water Heaters
Using solar water heaters is a great way to harness the sun’s energy and save on power consumption. This method involves using a free, renewable source of energy instead of relying on electricity or propane to heat your water.
There are several different types, but in essence, they involve a solar collector — usually a panel or evacuated tube design that absorbs solar radiation and transfers it to water.
This system stores heated water in an insulated tank for on-demand use, perfect for bathing in cold climates.
They can either be passive, relying on natural convection to move the hot water, or active, which uses pumps and controllers.
In an off grid scenario, a passive system is typically preferred as it doesn’t require electricity.
To get started, you can either purchase a ready-made solar water heating system or build your own.
Pros:
Low operating costs
Systems can be sized to meet individual needs
Require little upkeep
Cons:
Upfront cost of purchasing and installing a solar water heater can be high
Effectiveness of solar water heaters is contingent on the availability of sunlight
Reuse and Recycle System Ideas
20. Greywater Systems
Greywater systems allow for the recycling of water from showers, sinks, and washing machines. This system separates greywater (lightly used water) from blackwater (heavily polluted water, typically from toilets), allowing for different treatment and reuse strategies.
Greywater, with its relatively minor contamination, can be filtered and repurposed for non-potable uses such as flushing toilets, watering plants, or even showering again with additional purification.
For off grid bathroom ideas, incorporating a greywater system can mean the installation of pipes to direct the water from your fixtures to a treatment area.
Here, the water is filtered and treated before being used in gardens or toilets.
Pros:
Saves resources by recycling water
Helps reduce strain in septic systems
Helps you save money in the long run
Cons:
Can be expensive at first due to the potential need for plumbing modifications
Need regular maintenance to ensure the water is being treated properly and that the system is working effectively
Check out this video that shows you how to make your greywater system:
H/T @SteepintheWoods
21. Rainwater Harvesting Systems
Rainwater harvesting is another eco-friendly solution for your off grid bathroom. It’s a simple idea: collect rainwater and use it for your daily needs, like flushing toilets and washing clothes.
To get started, you’ll need a storage tank and a proper gutter system to channel the water flow.
Pros:
Reduces your dependence on the water grid
Lowers your water bill
Provides a backup in times of drought or water shortage
Cons:
Rainfall patterns may vary, making it hard to predict the amount of water available
You may need additional filtration or treatment for certain uses
Here’s a video showing you how to create a rainwater harvesting system you can use for your off grid bathroom:
H/T @homesteadonomics
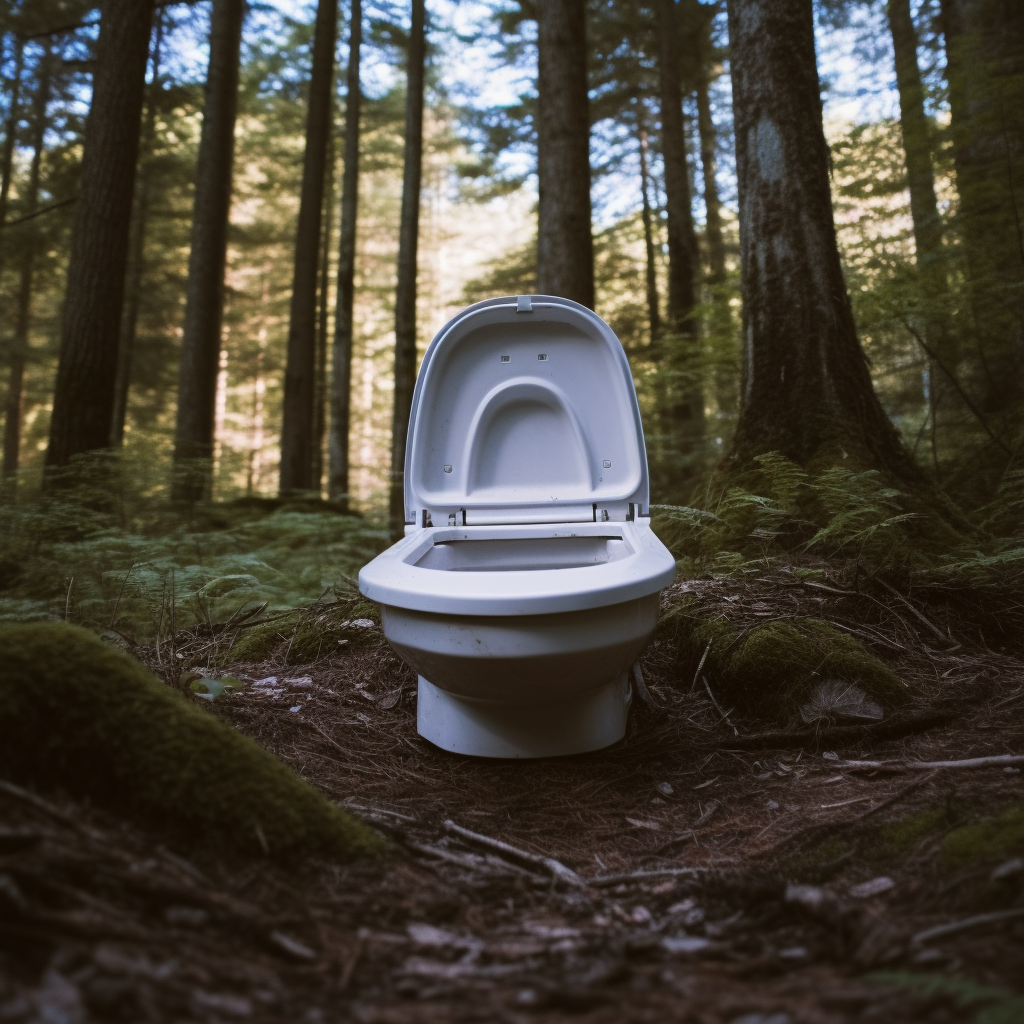
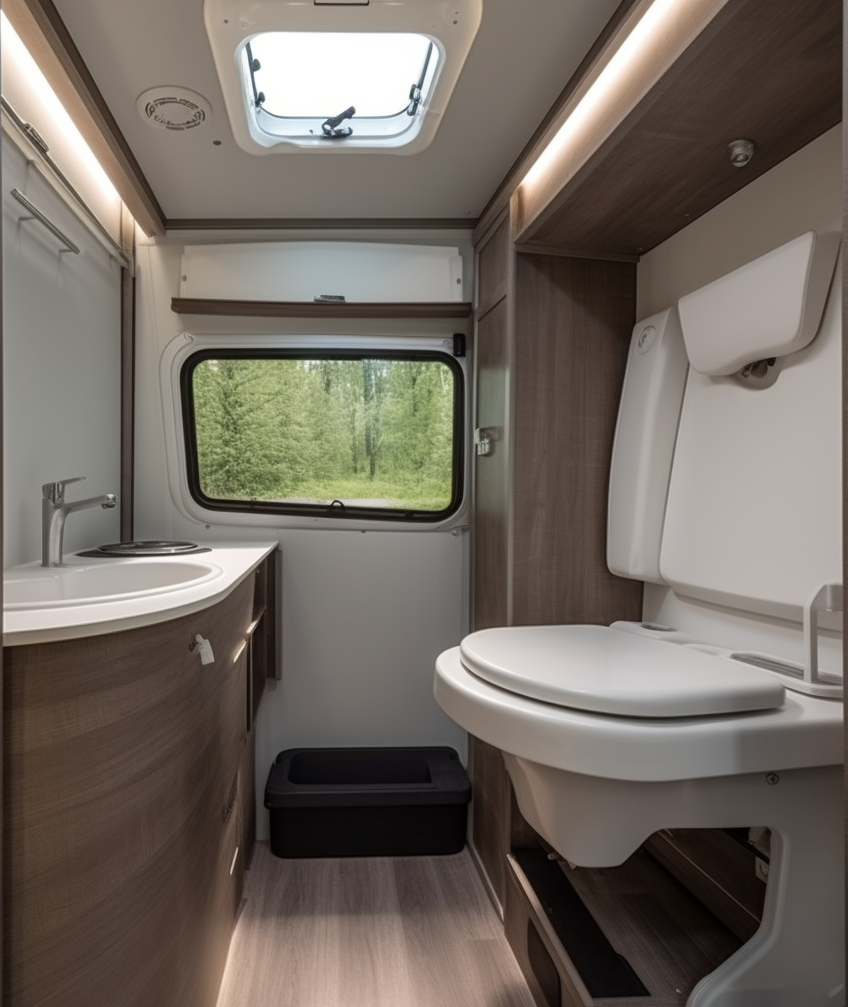
What Is An Off Grid Bathroom?
An off grid bathroom is a self-contained, self-sustaining restroom facility that functions without relying on traditional public utilities like water supply, sewage systems, or electricity.
The core philosophy behind an off grid bathroom is achieving sustainability and self-reliance, often in preparation for situations where conventional services are unavailable or when one chooses to live removed from societal dependencies.
Off grid bathrooms can vary greatly in their design, complexity, and luxury level, depending largely on the available resources, the user’s skill, and their specific requirements.
Elements Of An Off Grid Bathroom
There are a few elements that are common across most off grid bathrooms, which are the following:
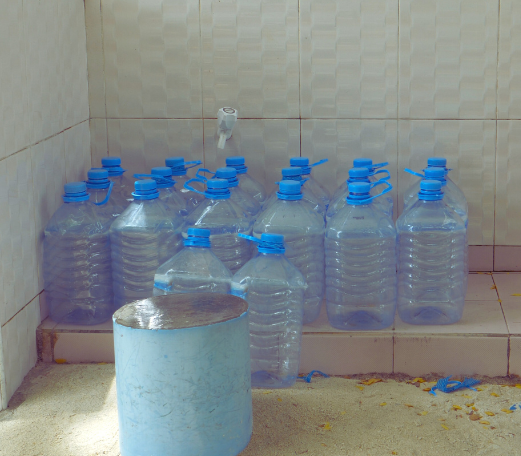
Water Supply: This may be sourced from rainwater harvesting, wells, nearby streams, or even manual hauling. The water is often stored in containers or tanks and is used sparingly to minimize wastage.
Toilet Facilities: Off grid bathrooms frequently feature composting toilets, which require no water and convert human waste into compost that can be used as fertilizer.
Other options might include incinerating toilets or basic pit latrines.
Lighting and Heating: These can be powered by renewable energy sources such as solar panels or wind turbines.
In some cases, wood-burning stoves might be used for heating.
Waste Management: Greywater (from sinks, showers, etc.) and blackwater (from toilets) are often dealt with on-site.
Greywater can be reused for tasks like watering plants, while blackwater is often composted or disposed of in a safe and environmentally friendly manner.
Bathing Facilities: These can range from simple bucket showers to full-fledged shower stalls, heated by solar power, propane, or wood-fired water heaters.
Why Make An Off Grid Bathroom?
Creating an off grid bathroom can offer numerous advantages, here are some reasons why you should have one:
Self-Sufficiency
This is one of the most attractive benefits of an off grid bathroom. It reduces reliance on external utilities, ensuring that your essential sanitary needs continue to be met even during power outages, natural disasters, or when living in remote areas.
Environmental Impact
Off grid bathrooms typically employ eco-friendly solutions like composting toilets and rainwater harvesting, reducing water usage and waste production.
This can significantly decrease your carbon footprint and contribute positively to the environment.
Cost Savings
While there might be some initial costs involved in setting up an off grid bathroom, over time, savings on water and electricity bills can be substantial.
Additionally, many off grid solutions are designed to be low-maintenance, which can further save on upkeep costs.
Versatility and Adaptability
Off grid bathrooms can be designed to fit various scenarios, from permanent residences to vacation cabins, RVs, or even emergency shelters.
They can be adapted to your particular needs, resources, and the environment you’re in.
Legal and Zoning Freedom
Some people choose off grid living, which includes off grid bathrooms, to escape restrictive building codes and regulations in certain areas.
However, it’s essential to note that you should always check and adhere to local regulations wherever you plan to establish your off grid setup.
Educational Value
Building and maintaining an off grid bathroom can be a rich learning experience, teaching valuable skills like plumbing, carpentry, and understanding water and waste management.
Preparedness
For those interested in emergency preparedness or a survivalist lifestyle, an off grid bathroom is an important component of being ready for any situation where traditional utilities might be disrupted.
What To Consider When Designing An Off Grid Bathroom
With careful planning, you can create a functional and beautiful space that meets your needs and promotes sustainability. Here are some factors you need to consider:
Space Optimization
When designing an off grid bathroom, you’ll want to make the most of the available space. Think about creative ways to maximize storage, such as using built-in shelves or multipurpose furniture.
For example, a sink that doubles as a countertop or a mirror with hidden storage would be great additions.
Compact, wall-mounted fixtures also help free up more room, making your bathroom feel spacious and comfortable.
Ventilation and Drainage
Proper ventilation and drainage are essential components of an off grid bathroom. Without adequate airflow, moisture can build up, leading to issues like mold and mildew.
Strategically place windows or vents to promote natural airflow, or consider installing solar-powered exhaust fans if necessary.
For drainage, you could explore options such as septic systems or compostable off grid toilets. You want to ensure that waste is managed properly to avoid unpleasant odors and environmental issues.
Natural Materials
Using natural materials in an off grid bathroom creates an eco-friendly and harmonious space. Consider materials like wood, stone, or bamboo for flooring, walls, or countertops.
These materials not only look great, but they’re also durable and easy to maintain.
Additionally, incorporating natural elements can seamlessly blend your bathroom with the surrounding environment, creating a tranquil and cozy atmosphere.
What To Consider When Building An Off Grid Bathroom
Choosing the right off grid bathroom is a highly personal decision, as the best choice depends on your unique lifestyle, preferences, and needs.
Here are the things you need to consider before you plan to build your off grid bathroom:
Understanding Your Specific Needs
Whether you’re honing your skills in the wild or preparing for a self-sufficient lifestyle in an isolated retreat, your specific bathroom needs play a crucial role in your decision.
If your plan involves being mobile, traversing terrains, and changing locations frequently, a lightweight, portable toilet would fit the bill.
On the other hand, if you’re setting up a permanent base in a secluded location, a robust composting toilet, offering a longer-term solution and less dependency on external waste disposal, would be a more suitable choice.
Budget Considerations
Working within a budget doesn’t mean you have to compromise on your off grid bathroom needs.
If your funds are limited, you may consider a simpler setup, like a bucket-style camping toilet. These models are incredibly cost-effective and practical.
They’re easy to use and transport, and toilets can be an asset during a crisis, making them a popular choice for those seeking affordability and functionality.
On the other hand, if your budget allows, investing in more advanced systems like composting toilets could prove beneficial in the long run.
Although they have a higher initial cost, their durability, ease of maintenance, and long-term waste management solutions can save you money over time.
So when choosing your off grid bathroom, consider not just the upfront costs but also the long-term benefits and how well the solution aligns with your survival strategy and self-sufficient lifestyle.
Comfort and Ease of Use
When setting up an off grid bathroom, don’t compromise on comfort. Just like your home toilet, it should be something you’re comfortable using daily.
Slightly more expensive models often offer a more homely feel, which can significantly enhance your off grid living experience.
Also, factor in the ease of use. Your off grid bathroom must be functional and straightforward. Look at how the waste disposal or conversion process works if you’re considering composting toilets.
Though some methods might seem complex at first, they may offer benefits like odor reduction and usable compost.
After all, the ideal off grid bathroom should effortlessly combine comfort, convenience, and a touch of home.
Maintenance Requirements
The level of care and upkeep your bathroom needs will heavily depend on the type of system you choose.
For instance, portable camping toilets are relatively low maintenance. They typically require a simple emptying and cleaning process after use.
However, it’s worth noting that frequent use may demand more regular servicing, which could be tricky if you’re on the move or away from convenient disposal facilities.
On the other hand, more permanent solutions like composting toilets require a different kind of maintenance.
So always factor in your willingness and ability to perform necessary maintenance tasks. Keep in mind that regular upkeep is crucial not only for sanitary reasons but also for the longevity of your off grid bathroom setup.
A well-maintained system will serve you effectively and reliably for many years.
Climate and Weather Conditions
Bear in mind the impact of climate and weather on your off grid bathroom.
In chilly climates, composting toilets might underperform due to slowed waste breakdown, and water-based systems risk freezing.
Similarly, hot, dry environments could cause rapid evaporation, reducing the effectiveness of certain waste disposal systems, like composting toilets, which could dry out.
Also, factors such as heavy rain or strong winds can affect both the stability of lighter bathroom setups and accessibility to outdoor facilities.
Always ensure your off grid bathroom can endure the specific weather conditions of your area for a smooth, efficient experience.
Accessories and Extras
While the core functionality is paramount, don’t overlook the benefits of useful add-ons.
Some off grid bathrooms come with additional features that can elevate your experience and add convenience. For instance, a toilet with a built-in sink or a shower attachment could enhance cleanliness and hygiene.
Privacy accessories, like a tent or a screen, might also be essential if you plan to set up your bathroom outdoors.
For those choosing portable options, look out for models that include carrying cases or bags for easier transport.
Also, consider extras like biodegradable toilet paper or waste disposal bags that are environmentally friendly.
Remember, the right accessories can turn a basic off grid bathroom into a more comfortable and efficient setup.
How Can I Build An Affordable Off Grid Bathroom
Start by considering what you really need. Will it just be you using the bathroom, or is there a whole family to think about? What level of comfort are you after?
Once you’ve got this figured out, you can choose a budget-friendly toilet system that’s right for you, from simple camping toilets to more sustainable composting options.
Next, think about water. You can make some great savings by using rainwater for washing and showering, or why not try a manually-filled portable shower for a quick and easy option?
When it comes to sinks and showers, a basic basin and a jug of water can work wonders, and a solar-heated shower bag in a privacy tent can give you that luxury feel without the hefty price tag.
And for waste disposal, composting or evaporation are both cost-effective options – just remember to check your local guidelines.
Last but not least, don’t be afraid to get creative with repurposed materials for your construction. You’ll save money and have a one-of-a-kind bathroom to show off!
Remember, building an off grid bathroom doesn’t have to be expensive — it’s all about making smart, affordable choices and having a bit of DIY fun along the way.
Frequently Asked Questions
How is a humanure toilet different from a composting toilet?
A humanure toilet and a composting toilet both compost human waste, but they function differently.
A composting toilet is a self-contained system that quickly composts waste within the unit through methods like aeration or heat.
Conversely, a humanure toilet is a simple setup, typically a bucket, where waste is manually moved to an external compost pile to decompose over a longer time.
So while both create compost, composting toilets offer faster, automated processing, whereas humanure toilets are simpler and more manual.
How can I ensure the comfort and ease of use of my off grid bathroom?
Ensuring comfort in your off grid bathroom starts with the right choice of facilities. Pick a toilet that aligns with your comfort levels, from composting toilets to simple bucket-style ones.
For bathing, solar showers or portable systems offer a warm, satisfying rinse.
Think about location too — it should be conveniently accessible, yet offer enough privacy. And don’t forget those little extras. For, instance, a comfy seat for your toilet or a small shelf for toiletries can transform your off grid bathroom from basic to cozy.
Can I have an outhouse with a shower and toilet?
Absolutely, you can have an outhouse with both a shower and toilet. It just requires careful planning and setup.
Your outhouse will need to be a bit larger to comfortably accommodate both. You’ll need a reliable water source for the shower, and consider how you’ll handle wastewater.
Also, think about heating options if you want warm showers, like a solar shower bag or a gas-powered water heater.
As for the toilet, composting or portable toilets are common off grid choices.
With these considerations, you can create a fully-functional off grid bathroom in your outhouse.
Off Grid Bathroom Ideas For Living When SHTF: Key Takeaways
Navigating through the world of off grid bathroom ideas, we’ve seen that comfort, adaptability, and a touch of creativity are key, especially when the grid goes down.
Remember, your best bet for an off grid bathroom setup is one that suits your survival strategies, caters to your personal needs, fits your budget, and is adaptable to your environment.
You might choose a simple yet effective bucket toilet or an ecologically conscious humanure system. Perhaps, the higher-end composting toilet aligns more with your prepping style.
Similarly, when it comes to keeping fresh and clean, a sun-soaked solar shower bag or a nifty portable shower system could be your new best friend.
In essence, preparing an off grid bathroom is about finding a balance between managing waste effectively and maintaining hygiene so that you can stay healthy and comfortable even in the harshest of situations.
A bushcraft furniture salve is more than just a maintenance product; it’s an essential solution for preserving the longevity and quality of your wooden belongings.
You should keep your furniture and wooden tools in tip-top condition, especially when your survival could hinge on it.
What if I told you there was a natural alternative to traditional furniture polish that could help you take one step closer to being better prepared?
But don’t just take our word for it. Wise Owl has been used and trusted by bushcraft enthusiasts for years. It’s the go-to choice for bushcraft furniture salve for those who demand the best from their wood and leather products.
In this article, we’ll dive deep into the benefits of Wise Owl Furniture Salve and show you how it can help you get prepared for whatever comes your way.
So read on if you are ready to take your prepping game to the next level.
Wise Owl furniture salves are a game-changer in furniture maintenance as craftsmanship lies at the core of these unique solutions. These are a unique and versatile line of products designed to protect, restore, and rejuvenate your furniture and other various surfaces.
These make a great bushcraft furniture salve because they are a natural sealant that can be used to protect and restore the soft sheen of your wooden furniture and tools.
The primary function of these salves is to breathe life back into worn-out or aged furniture, be it wood or leather, by nourishing the material and restoring its original luster.
They also offer protection from damage, including water damage, and feature bactericidal properties that help shield your furniture from harmful bacteria.
Ingredients of Wise Owl Furniture Salves
The secret of a salve’s ingredient lies in the blend of natural waxes and oils. Wise Owl Furniture Salves contain a natural formula that is gentle on your furniture and the environment.
What makes Wise Owl stand out is its high hemp seed oil content in the formula, which provides a nourishing and protective layer to your furniture.
This natural ingredient is known for its moisturizing and protective properties, making it an ideal choice for furniture care.
Wise Owl products also contain natural ingredients that are free from harsh chemicals, making it safe for use around children and pets.
Plus, it contains coconut oil, which keeps the wax soft and easy to apply on any surface.
Benefits And Uses Of Wise Owl Furniture Salve
Now let’s explore the multiple uses and advantages of Wise Owl salves. From rejuvenation to preservation, the applications are boundless.
Protects Furniture
Wise Owl Furniture Salves provide a protective barrier to your furniture against moisture and wear. This defense mechanism is made of all-natural and non-toxic ingredients that can help restore and protect your wooden furniture or leather goods.
It can help prevent cracking, fading, and other damage caused by exposure to sunlight, moisture, and other environmental factors.
With water-protective qualities, this salve ensures your furniture and tools remain sturdy and functional, even in adverse weather conditions. It’s an essential component of your survival kit, providing that extra layer of protection your equipment needs when you’re in the wild.
It can also enhance the natural beauty of the wood, giving it a rich and lustrous shine.
Restores Furniture
Breathing life back into wooden furniture is another key benefit. This furniture salve is a natural super oil that you can use on different kinds of surfaces.
Its bactericidal properties shield your gear from harmful bacteria, extending its longevity even in the harshest environments.
Provides Aromatherapy and Scents
Not only does Wise Owl Furniture Salve restore your furniture, but it also provides aromatherapy benefits that enchant your space with calming scents. This also helps with deodorizing musty old furniture.
From lavender to peppermint there are plenty of scents to choose from to suit your needs. They recently came out with a new scent that brings the fresh smell of summer to your next project.
Application and Maintenance
Here’s a guide on how to properly apply and maintain your furniture using Wise Owl salves.
How To Apply Wise Owl Furniture Salve
Applying Wise Owl Furniture Salve is easy and straightforward. You only need a good brush and the right techniques. There are two ways to use it: using a brush or a lint-free cloth.
If you prefer to use a brush, make sure it is a natural bristle brush. Synthetic brushes can leave streaks and may not apply the salve evenly. On the other hand, a natural bristle brush will give you a smooth, even application.
But if you prefer to use a cloth, make sure it is lint-free to avoid leaving any fibers behind. A microfiber cloth or an old T-shirt works well.
Regardless of the method you choose, here’s how to apply Wise Owl to your furniture:
First, make sure the surface you are applying the salve to is clean and dry.
Then, using a natural bristle brush, apply a thin layer of the salve in the direction of the wood grain. The butter texture of the salve makes it easy to apply evenly and smoothly.
After applying, wait for 5-10 minutes to allow the salve to penetrate the wood.
Once the waiting period is over, use a lint-free cloth to wipe off any excess bushcraft furniture salve. The result is a beautiful, natural finish that will protect your furniture for years to come.
H/T to @mycreativedays for this video on how to use Wise Owl furniture salve.
Maintaining Furniture With Wise Owl Furniture Salve
Consistency in maintenance ensures long-lasting results. Monthly touch-ups can make all the difference. As mentioned earlier, Wise Owl Furniture Salve not only protects your wood and leather goods but also helps maintain it. Regular application of the salve will keep your furniture looking its best and prevent drying and cracking.
To maintain your furniture, simply follow the same steps as when applying the salve.
Clean and dry the surface, and apply a thin layer of the salve with a natural bristle brush.
Wipe off any excess with a lint-free cloth.
Repeat this process every six to twelve months, or as needed.
Using Wise Owl Furniture Salve On Leather
Using Wise Owl Furniture Salve on leather provides extra nourishment and durability. Consider it a spa treatment for your leather goods.
First, clean the leather with a damp cloth and let it dry.
Apply a small amount of Wise Owl Furniture Salve evenly using a soft cloth.
Allow the salve to soak in, ideally overnight, to deeply nourish the leather.
Buff the surface with a dry cloth to remove any excess salve and enhance the leather’s shine.
Regularly repeat this process for ongoing care, always spot test first, and avoid suede or unfinished leather.
Wise Owl Furniture Salve Reviews
Take a glimpse of what users are saying about the different Wise Owl Furniture salve options. Real-world testimonials are the best quality indicators.
Wise Owl products include a variety of furniture salves and tonics that are made from high-quality, all-natural ingredients. They also carry a variety of paint, painting supplies and candles.
Here’s a brief overview of a few of Wise Owl’s Furniture Salve products:
The Tobacco Flower variant offers a rich, rustic aroma. Users often associate it with sophistication and luxury. This salve is made with a blend of beeswax and natural oils and has a warm and inviting scent that’s perfect for cozy spaces. It helps to moisturize and protect the wood while also adding a subtle shine.
The Tobacco Flower variant offers a rich, rustic aroma. Users often associate it with sophistication and luxury. If you’re looking for a furniture polish that’s easy to apply and has a pleasant scent, Noir Moon is a great option.
It’s made with a blend of natural oils and waxes and helps to protect wood from scratches and other damage.
This unscented variant offers a subtle and natural approach to furniture care. This blend is perfect for those who prefer a non-intrusive, fragrance-free salve, while still reaping the robust conditioning benefits of hemp seed oil.
This unscented hemp version is ideal for maintaining the original look and feel of your bushcraft furniture, offering an understated solution to restoration and preservation.
Frequently Asked Questions
Can furniture salve be used on all types of wood?
Yes, Wise Owl Furniture Salve is safe to use on all types of wood, including hardwoods, softwoods, and even reclaimed or antique woods.
It is also safe to use on painted or stained wood surfaces.
Is furniture salve safe for indoor use?
Yes, Wise Owl Furniture Salve is safe for indoor use, as it is made from all-natural and non-toxic ingredients.
Also, it does not contain any harmful chemicals or fumes that could be harmful to you or your family.
Does furniture salve leave a greasy residue?
No, Wise Owl Furniture Salve does not leave a greasy residue on your furniture. It is designed to soak into the wood, leaving behind a protective layer that enhances the natural beauty of the wood.
How often should furniture salve be applied?
We recommend applying Wise Owl Furniture Salve every 6-12 months, depending on the level of use and exposure to environmental factors.
Regular application can help keep your furniture and leather goods looking its best and protect it from damage.
Wise Owl Furniture Salve: Key Takeaways
Wise Owl Furniture Salves offer an unmatched blend of preservation, restoration, and sensory delight. These are more than just maintenance products; they’re essential investments for anyone serious about home care.
If you’re looking for a natural way to protect and preserve your wooden furniture, Wise Owl Furniture Salve is a great product to consider.
Here are some key takeaways to keep in mind:
Made with all-natural ingredients: This furniture salve is made with a blend of beeswax, coconut oil, and essential oils, so you can feel good about using it in your home.
Provides long-lasting protection: Not only does Wise Owl Furniture Salve protect your furniture from scratches and water damage, but it also helps to bring out the natural beauty of the wood.
Easy to apply: Simply apply a small amount of the salve to a clean, dry cloth and rub it into your furniture in a circular motion. It’s that easy!
Versatile: This furniture salve can be used on a variety of wooden surfaces, including tables, chairs, cabinets, and more.
Wise Owl Furniture Salve is a great product for anyone looking to protect and preserve their wooden furniture in a natural and affordable way.
What are your thoughts about Wise Owl products? Have you used them? Comment your thoughts below!
Making emergency heaters can be as simple as arranging a few tea light candles on a heat-resistant surface, covering them with a ceramic flower pot, and using the pot to radiate heat.
If you want to learn more on emergency heaters you can make at home by using items you already have, read on.
In this guide, we’re going to cover 10 DIY solutions for heaters that you can whip up — with or without electricity. So, are you ready to master the art of makeshift emergency heaters? Dive in, and let’s get started.
Emergency heaters are devices used to generate heat during unexpected situations such as power outages, heating system failures, or extreme cold weather conditions.
They are not just a winter essential; they’re your line of defense in unforeseen situations like power outages or severe storms.
They can be commercial products or DIY creations, designed to provide warmth quickly and efficiently. From battery-powered units to makeshift candle heaters, they come in various types to meet different needs.
Now let’s proceed with the different emergency heaters you can make at home!
Flame-Based Heaters
Flame-based emergency heaters are a classic go-to, using open flames or combustion as their heat source, and are especially effective in well-ventilated spaces. They burn fuels like propane, natural gas, kerosene, or wood.
Examples include portable propane heaters, kerosene heaters, wood stoves, and candles.
These DIY survival heaters can be helpful in emergencies, especially when you have no electricity.
However, these have safety concerns. For one, open flames can cause fires, and combustion can produce harmful gases like carbon monoxide.
So always follow safety guidelines and ensure proper ventilation when using this type of heater.
Also, never leave flame-based heaters unattended, and extinguish them by smothering the flame with a non-flammable, heat-resistant cover.
1. Metal Can Heater
A metal can heater is an effective and low-tech solution that utilizes candles or alcohol as a heat source. The can serves as a container and heat distributor.
Materials:
Metal can (e.g., paint can or large soup can)
Toilet paper roll
70% isopropyl alcohol
Lighter or matches
Instructions:
Remove the label and clean the metal can.
2. Place the toilet paper roll inside the can, ensuring it fits snugly.
3. Pour isopropyl alcohol over the toilet paper roll until it is saturated.
4. Use a lighter or matches to ignite the alcohol-soaked toilet paper.
5. The metal can heater will produce heat for several hours.
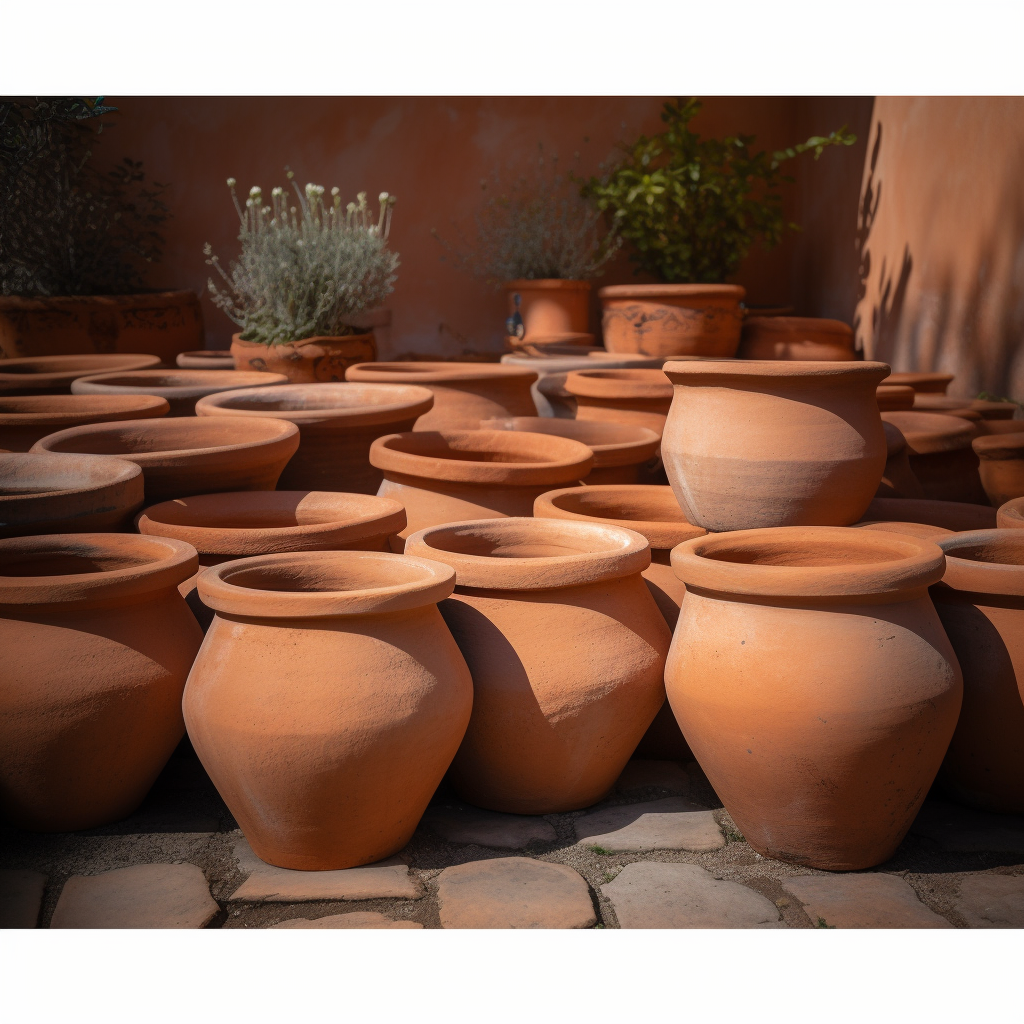
2. Coffee Can Heater
Coffee can heaters are easy to make and work well with tea lights to generate sufficient warmth. The idea is to create a heat source by burning tea light candles inside the can and using the terracotta pots to absorb, store, and radiate the heat.
The pots are placed one inside the other, inverted over the lit candles, and the coffee can help contain the heat and direct it outward.
Materials:
Metal coffee can
2 terracotta pots (one smaller than the other)
3-4 tea light candles
Lighter or matches
Instructions:
Remove the label and clean the coffee can.
2. Place the tea light candles inside the coffee can and light them.
3. Invert the smaller terracotta pot over the candles and position it inside the can.
4. Invert the larger terracotta pot over the smaller one, creating a chamber between the two pots.
5. The coffee can heater will radiate heat for several hours.
3. Terra Cotta Pot Heater/ Flower Pot Heater
Terra cotta pot heaters, also known as flower pot heaters, rely on the pot’s heat retention capabilities to keep spaces warm.
This one is a great option for making a homemade emergency heaters with candles. Burning the candle under the inverted terra cotta pot absorbs and radiates the heat into the surrounding area.
The metal stand elevates the pot above the candle, allowing heat transfer.
Materials:
Terra cotta pot
Metal stand
Flat candle or tea light
Instructions:
Light the candle or tea light.
2. Place the lit candle on a stable, non-flammable surface.
3. Invert the terra cotta pot and place it over the lit candle using the metal stand to elevate it.
4. The terra-cotta pot will absorb and radiate heat from the candle.
Electric Heaters
Electric heaters are convenient and efficient, requiring only an electrical source to deliver immediate heat. These emergency heaters come in various types and sizes to suit different needs.
Some common electric heaters include space heaters, oil-filled radiators, and infrared heaters.
They are often portable and easy to use, making them popular for emergency heating situations.
1. Battery-Powered Heater
Battery-powered heaters offer portability and ease, making them a go-to for travelers and outdoor enthusiasts.
Materials:
12V DC heating pad
12V battery
Jumper cables or alligator clips
Instructions:
Connect the heating pad to the battery using jumper cables or alligator clips.
2. The heating pad will warm up, providing a portable heat source.
2. Rechargeable Hand Warmer Heater
Rechargeable hand warmer heaters are pocket-sized heat sources that provide instant warmth on-the-go.
Materials:
Rechargeable hand warmer
USB charger or power bank
Instructions:
Charge the hand warmer using the USB charger or a power bank.
2. Once charged, turn on the hand warmer and place it in your pocket or under a blanket to provide a portable heat source.
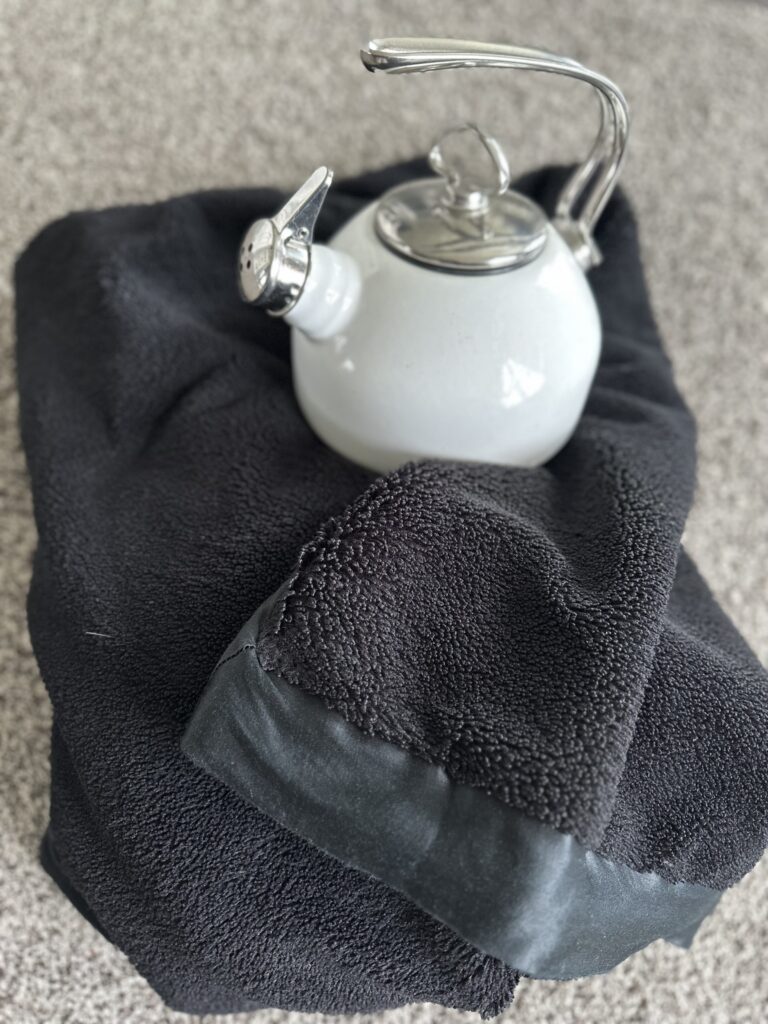
3. Hot Water Bottle Heater
Hot water bottle heaters are a traditional method, using sealed containers of hot water to provide radiant heat.
Materials:
Hot water bottle
Kettle or pot to heat water
Towel or blanket
Instructions:
Fill the kettle or pot with water and heat it to boiling. (You can heat the kettle using a stove or an electric kettle).
2. Carefully pour the hot water into the hot water bottle.
3. Wrap the hot water bottle in a towel or blanket to avoid burns and place it in the area you want to warm up.
Reflective Heaters
Reflective heaters work by radiating heat from a glowing element, maximizing efficiency by directing heat towards a specific area.
These utilize infrared radiation to produce heat. They emit infrared waves that nearby surfaces absorb and release as warmth. It’s a great alternative to make heat without electricity or fire.
They’re energy-efficient and ideal for targeted heating. Reflective heaters are popular for heating individual rooms or small spaces, providing immediate warmth and easy adjustability.
1. Insulation Heater
Insulation heaters focus on trapping warm air to maintain a comfortable temperature over time.
3. The reflective surface of the Mylar blanket will help retain heat in the room by reflecting it back.
Soda Can Solar Heater
A soda can solar heater is a DIY marvel, leveraging the sun’s rays to warm enclosed spaces. Creating a DIY solar heater from tin cans, also known as a soda can heater, is an eco-friendly way to harness solar energy for heating purposes.
Materials:
Empty tin cans or soda cans (enough to fill the desired size of your heater)
A wooden or metal frame (for holding the cans)
Black high-temperature spray paint
Plexiglas or glass sheet (to cover the front of the frame)
Insulation material (optional, for the back of the frame)
Aluminum foil (optional, for added reflection)
Screws or nails (for assembling the frame)
Duct tape or aluminum tape
Drill with a metal drill bit
Hose clamps
Silicone or heat-resistant adhesive
Screwdriver
Gloves and safety goggles
Instructions:
Clean and dry the cans thoroughly, removing any labels or adhesive residue.
2. Using a drill with a metal drill bit, make holes in the top and bottom of each can.
3. Spray paint the cans black with high-temperature paint.
4. Connect the cans by stacking them on top of each other and securing them with duct tape or aluminum tape, forming vertical columns.
5. Build a frame using wood or metal, sized to fit your columns of cans. If desired, insulate the back of the frame and add a layer of aluminum foil to enhance reflection.
6. Place the connected cans inside the frame, and secure them with hose clamps or adhesive.
7. Cover the front of the frame with Plexiglass or glass. Attach the cover using screws or nails, and seal the edges with silicone or heat-resistant adhesive to prevent heat loss.
8. Install the solar heater in a sun-facing location, such as an exterior wall or a sunny window.
9. Allow the sun to heat the cans and provide supplemental heating.
Practice safety when constructing and installing the heater, and use proper protective gear such as gloves and safety goggles.
Safety Points To Remember About Emergency Heaters
Safety is crucial when crafting homemade emergency heaters, follow these points to ensure you minimize risks:
Never leave a makeshift heater unattended.
Never leave candles or tea lights burning unattended, even if you’re using the heater to keep warm while asleep.
Use the heater in a well-ventilated area to prevent the buildup of harmful gases.
Place the heater on a non-flammable surface and keep it away from flammable objects like curtains, furniture, and paper products.
Always be careful when handling open flames. Keep a fire extinguisher nearby.
Use the heater as a temporary solution only. They are not intended as a primary source of heat and should not be used for prolonged periods.
FAQs About Emergency Heaters
How long will a coffee can heater last?
A coffee can heater can last for several hours, depending on the amount of fuel used.
For instance, one pint of alcohol might burn for about 3-5 hours. Keep in mind that this varies based on factors such as can size, air ventilation, and fuel concentration.
What is the best emergency heat source at home?
The best emergency heat source for your home will depend on your personal preference. Usually, a combination of heaters works best. It also depends on the supplies you have on hand.
If you’re outside, flame-based heaters will work, but if you are indoors or want to use alternatives because of heater failure, electric and reflective heaters are your best bet.
What is the cheapest emergency heat source?
Candles or homemade alcohol burners are generally the cheapest emergency heat sources. But they are the most dangerous. You need to monitor them when using them to prevent fire.
Can candles heat a room?
Yes, candles can provide some heat to a room, but they are not a highly efficient heat source.
Each candle produces about 80 to 100 watts of heat, which isn’t enough to warm a large space, especially if it’s drafty.
However, if used in a small, enclosed space, and if safety precautions are taken, several candles together could slightly raise the temperature or at least provide a perception of warmth.
Always remember, candles should never be left unattended due to the fire risk.
How can I heat my room without electricity?
Making a do-it-yourself emergency heater like the ones mentioned in this article can help heat a room without electricity. However, you must make multiple heaters to ensure it warms up a whole room.
Key Takeaways of Emergency Heaters You Can Make At Home
Mastering the art of using everyday items to create warmth is a game-changer during unexpected power outages or heating failures.
This skill boosts self-reliance and resilience in tough situations.
Making your heater is not only practical in emergencies but also encourages resourcefulness and creativity.
But remember, while these emergency heaters provide warmth in challenging situations, safety should be your top priority.
Never leave your DIY heaters unattended and ensure proper ventilation when in use.
These homemade heaters, born out of necessity, are temporary solutions, not replacements for your primary heating system.
However, they play a crucial role in emergency situations by helping keep you warm until power is restored or your heating system is repaired.
Safety is crucial, so always keep a close eye on homemade heaters, ensure proper ventilation, and avoid flammable materials. Stay warm, stay safe, and embrace the art of emergency heaters you can make at home.
Knowing how a dry flush toilet works can be crucial for those considering an eco-friendly waste disposal option.
Unlike traditional flush toilets that rely on water, this innovative system employs a unique mechanism and special cartridges to encapsulate and seal waste, providing both convenience and sustainability.
In this article, we’ll dive into the world of these toilets that offer a secure, environmentally friendly solution to waste management in a crisis.
So read on, and arm yourself with this essential knowledge and be prepared for anything!
A dry flush toilet is a waterless, odorless system designed for waste management. Unlike traditional flush toilets that rely on water, this system employs a unique mechanism to seal and contain waste.
A Dry Flush toilet is a toilet with a system that doesn’t rely on water to process waste, unlike traditional toilets.
Instead, it employs groundbreaking vacuum-sealing technology to encase waste in a neat, compact package — all without a single drop of water.
It’s an ingenious solution you can use in off-grid living, RVs, tiny homes, and other areas where traditional plumbing isn’t practical or available.
The Dry Flush Brand
Dry Flush isn’t a term for waterless toilets but rather a reputable brand that creates Laveo Dry Flush toilets. It is a leading brand that specializes in creating high-quality, waterless toilet systems. Known for their innovative technology, they offer a range of models to suit various lifestyles and needs.
These toilets feature a patented process to seal waste in a specially designed bag within the toilet, making disposal easy and sanitary.
Since its establishment in 2012, Dry Flush has been a pioneer in the industry, leading the way by being the first to create this type of toilet system for the consumer market.
How Does A Dry Flush Toilet Work?
A Dry Flush toilet works by using a refill cartridge containing a series of foil-lined bags. It revolves around a replaceable cartridge system. This cartridge works in tandem with a motorized unit to seal and contain waste effectively. When you use it, everything goes into a special liner in the bowl.
Each time you flush, the built-in vacuum system springs into action. It compresses the waste, neatly wrapping and sealing it within one of these foil bags.
This sealed liner, containing the waste, then drops into a hidden compartment in the toilet. Then a fresh liner automatically unrolls in the bowl, ready for the next use.
The waste stays neatly sealed in its liner, completely odor-free and out of sight, until the cartridge (which holds multiple liners) is full and needs to be replaced.
The disposal process is simple and sanitary. When the cartridge is full, you remove it like you would a trash bag, seal it up, and dispose of it appropriately.
Then, just replace it with a new cartridge, and you’re all set for many more flushes.
So while a Dry Flush toilet operates differently than a traditional toilet, it’s still a breeze to use, with no messy or unpleasant steps to deal with. And the best part? It uses zero water, making it an eco-friendly choice.
Top Brands of Dry Toilet
Many other reputable brands provide a variety of eco-friendly waste management alternatives. Laveo and Sun-Mar Excel are among other reputable names that provide alternative waterless toilet solutions.
Before you make a decision, it’s crucial to dig deep and compare different models. The perfect fit for your needs is out there, and a little bit of research goes a long way in helping you find it.
While dry toilets come with various benefits, there are also some drawbacks to consider. Efficiency and sustainability are definite pros, but initial costs and cartridge replacements can be cons.
Pros
Conserves water: Using a Dry Flush toilet saves a significant amount of water compared to traditional toilets. So it’s an eco-friendly choice.
Easy to install: Requires zero plumbing, making it a quick and straightforward process to set up.
Portable and lightweight: With its compact design, you can transport Dry Flush toilets easily to various locations.
Odor-free: The vacuum sealing system effectively contains and eliminates odors.
Low maintenance: There is no need for septic tanks or sewage systems, reducing maintenance requirements.
Cons
Refill cost: A Dry Flush toilet refill can get expensive over time, especially with frequent use.
Limited capacity: The system can only hold a certain number of flushes before replacing the cartridge.
Waste disposal: You need to remove and dispose of sealed waste bags periodically.
Where Can I Use Dry Flush Toilets?
Dry flush toilets can be used in places where water supply is limited or non-existent. They’re versatile, so you may find them in numerous settings, such as the following:
RVs and Campervans
Dry flush toilets revolutionize waste management in RVs and campervans with their compact design and odor-free operation, making them perfectly suited for the limited space available during road trips. This is because traveling in a recreational vehicle often means long journeys without guaranteed pit stops.
Having a Dry Flush toilet onboard ensures a comfortable and worry-free adventure, giving you more time to enjoy the sights and less time fretting about the next rest stop.
Plus, they provide a compact and odor-free waste management system perfect for life on the road.
Tiny Homes
Tiny homes benefit greatly from dry flush toilets with their small footprint and easy installation. Dry Flush toilets are compact, making them a clever solution to the small-space challenge.
Plus, their eco-friendly operation aligns perfectly with the ethos of the tiny house lifestyle.
Off-Grid Cabins
Off-grid cabins often lack conventional plumbing, making dry flush toilets a suitable alternative. They’re not only easy to install but also minimize environmental impact.
Plumbing services are usually scarce in these untouched areas, making Dry Flush toilets a perfect fit. They help maintain sanitary conditions while keeping water consumption to a minimum.
Construction Sitesand Outdoor Events
Construction sites and outdoor events often require temporary sanitation solutions. For locations like construction sites or bustling outdoor festivals, Dry Flush toilets provide a cleaner and more environmentally friendly alternative to traditional porta-potties.
They’re portable, easy to set up, and most importantly, they do away with the foul smells that usually come with outdoor toilet facilities.
Boats and Yachts
On boats and yachts, managing waste effectively is crucial. Dry flush toilets provide a hassle-free, odorless solution ideal for marine conditions. Whether setting sail for a weekend fishing trip or embarking on a long-term ocean journey, a Dry Flush toilet is a must-have on board.
It handles the choppy waters with ease and doesn’t need a constant water supply. It’s the reliable mate you need on your maritime adventures.
In emergency shelters, sanitation is a high priority. Dry flush toilets offer a quick, deployable option that requires no plumbing or electrical setup.
In disaster relief situations, providing sanitation facilities can be challenging. Dry Flush toilets are a practical solution for home shelters and temporary housing.
Is A Dry Flush Toilet For Me?
A Dry Flush toilet is an excellent choice if you want a waterless system and want to conserve water.
They’re also a perfect option if you’re on the move or live in an area without access to traditional plumbing. So if you’re embracing a minimalist, eco-friendly lifestyle, a Dry Flush might be good for you.
On the flip side, the recurring cost of refill cartridges and the need for a proper disposal system may be a downside for some.
Also, if you are highly concerned about waste reduction and the environmental impact of the cartridges, you might want to explore other options like composting toilets.
At the end of the day, it really boils down to what matters most to you and the level of convenience you’re after.
It’s a personal choice that should be based on a thorough understanding of how the Dry Flush toilet functions, its maintenance needs, and how well it aligns with your lifestyle.
Frequently Asked Questions
Do Dry Flush toilets smell?
It depends on the type of waterless toilet you have. If you installed the toilet yourself, the answer is probably yes.
Unless of course, you’re using a Dry Flush toilet.
This is because they use odorless technology, and the waste is completely contained inside an odorless, double-lined bag within each disposable liner cartridge.
How do I dispose of the waste from a Dry Flush toilet?
You should dispose of the sealed waste bags in a designated trash receptacle. Check with your local guidelines on proper waste disposal.
How often do I need to change the Laveo Dry Flush toilet refills?
The frequency of changing the refills depends on the usage of the toilet. Each refill cartridge holds 15 to 17 flushes.
Once you’ve reached maximum capacity, you’ll need to replace the cartridge with a new one.
Are Dry Flush toilets environmentally friendly?
Yes, Dry Flush toilets are environmentally friendly. They conserve water and do not need chemicals for waste processing.
Remember, it’s essential to dispose of the waste bags properly. This helps cut any negative environmental impact.
Can I use a Dry Flush toilet in a residential home?
Dry Flush toilets are originally designed for non-traditional settings. But it could be used in a residential home as a supplementary or temporary toilet solution.
That being said, these may not be practical for long-term, everyday use. You have to consider the cost of refills and their limited waste capacity.
Do Dry Flush toilets require electricity to operate?
Yes, dry Flush toilets must have a power source to operate the vacuum-sealing system. A standard 110V outlet or a 12V battery is enough to power them for off-grid use.
Key Takeaways: How Does A Dry Flush Toilet Work & Are They Worth It?
A Dry Flush toilet is an innovative product has undoubtedly transformed the experience of off-grid living, making it more convenient and sustainable.
The technology offers an exciting glimpse into the future of sustainable sanitation solutions.
Yes, there are costs to consider but when you weigh this against the ease of use, the water savings, the environmental benefits, and the sheer convenience, you might find that the scales tip in favor of Dry Flush toilets.
Understanding how a dry flush toilet works and evaluating its merits can help you make an educated choice.
Ultimately, the decision is based on your lifestyle and priorities. But if you’ve been seeking an efficient, waterless solution for your sanitation needs, the Dry Flush toilet is undoubtedly worth considering.
We hope this guide has given you insight on how does a dry flush toilet work and some good options to choose from if you’re in the market. Please leave your comments below about your experience with these toilets and if there is one you prefer that we did not mention.
Disclaimer: The following article is intended for informational purposes only and is not to be used as a practical guide for actual situations involving waterboarding. Waterboarding is considered a form of torture and is illegal and inhumane. The information provided is based on theoretical research and personal accounts and does not guarantee survival in a real-life situation.
The techniques discussed should not be practiced without professional guidance and supervision due to the potential for serious harm or fatality. The publisher does not endorse or encourage the practice or use of waterboarding in any form or situation. Always prioritize legal and ethical practices in all situations.
The first step in understanding how to survive waterboarding, a form of torture, is recognizing its grave implications. Waterboarding is a form of torture designed to break the human spirit. The fear of drowning and the uncertainty of escape are overwhelming, and you wonder how you could possibly survive.
In today’s unpredictable world, being prepared for anything is essential. This article delves into the dark realm of waterboarding, revealing crucial tips and strategies that could mean the difference between life and death.
Whether driven by curiosity or genuine concern, understanding how to survive waterboarding can arm you with invaluable knowledge and mental fortitude.
So read on, and unlock the secrets of survival in the face of this nightmarish experience.
Waterboarding is a form of interrogation often classified as torture. It simulates the sensation of drowning, inducing extreme psychological and physical distress.
Waterboarding is when someone makes you lie on your back, and places a wet rag over your face. Suddenly, cold water starts pouring over the cloth, making it difficult for you to breathe.
Panic attacks set in as you gasp for air, but the water keeps coming. At this point I bet you wish you had read up on an article on how to survive waterboarding.
So how does waterboarding work? Waterboarding is an extreme form of interrogation that has been widely debated for its ethical implications.
The cloth restricts breathing, and the sensation of water on the face creates a panic response in the person being interrogated.
The sensation of drowning is terrifying, and the person being waterboarded usually experiences extreme fear, panic, and a sense of suffocation.
Waterboarding has been used by various government agencies and military forces worldwide, but it’s now widely considered a form of torture.
It’s a cruel and inhumane practice.
Many countries, including the United States, have banned it, and organizations like the UN and Amnesty International have condemned it. But that doesn’t mean no one’s doing it.
Some people argue that it works for getting information. Still, research going back to World Wars I and II has shown that torture often leads to unreliable intelligence because victims might say anything to make it stop.
What Are The Effects Of Waterboarding?
The effects of waterboarding are debilitating, both psychologically and physically. Short-term impacts include panic, while long-term repercussions can be as severe as death or PTSD.
Waterboarding can damage a person, both physically and mentally. Some pretty infamous cases, like those involving Khalid Sheikh Mohammed and Abu Zubaydah, show just how bad it can get.
Khalid Sheikh Mohammed was waterboarded a whopping 183 times. He was instrumental in the 9/11 attacks, so take that as you may. It did cause him severe pain and distress, but it also led to many false confessions.
So, it makes you wonder if this torture technique is even helpful in getting reliable info.
Abu Zubaydah, another big name in al-Qaeda. Before being transferred to Guantánamo Bay, Zubaydah was tortured in various ways at CIA “black sites.” He went through waterboarding 83 times.
Just like with Khalid Sheikh Mohammed, this left some serious psychological trauma on him. We’re talking about PTSD, anxiety, and other mental health issues.
And guess what? Waterboarding him also led to false confessions, making you question the whole point of using such a brutal practice.
So, to sum it up, waterboarding can have some seriously effects including death. It can cause significant pain, suffocation, and long-lasting health problems.
On top of that, it can leave people with PTSD, anxiety, and other mental health disorders.
Considering the cases mentioned and others, it’s hard to believe that waterboarding is even effective in getting reliable information.
The experience of being waterboarded can be so traumatic that it stays with a person for the rest of their life, causing them to relive the fear and panic they experienced during the ordeal.
How To Survive WaterboardingTorture
Breathing control and mental resilience are your greatest assets in such situations. If you find yourself facing the grim reality of waterboarding, survival hinges on preparation and presence of mind.
Honestly, there is no surefire method to prepare for waterboarding.
You might even forget all your preparation when you suddenly feel like you’re drowning because you’ll be desperate to breathe.
Still, there are a few things you can do to try and make the experience a little more bearable:
1. Focus On Your Breathing
The key to surviving waterboarding lies in mastering your breath. Controlled breathing minimizes panic and can give you precious seconds to think.
Focus on your breathing, taking slow, deep breaths through your nasal cavity to create a small air pocket between your nostrils and the cloth. This can help you stay in control and prevent hyperventilation.
For example, practice slow, controlled breathing techniques like meditation or yoga. The more familiar you are with these methods, the more likely you’ll be able to use them during waterboarding.
2. Stay Calm
It’s essential to try to stay as calm as possible as panic will only worsen the situation, so try to keep a level head and remind yourself that the waterboarding will eventually end.
Focus on your breathing, taking slow, deep breaths through your nasal cavity to create a small air pocket between your nostrils and the cloth. This can help you stay in control and prevent hyperventilation.
One way to practice staying calm is to engage in activities that put you in high-pressure situations, such as participating in competitive sports.
The more accustomed you become to managing stress and anxiety, the better equipped you’ll be to remain calm during waterboarding.
3. Control Your Gag Reflex
Waterboarding can trigger your gag reflex, making you feel like you’re going to vomit. Controlling your gag reflex can mean the difference between panic and manageable discomfort.
If you can, try to suppress this reflex to avoid choking on your vomit. Swallowing at intervals can help control this reflex but it’s essential to be careful not to choke on saliva, either.
You can practice managing your gag reflex by placing a clean toothbrush or your finger on the back of your tongue for a few seconds every day.
Then gradually increase the duration to become more comfortable with suppressing the reflex.
4. Use Distraction Techniques
Using distraction techniques, like counting or recalling memories, can divert your mind from the immediate discomfort. These methods can help you maintain a semblance of control.
To help distract yourself from the sensation of drowning, try to focus on something else, like a happy memory, a loved one, or an image that brings you comfort.
This can help you mentally escape the situation, even if only for a brief moment.
For example, you could visualize yourself on a beautiful beach, hearing the waves crash and feeling the sun’s warmth on your skin.
The more vivid the image, the more effective the distraction technique.
5. Build Mental Resilience
Building mental resilience can significantly enhance your chances of surviving waterboarding. Repeatedly confronting and overcoming fear can fortify your mental defenses.
Work on mental resilience techniques like meditation and visualization to help you cope with extreme stress and fear.
Consider practicing mindfulness meditation daily, focusing on your breath, and allowing thoughts to come and go without judgment.
This can help increase your mental resilience and ability to stay present and calm in stressful situations.
6. Improve Physical Fitness
Physical fitness can also impact your survival chances. Cardiovascular exercises that improve lung capacity can be particularly beneficial.
A strong and healthy body can make it easier to endure waterboarding. Focus on building cardiovascular endurance and lung capacity through swimming, running, and yoga.
For example, incorporating interval training into your workout routine can help increase lung capacity and cardiovascular endurance.
Additionally, practicing yoga can improve your breath control and overall physical strength.
Can You Train For Waterboarding Torture?
While no preparation can completely mitigate the trauma, mental and physical training techniques can provide a marginal but crucial advantage. Keep in mind that it’s not ethical or legal to train or practice waterboarding as a form of torture.
Training or practicing waterboarding could result in severe legal consequences and cause significant harm to the individuals involved.
It’s essential to recognize that waterboarding is inhumane and has long-lasting physical and psychological effects on the victim.
Instead of seeking ways to train or practice surviving waterboarding, promoting more ethical and humane methods of gathering information and addressing conflict resolution is crucial.
If you’re interested in learning techniques to withstand extreme conditions or enhance mental resilience, consider exploring practices like meditation, mindfulness, and breathing exercises.
These methods can help develop mental strength and coping skills in high-stress situations without resorting to torture or causing harm to others.
FAQs About How To Survive Waterboarding
Is it possible to survive waterboarding?
Yes, it is possible to survive waterboarding, although it’s an incredibly difficult and terrifying experience.
This is because if you’re not getting enough oxygen for a long time, it can cause some serious damage to your organs.
And if the people holding you captive don’t let you catch your breath and clear the water from your nose and throat, things can go south real quick, which means you could die in a few minutes.
Does waterboarding work if you hold your breath?
Holding your breath during waterboarding might help for a short period, but it’s not a long-term solution.
The captors will continue pouring the water, and you’ll eventually need to take a breath. So, the best approach is to try to breathe slowly and calmly through your nose.
How long can you survive waterboarding?
The length of time a person can survive waterboarding varies depending on factors like the individual’s physical and mental resilience and the specific conditions of the waterboarding session.
It’s important to remember that waterboarding is a form of torture, and the goal is often to extract information rather than to kill the victim.
That being said, there have been instances where waterboarding has led to death, mainly when performed by individuals with little regard for the safety of the person being subjected to the ordeal.
Key Takeaways: How To Survive Waterboarding
Surviving waterboarding requires a complex interplay of physical and mental strategies. Preparation and presence of mind are your most valuable tools for navigating this nightmarish scenario.
The thought of facing a harrowing ordeal like waterboarding is spine-chilling. The sensation of drowning, the sheer panic, and the unknown leave you questioning your ability to survive such a horrifying experience.
The stark reality is that waterboarding has a dark and lasting impact on its victims. Gaining knowledge and understanding of how to endure waterboarding can give you the mental strength and the essential tools for survival.
The stakes have never been higher — false confessions, unreliable information, and a lifelong struggle with anxiety and PTSD are only a few of the consequences.
Surviving waterboarding isn’t just about staying alive; it’s about minimizing the long-lasting physical and emotional damage.
You need to learn how to remain calm, focus on your breathing, and build mental resilience.
But with the right knowledge and preparation, you can increase your chances of survival and help pave the way for a world that stands against such horrifying practices.
Don’t let fear paralyze you; use it to fuel your determination to survive and create a better, more compassionate future for us all.
Picture yourself deep in the wilderness, miles away from civilization, and suddenly find yourself in a life-or-death situation. Your heart races as you realize your phone has no signal.
These situations make you wish you had a survival walkie-talkie on hand.
A reliable walkie-talkie is a non-negotiable addition to your survival kit. Professional guides and experienced adventurers know all too well the value of a good walkie-talkie.
They also provide access to vital weather updates and a lifeline to emergency services when you need them most.
In a world of uncertainty, having a reliable survival walkie-talkie by your side can make all the difference in staying connected and safe during emergencies.
But with so many options available, how do you choose which is right for you?
Fear not! We’ve done the research and compiled a list of the top 10 walkie-talkies that will keep you connected with your group when it matters most.
Our Top Picks For The Best Survival Walkie Talkies For Preppers
Topsung M880 walkie talkies are built to keep you connected when it matters most. Boasting 22 main channels and 121 privacy codes, these walkie talkies offer an impressive range of up to 1/4/16 miles so you’re never out of touch.
With a standby time of 3-4 days on just 3 AA batteries, these lightweight, palm-sized devices (2.9 oz) are packed with advanced features.
It has hands-free function (VOX), keypad lock, LCD screen with backlight, belt clip, earpiece jack, adjustable power, and volume, and durable, eco-friendly materials (ABS).
As icing on the cake, it also comes with the latest FCC certification and a 30-day replacement guarantee — a lot of bang for your buck.
When it comes to cheap yet quality handheld amateur radios, Baofeng is a household name. This Baofeng walkie talkie is designed for reliability and convenience.
Featuring a 1500mAh rechargeable battery, you can continuously use it for all day, with 2-4 days of regular operation and 5-7 days of standby time. You can also charge it easily with options like power banks, PC chargers, or car chargers.
With 16 pre-programmed channels, each offering 50 CTCSS and 105 DCS tunes for private communication, these walkie talkies are perfect for any situation, even in challenging terrains.
The lightweight, slim design is ready to use right out of the box, and the package includes all the accessories you’ll need. Although the quality might not rival high-end models, you’ll get more than what you paid for at just $30.
Rest assured, these walkie talkies have passed the FCC certification and come with a 30-day money-back guarantee, a 12-month warranty, and 24/7 email support.
If you’re looking for a pocket-sized walkie talkie with a lightweight build at an affordable price point, consider these on for size. It’s as thin as a cellphone, making it easy to carry, perfect for long adventures.
It has a unique belt clip design for quick removal and installation. The VOX hands-free function keeps your hands available for other tasks.
There’s also USB charging, fast charging, automatic power-saving, and low battery reminders.
Ideal for commercial events and outdoor activities, the RT22 is a practical addition to your emergency kit, taking up minimal space while leaving room for other essential items.
Their size takes up very little space in your emergency kits, leaving more room for other important items you might otherwise not be able to take with you.
This is an affordable, full-featured radio that provides excellent sound quality and range. It’s definitely not a toy, but it won’t break the bank either.
If you’re on a budget but still need a walkie talkie that delivers, this is the one for you. You’ll be surprised by its price and array of features in this little device.
The MOICO Long Range Walkie Talkie has an amazing 5-mile range in open fields and a decent 1.2-mile maximum range in urban areas. That should be enough to talk to your friends and family if you’re not looking to stray too far apart.
What sets this walkie talkie apart is its 22 FRS channels and 99 sets of CTCSS tones, providing a whopping 2,178 combinations to ensure your conversations remain private. That’s a lot of privacy for such an affordable device!
There’s also a one-to-one or one-to-more communication function that allows multiple walkie talkies to communicate on the same channel. It also comes with VOX-Hands Free Function, with three sensitivity levels for hands-free operation.
The T460 walkie talkie boasts an impressive 35-mile mountain-to-valley and an impressive 2-mile urban neighborhood range.
Real-life ranges will depend on how much obstruction or interference is around, but it’s nice to have that three-mile potential.
The real-time weather updates via the weather channel and weather alerts are great at preparing you for all weather scenarios. It also has 22 channels and 121 privacy codes, so finding an available channel should be a breeze.
The iVOX/VOX function serves as a speakerphone, allowing hands-free communication in any scenario. Powered by NiMH rechargeable batteries, you can enjoy around 8.5 hours of use or simply pop in 3 AA batteries for up to 21 hours on the move.
The built-in LED flashlight is a thoughtful addition, coming in handy when navigating in the dark.
With 22 channels, 121 privacy codes, and 2,662 combinations, you’ll easily find an available channel for clear communication. This walkie talkie features a communication range of up to 35 miles. But that depends on terrain and conditions.
The weatherproof IP54 rating and built-in flashlight ensure peace of mind during evening adventures, emergencies, or power outages.
Stay updated as this radio provides 11 weather channels, including seven NOAA channels. Additional features include 20 call tones, a keypad lock, a talk confirmation tone, a low battery alert, and an eco-smart design for less power consumption.
It’s also compatible with other FRS/ GMRS (General Mobile Radio Service) radios and powered by dual power options.
If you’re looking for a radio that lets you access all 40 CB radio channels, stay informed about road conditions, and receive NOAA weather alerts with crystal-clear communication, this is the one for you.
You can get improved CB radio transmission and reception with the Soundtracker System, which filters through 90% of noise and optimizes signal transfer.
It also features a built-in NOAA Weather Radio Channel that helps you stay prepared with 24-hour updates on weather, emergencies, and hazards.
You can also monitor two pre-selected channels simultaneously with its Dual Watch feature. And with just one press, you can enjoy full coverage, accessing up to 40 CB radio channels.
The easy-to-use, illuminated multifunctional display ensures visibility in any lighting condition, while the handheld design makes it perfect for on-the-go adventures.
This walkie talkie is your lifeline, providing license-free communication up to 28 miles away. With 22 FRS channels, 38 privacy codes, and crystal-clear sound quality, you’ll know your messages are heard and understood, no matter the situation.
The 38 CTCSS privacy codes offer up to 836 channel options, blocking unwanted eavesdroppers and ensuring your private conversations remain just that – private.
It also ensures long-range communication with minimal obstructions, so you can stay connected and feel secure.
The package comes with belt clips, rechargeable battery packs, a desktop charger, and a micro USB charging cable – everything you need for easy transport and charging on the go or during daily use.
And with compatibility across all Midland FRS walkie-talkies and accessories, this walkie talkie is a versatile choice for any communication scenario.
I only wish that it could last longer. It only has a 10-hour battery life which is unsuitable for emergencies.
If you’re ever out on a marine adventure and your trusty radio happens to slip out of your hands and into the depths below, don’t worry—this one’s made to float and is here to save the day!
With its vibrant orange core, it’s easy to spot and retrieve, averting potential disaster. And with an impressive 6 watts of power, you’ll experience extended range communications, ensuring you can stay connected even in the most remote locations.
It has full access to NOAA weather channels, emergency alarms, and a JIS7/IPX7-rated submersible design. The noise-canceling microphone cuts through background noise, providing crystal-clear conversations.
Plus, this radio has you covered, whether navigating the waters of the USA, Canada, or international seas, providing maximum coverage to keep you connected and secure.
In a bustling hotel, retail store, or restaurant, where efficient communication is key to success, this radio emerges as the ultimate tool to keep your team connected and coordinated. It’s ideal for use in these demanding on-site applications.
It offers an impressive 25-floor range, with 22 preset channels with privacy codes for minimal interference.
Built tough, the DXFRS800 is shock-resistant and can withstand a 2-meter drop. Its anti-slip design guarantees secure handling, while the LCD keeps you informed of the radio’s status so you’re always in control.
With 18 hours of run-time, these radios are ready to keep up. The hands-free VOX operation allows your team to stay productive, while vibration alerts and auto squelch ensure that you won’t miss any crucial messages amidst the hustle and bustle.
With storage for an astounding 4,000 channels, 10,000 talk groups, and 200,000 contacts, you’ll never feel lost or disconnected.
The DMR-6X2’s built-in GPS, audio recorder, and backward compatibility with BTECH and Nagoya SMA-Female antennas and previous BTECH accessories make it a versatile and reliable tool for any task.
With this walkie talkie, you can stay ahead with upgradeable firmware and radio that supports various channel configurations. The ‘Digital Monitor’ feature even allows you to keep an eye on all available DMR traffic on your current channel.
Additional highlights like simple text messaging, imperial GPS display, and easy talk group access further enhance your communication capabilities. Plus, the radio’s support for various analog modes makes it adaptable to a wide range of situations.
And with a battery life of up to 35 hours on a single charge, you can trust this walkie talkie to be there for you through the most demanding circumstances.
This high-power, long-range walkie talkie is built precisely for working in a demanding environment like construction sites or large-scale events.
With an impressive battery life of over 24 hours, you can count on this walkie talkie to last throughout your adventure. Its VOX-ready, emergency alarms and 50 non-standard CTCSS and 232 DCS codes ensure your team stays connected and protected.
Rain or shine, the IP67 waterproof speaker mic delivers clear and loud audio, while the rugged and durable body can withstand shocks, vibrations, and multiple 2-meter drops.
The IP67 waterproof speaker mic ensures clear and loud audio even in harsh weather conditions, while the rugged and durable body can withstand shocks, vibrations, and multiple two-meter drops.
These radios are specifically designed for large commercial environments and may not directly connect to other radio brands. However, if needed, you can contact the company for firmware assistance to ensure seamless integration.
I Already Have A Smartphone…
When phone signals fail, such as natural disasters, terror attacks, or nuclear fallout, your phone is as good as a paperweight. This is where survival walkie-talkies become indispensable.
Smartphones may be convenient, but their reliability can falter in extreme situations. As a survivalist, it’s important to have a backup communication method like a walkie-talkie.
Their radio signal-based operation doesn’t depend on mobile networks. This should give you uninterrupted communication in the most challenging circumstances.
With a frequency range reaching up to 12 km or more and the ability to connect to over 22 channels, survival walkie-talkies are perfect for emergencies.
Don’t leave your safety to chance — invest in a reliable walkie-talkie for your survival tool kit.
What Is A Walkie Talkie?
A walkie-talkie, also known as a two-way radio, is a handheld communication device that allows you to talk to others over radio frequencies without relying on cell networks.
It’s a push-to-talk device, meaning you can’t speak and listen simultaneously. Walkie-talkies have been around for decades, we used to use them all the time as toys when we were kids.
But they’ve become popular among outdoor enthusiasts, event organizers, and emergency responders due to their simplicity and reliability.
Benefits Of Having A Walkie Talkie
Reliable communication: In areas with limited or no cell service, walkie-talkies provide a dependable way to stay connected with your group. This can be crucial during camping trips, hiking adventures, and indispensable in survival scenarios.
Cost-effective: There are no monthly fees or contracts associated with walkie-talkies. Once you purchase the device, you can use it without incurring additional costs.
Easy to use: With their push-to-talk feature and straightforward controls, walkie-talkies are user-friendly and accessible to people of all ages.
Enhanced safety: In emergencies, walkie-talkies can help you maintain communication with your group or connect with emergency channels.
What To Look For In Buying A Good Two Way Radio
Range
In a true SHTF scenario, communication is vital. Look for a walkie-talkie with an impressive range, ideally one that can reach up to 20 miles or more.
Battery Type
One of the most crucial aspects of any walkie-talkie is its battery life. After all, a dead walkie-talkie is about as useful as a two tin cans attached to opposite ends of a string.
You may not always have access to batteries or power sources. So you’ll want a device with long-lasting battery life or one that uses rechargeable or replaceable batteries.
You can also opt for solar-powered walkie talkies. These can harness the power of the sun to recharge their batteries.
Remember that choosing a walkie talkie with a reliable battery ensures you stay connected, even during extended emergencies or off-grid adventures.
Durability and Weather Resistance
A rugged, water-resistant design is a must for any survival walkie-talkie. You need a device that can take a beating and keep on ticking, regardless of the conditions.
Channels and Privacy Codes
More channels and privacy codes mean less interference and clearer communication. In survival situations, you NEED to minimize confusion and maintain secure lines of contact. Secure channels are even more important if you’re up against enemies.
Emergency Features
It’d be good to look for a survival walkie talkie with additional features like weather alerts, SOS signals, or built-in flashlights to keep you informed and prepared during emergencies.
Hands-Free Operation
Look for a walkie-talkie with hands-free options like a headset or voice-activated transmission. This allows you to communicate while keeping your hands free to focus on other tasks.
How To Use A Walkie Talkie
1. Power up: Charge or insert fresh batteries and turn on your walkie-talkie.
2. Choose a channel: Select a communication channel for you and your partner(s).
3. Adjust volume: Set a comfortable listening level using the volume control.
4. Talk: Hold the “talk” button, speak clearly into the walkie-talkie, and release the button when done.
5. Listen: Keep the device near your ear to hear responses, and ensure your partner(s) are on the same channel.
6. Use etiquette: Say “over” when you finish speaking and avoid interrupting others.
7. Check the battery: Monitor battery life and recharge or replace as needed.
Walkie Talkie Lingos
To ensure clear and concise communication, users often use specific lingo or phrases. Here’s a list of common walkie talkie lingos and their meanings:
1. Affirmative: Used to confirm or agree with a statement or request. It means “yes.”
2. Breaker/Break: A term used to interrupt or request to join an ongoing conversation, usually followed by the channel number or user’s identifier.
3. Copy: Acknowledgment that a message has been received and understood.
4. Goahead: Permission to proceed with a message or action.
5. Negative: Used to disagree or indicate “no” in response to a question or request.
6. Over: Indicates the end of a transmission and that the sender is awaiting a response.
7. Out: Signals the end of a conversation without expecting a response, meaning the channel is now free for others to use.
8. Roger: Another way to confirm that a message has been received and understood, similar to “copy.”
9. Standby: A request to wait for further instructions or information.
10. Wilco: Short for “will comply,” indicating that the sender will follow the instructions provided.
11. 10-codes: A set of standardized codes used to represent common phrases, such as “10-4” for “message received” or “10-20” for “location.” Note that the use of 10-codes varies between different agencies and organizations.
12. Repeat: A request to resend the last message, often used when the transmission was unclear.
13. Sayagain: Similar to “repeat,” it is a request to have the last message repeated.
14. Clear: Indicates that the user has finished their transmission and is leaving the channel open for other users.
FAQ About The Best Survival Walkie Talkies
Are walkie talkies good for SHTF?
Walkie-talkies are great for SHTF situations, as they enable short-range communication without depending on cell networks. They’re especially useful in emergencies when other communication methods might be down.
What radios do preppers use?
Preppers typically use HAM radios, CB radios, or GMRS/FRS radios, as these provide longer range communication and access to emergency channels. These radios can help you stay informed and connected with others during crisis situations.
Would an EMP affect walkie-talkies?
An EMP could potentially affect walkie-talkies, as it can damage electronic devices. However, if you store your walkie-talkies in a Faraday cage or other protective enclosures, they might remain functional after an EMP event.
Wrap Up of The Best Survival Walkie Talkies For Preppers
Don’t wait until it’s too late to realize the importance of reliable communication in critical situations. Equip yourself with a tool that keeps you connected and informed when it matters most.
Whether you’re an avid hiker, a dedicated prepper, or just someone who wants to be ready for life’s unexpected twists and turns, having the right walkie talkie can be a game-changer.
Explore your options, find the perfect two-way radio, and confidently face whatever challenges life throws your way, knowing you’re prepared for the unexpected.