
Making emergency heaters can be as simple as arranging a few tea light candles on a heat-resistant surface, covering them with a ceramic flower pot, and using the pot to radiate heat.
If you want to learn more on emergency heaters you can make at home by using items you already have, read on.
In this guide, we’re going to cover 10 DIY solutions for heaters that you can whip up — with or without electricity. So, are you ready to master the art of makeshift emergency heaters? Dive in, and let’s get started.
In This Guide
What Are Emergency Heaters?
Emergency heaters are devices used to generate heat during unexpected situations such as power outages, heating system failures, or extreme cold weather conditions.
They are not just a winter essential; they’re your line of defense in unforeseen situations like power outages or severe storms.
They can be commercial products or DIY creations, designed to provide warmth quickly and efficiently. From battery-powered units to makeshift candle heaters, they come in various types to meet different needs.
Now let’s proceed with the different emergency heaters you can make at home!
Flame-Based Heaters
Flame-based emergency heaters are a classic go-to, using open flames or combustion as their heat source, and are especially effective in well-ventilated spaces. They burn fuels like propane, natural gas, kerosene, or wood.
Examples include portable propane heaters, kerosene heaters, wood stoves, and candles.
These DIY survival heaters can be helpful in emergencies, especially when you have no electricity.
However, these have safety concerns. For one, open flames can cause fires, and combustion can produce harmful gases like carbon monoxide.
So always follow safety guidelines and ensure proper ventilation when using this type of heater.
Also, never leave flame-based heaters unattended, and extinguish them by smothering the flame with a non-flammable, heat-resistant cover.
1. Metal Can Heater
A metal can heater is an effective and low-tech solution that utilizes candles or alcohol as a heat source. The can serves as a container and heat distributor.

Materials:
- Metal can (e.g., paint can or large soup can)
- Toilet paper roll
- 70% isopropyl alcohol
- Lighter or matches
Instructions:
- Remove the label and clean the metal can.
2. Place the toilet paper roll inside the can, ensuring it fits snugly.
3. Pour isopropyl alcohol over the toilet paper roll until it is saturated.
4. Use a lighter or matches to ignite the alcohol-soaked toilet paper.
5. The metal can heater will produce heat for several hours.
2. Coffee Can Heater
Coffee can heaters are easy to make and work well with tea lights to generate sufficient warmth. The idea is to create a heat source by burning tea light candles inside the can and using the terracotta pots to absorb, store, and radiate the heat.
The pots are placed one inside the other, inverted over the lit candles, and the coffee can help contain the heat and direct it outward.
Materials:
- Metal coffee can
- 2 terracotta pots (one smaller than the other)
- 3-4 tea light candles
- Lighter or matches
Instructions:
- Remove the label and clean the coffee can.
2. Place the tea light candles inside the coffee can and light them.
3. Invert the smaller terracotta pot over the candles and position it inside the can.
4. Invert the larger terracotta pot over the smaller one, creating a chamber between the two pots.
5. The coffee can heater will radiate heat for several hours.
3. Terra Cotta Pot Heater/ Flower Pot Heater
Terra cotta pot heaters, also known as flower pot heaters, rely on the pot’s heat retention capabilities to keep spaces warm.
This one is a great option for making a homemade emergency heaters with candles. Burning the candle under the inverted terra cotta pot absorbs and radiates the heat into the surrounding area.
The metal stand elevates the pot above the candle, allowing heat transfer.
Materials:
- Terra cotta pot
- Metal stand
- Flat candle or tea light
Instructions:
- Light the candle or tea light.
2. Place the lit candle on a stable, non-flammable surface.
3. Invert the terra cotta pot and place it over the lit candle using the metal stand to elevate it.
4. The terra-cotta pot will absorb and radiate heat from the candle.

Electric Heaters
Electric heaters are convenient and efficient, requiring only an electrical source to deliver immediate heat. These emergency heaters come in various types and sizes to suit different needs.
Some common electric heaters include space heaters, oil-filled radiators, and infrared heaters.
They are often portable and easy to use, making them popular for emergency heating situations.
1. Battery-Powered Heater
Battery-powered heaters offer portability and ease, making them a go-to for travelers and outdoor enthusiasts.
Materials:
- 12V DC heating pad
- 12V battery
- Jumper cables or alligator clips
Instructions:
- Connect the heating pad to the battery using jumper cables or alligator clips.
2. The heating pad will warm up, providing a portable heat source.
2. Rechargeable Hand Warmer Heater
Rechargeable hand warmer heaters are pocket-sized heat sources that provide instant warmth on-the-go.
Materials:
- Rechargeable hand warmer
- USB charger or power bank

Instructions:
- Charge the hand warmer using the USB charger or a power bank.
2. Once charged, turn on the hand warmer and place it in your pocket or under a blanket to provide a portable heat source.
3. Hot Water Bottle Heater
Hot water bottle heaters are a traditional method, using sealed containers of hot water to provide radiant heat.
Materials:
- Hot water bottle
- Kettle or pot to heat water
- Towel or blanket
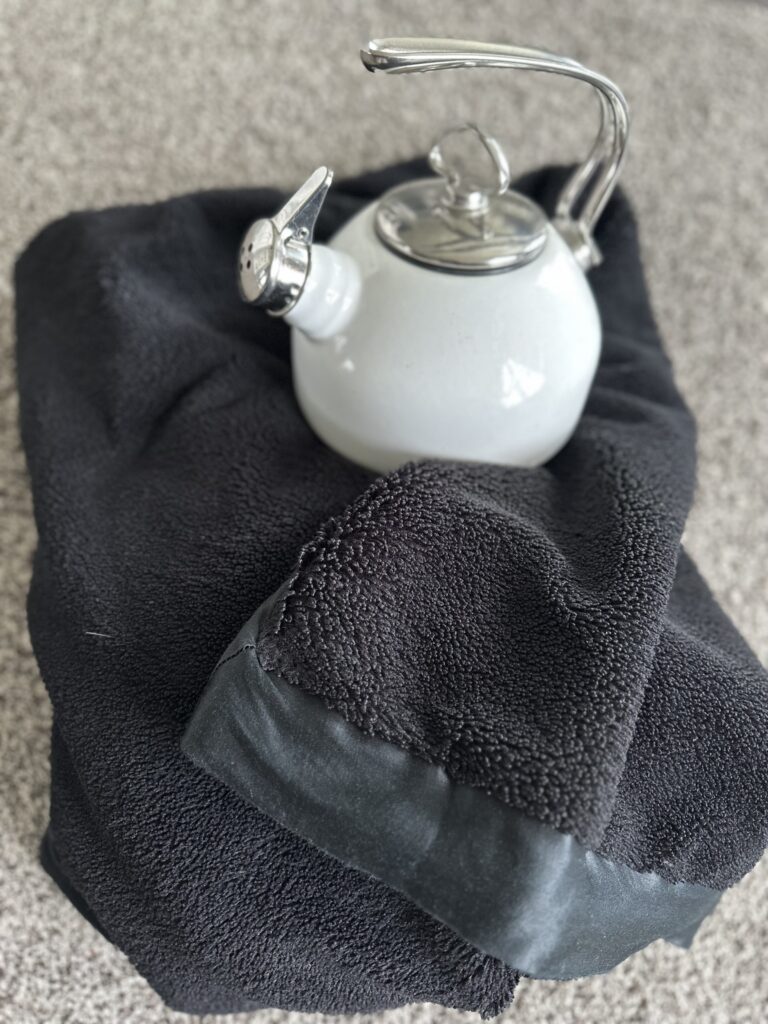
Instructions:
- Fill the kettle or pot with water and heat it to boiling. (You can heat the kettle using a stove or an electric kettle).
2. Carefully pour the hot water into the hot water bottle.
3. Wrap the hot water bottle in a towel or blanket to avoid burns and place it in the area you want to warm up.
Reflective Heaters
Reflective heaters work by radiating heat from a glowing element, maximizing efficiency by directing heat towards a specific area.
These utilize infrared radiation to produce heat. They emit infrared waves that nearby surfaces absorb and release as warmth. It’s a great alternative to make heat without electricity or fire.
They’re energy-efficient and ideal for targeted heating. Reflective heaters are popular for heating individual rooms or small spaces, providing immediate warmth and easy adjustability.
1. Insulation Heater
Insulation heaters focus on trapping warm air to maintain a comfortable temperature over time.
Materials:
- Blankets or sleeping bags
- Duct tape
Instructions:
- Hang blankets or sleeping bags around windows and doors to insulate the room.
2. Use duct tape to secure the edges and create a better seal against drafts.

2. Reflective Window Insulation Heater
Reflective window insulation heaters maximize heat by reflecting indoor heat back into the room.
Materials:
- Reflective window insulation film
- Scissors or utility knife
- Tape
Instructions:
- Cut the reflective window insulation film to the size of your window.
2. Attach the film to the inside of the window using tape, with the reflective side facing inwards.
- The film will reflect heat into the room, helping to keep it warm.
3. Mylar Blanket Heater
Mylar blanket heaters employ space-age materials to conserve body heat, making them perfect for emergency situations.
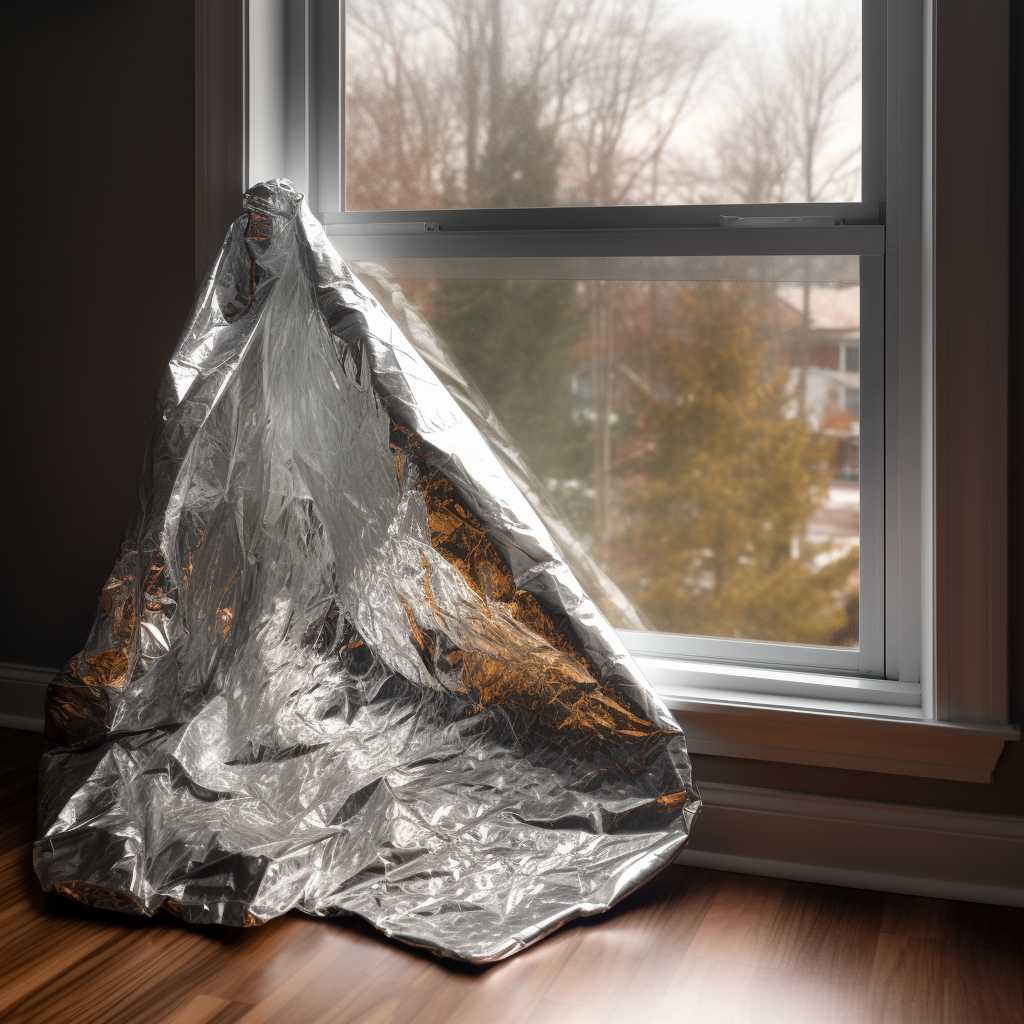
Materials:
- Mylar emergency blanket
- Tape or thumbtacks
Instructions:
- Hang the Mylar emergency blanket on a wall, with the shiny side facing the room.
2. Use tape or thumbtacks to secure the edges.
3. The reflective surface of the Mylar blanket will help retain heat in the room by reflecting it back.
Soda Can Solar Heater
A soda can solar heater is a DIY marvel, leveraging the sun’s rays to warm enclosed spaces. Creating a DIY solar heater from tin cans, also known as a soda can heater, is an eco-friendly way to harness solar energy for heating purposes.
Materials:
- Empty tin cans or soda cans (enough to fill the desired size of your heater)
- A wooden or metal frame (for holding the cans)
- Black high-temperature spray paint
- Plexiglas or glass sheet (to cover the front of the frame)
- Insulation material (optional, for the back of the frame)
- Aluminum foil (optional, for added reflection)
- Screws or nails (for assembling the frame)
- Duct tape or aluminum tape
- Drill with a metal drill bit
- Hose clamps
- Silicone or heat-resistant adhesive
- Screwdriver
- Gloves and safety goggles

Instructions:
- Clean and dry the cans thoroughly, removing any labels or adhesive residue.
2. Using a drill with a metal drill bit, make holes in the top and bottom of each can.
3. Spray paint the cans black with high-temperature paint.
4. Connect the cans by stacking them on top of each other and securing them with duct tape or aluminum tape, forming vertical columns.
5. Build a frame using wood or metal, sized to fit your columns of cans. If desired, insulate the back of the frame and add a layer of aluminum foil to enhance reflection.
6. Place the connected cans inside the frame, and secure them with hose clamps or adhesive.
7. Cover the front of the frame with Plexiglass or glass. Attach the cover using screws or nails, and seal the edges with silicone or heat-resistant adhesive to prevent heat loss.
8. Install the solar heater in a sun-facing location, such as an exterior wall or a sunny window.
9. Allow the sun to heat the cans and provide supplemental heating.
Practice safety when constructing and installing the heater, and use proper protective gear such as gloves and safety goggles.
Safety Points To Remember About Emergency Heaters
Safety is crucial when crafting homemade emergency heaters, follow these points to ensure you minimize risks:
- Never leave a makeshift heater unattended.
- Never leave candles or tea lights burning unattended, even if you’re using the heater to keep warm while asleep.
- Use the heater in a well-ventilated area to prevent the buildup of harmful gases.
- Place the heater on a non-flammable surface and keep it away from flammable objects like curtains, furniture, and paper products.
- Always be careful when handling open flames. Keep a fire extinguisher nearby.
- Use the heater as a temporary solution only. They are not intended as a primary source of heat and should not be used for prolonged periods.

FAQs About Emergency Heaters
How long will a coffee can heater last?
A coffee can heater can last for several hours, depending on the amount of fuel used.
For instance, one pint of alcohol might burn for about 3-5 hours. Keep in mind that this varies based on factors such as can size, air ventilation, and fuel concentration.
What is the best emergency heat source at home?
The best emergency heat source for your home will depend on your personal preference. Usually, a combination of heaters works best. It also depends on the supplies you have on hand.
If you’re outside, flame-based heaters will work, but if you are indoors or want to use alternatives because of heater failure, electric and reflective heaters are your best bet.
What is the cheapest emergency heat source?
Candles or homemade alcohol burners are generally the cheapest emergency heat sources. But they are the most dangerous. You need to monitor them when using them to prevent fire.
Can candles heat a room?
Yes, candles can provide some heat to a room, but they are not a highly efficient heat source.
Each candle produces about 80 to 100 watts of heat, which isn’t enough to warm a large space, especially if it’s drafty.
However, if used in a small, enclosed space, and if safety precautions are taken, several candles together could slightly raise the temperature or at least provide a perception of warmth.
Always remember, candles should never be left unattended due to the fire risk.
How can I heat my room without electricity?
Making a do-it-yourself emergency heater like the ones mentioned in this article can help heat a room without electricity. However, you must make multiple heaters to ensure it warms up a whole room.

Key Takeaways of Emergency Heaters You Can Make At Home
Mastering the art of using everyday items to create warmth is a game-changer during unexpected power outages or heating failures.
This skill boosts self-reliance and resilience in tough situations.
Making your heater is not only practical in emergencies but also encourages resourcefulness and creativity.
But remember, while these emergency heaters provide warmth in challenging situations, safety should be your top priority.
Never leave your DIY heaters unattended and ensure proper ventilation when in use.
These homemade heaters, born out of necessity, are temporary solutions, not replacements for your primary heating system.
However, they play a crucial role in emergency situations by helping keep you warm until power is restored or your heating system is repaired.
Safety is crucial, so always keep a close eye on homemade heaters, ensure proper ventilation, and avoid flammable materials. Stay warm, stay safe, and embrace the art of emergency heaters you can make at home.
ABOUT THE AUTHOR
Angie Montgomery is the co-founder of Monday Day Prepping. She and her husband Bill have been "prepper's" since 2008. When she's not helping manage the homestead, she enjoys teaching her two boys how to cook and make natural alternatives to cleaners and other household items.
0 Comments