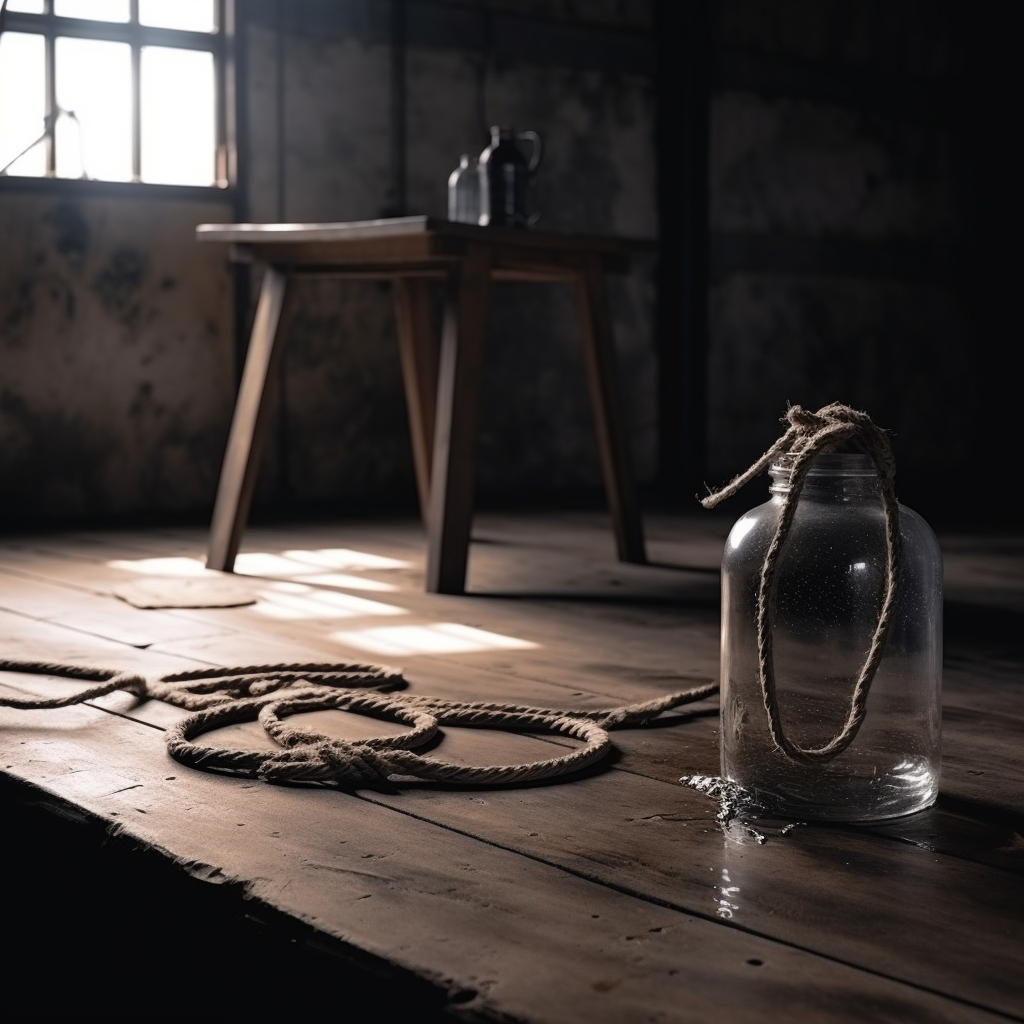
A bushcraft furniture salve is more than just a maintenance product; it’s an essential solution for preserving the longevity and quality of your wooden belongings.
You should keep your furniture and wooden tools in tip-top condition, especially when your survival could hinge on it.
What if I told you there was a natural alternative to traditional furniture polish that could help you take one step closer to being better prepared?
But don’t just take our word for it. Wise Owl has been used and trusted by bushcraft enthusiasts for years. It’s the go-to choice for bushcraft furniture salve for those who demand the best from their wood and leather products.
In this article, we’ll dive deep into the benefits of Wise Owl Furniture Salve and show you how it can help you get prepared for whatever comes your way.
So read on if you are ready to take your prepping game to the next level.
Wise Owl furniture salves are a game-changer in furniture maintenance as craftsmanship lies at the core of these unique solutions. These are a unique and versatile line of products designed to protect, restore, and rejuvenate your furniture and other various surfaces.
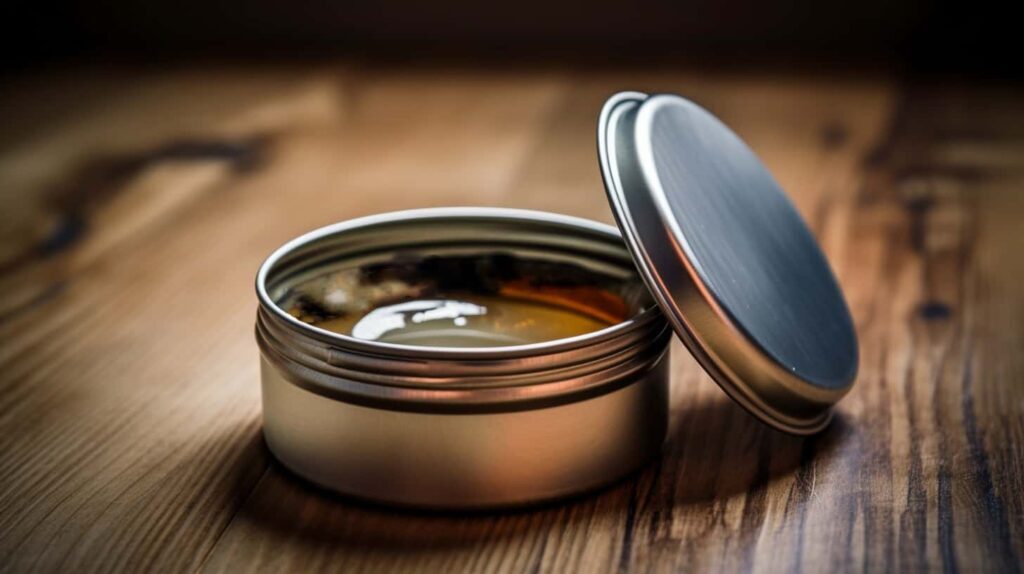
These make a great bushcraft furniture salve because they are a natural sealant that can be used to protect and restore the soft sheen of your wooden furniture and tools.
The primary function of these salves is to breathe life back into worn-out or aged furniture, be it wood or leather, by nourishing the material and restoring its original luster.
They also offer protection from damage, including water damage, and feature bactericidal properties that help shield your furniture from harmful bacteria.
Ingredients of Wise Owl Furniture Salves
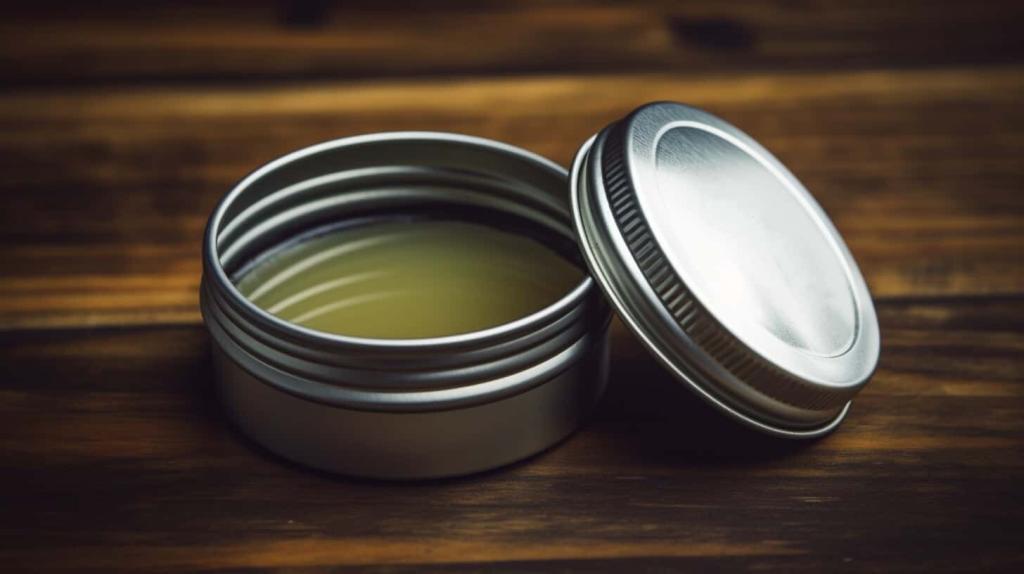
The secret of a salve’s ingredient lies in the blend of natural waxes and oils. Wise Owl Furniture Salves contain a natural formula that is gentle on your furniture and the environment.
What makes Wise Owl stand out is its high hemp seed oil content in the formula, which provides a nourishing and protective layer to your furniture.
This natural ingredient is known for its moisturizing and protective properties, making it an ideal choice for furniture care.
Wise Owl products also contain natural ingredients that are free from harsh chemicals, making it safe for use around children and pets.
Plus, it contains coconut oil, which keeps the wax soft and easy to apply on any surface.
Benefits And Uses Of Wise Owl Furniture Salve
Now let’s explore the multiple uses and advantages of Wise Owl salves. From rejuvenation to preservation, the applications are boundless.
Protects Furniture
Wise Owl Furniture Salves provide a protective barrier to your furniture against moisture and wear. This defense mechanism is made of all-natural and non-toxic ingredients that can help restore and protect your wooden furniture or leather goods.
It can help prevent cracking, fading, and other damage caused by exposure to sunlight, moisture, and other environmental factors.
With water-protective qualities, this salve ensures your furniture and tools remain sturdy and functional, even in adverse weather conditions. It’s an essential component of your survival kit, providing that extra layer of protection your equipment needs when you’re in the wild.
It can also enhance the natural beauty of the wood, giving it a rich and lustrous shine.
Restores Furniture
Breathing life back into wooden furniture is another key benefit. This furniture salve is a natural super oil that you can use on different kinds of surfaces.
Its bactericidal properties shield your gear from harmful bacteria, extending its longevity even in the harshest environments.
Provides Aromatherapy and Scents
Not only does Wise Owl Furniture Salve restore your furniture, but it also provides aromatherapy benefits that enchant your space with calming scents. This also helps with deodorizing musty old furniture.
From lavender to peppermint there are plenty of scents to choose from to suit your needs. They recently came out with a new scent that brings the fresh smell of summer to your next project.
Application and Maintenance
Here’s a guide on how to properly apply and maintain your furniture using Wise Owl salves.
How To Apply Wise Owl Furniture Salve
Applying Wise Owl Furniture Salve is easy and straightforward. You only need a good brush and the right techniques. There are two ways to use it: using a brush or a lint-free cloth.
If you prefer to use a brush, make sure it is a natural bristle brush. Synthetic brushes can leave streaks and may not apply the salve evenly. On the other hand, a natural bristle brush will give you a smooth, even application.
But if you prefer to use a cloth, make sure it is lint-free to avoid leaving any fibers behind. A microfiber cloth or an old T-shirt works well.
Regardless of the method you choose, here’s how to apply Wise Owl to your furniture:
First, make sure the surface you are applying the salve to is clean and dry.
Then, using a natural bristle brush, apply a thin layer of the salve in the direction of the wood grain. The butter texture of the salve makes it easy to apply evenly and smoothly.
After applying, wait for 5-10 minutes to allow the salve to penetrate the wood.
Once the waiting period is over, use a lint-free cloth to wipe off any excess bushcraft furniture salve. The result is a beautiful, natural finish that will protect your furniture for years to come.
H/T to @mycreativedays for this video on how to use Wise Owl furniture salve.
Maintaining Furniture With Wise Owl Furniture Salve
Consistency in maintenance ensures long-lasting results. Monthly touch-ups can make all the difference. As mentioned earlier, Wise Owl Furniture Salve not only protects your wood and leather goods but also helps maintain it. Regular application of the salve will keep your furniture looking its best and prevent drying and cracking.
To maintain your furniture, simply follow the same steps as when applying the salve.
Clean and dry the surface, and apply a thin layer of the salve with a natural bristle brush.
Wipe off any excess with a lint-free cloth.
Repeat this process every six to twelve months, or as needed.
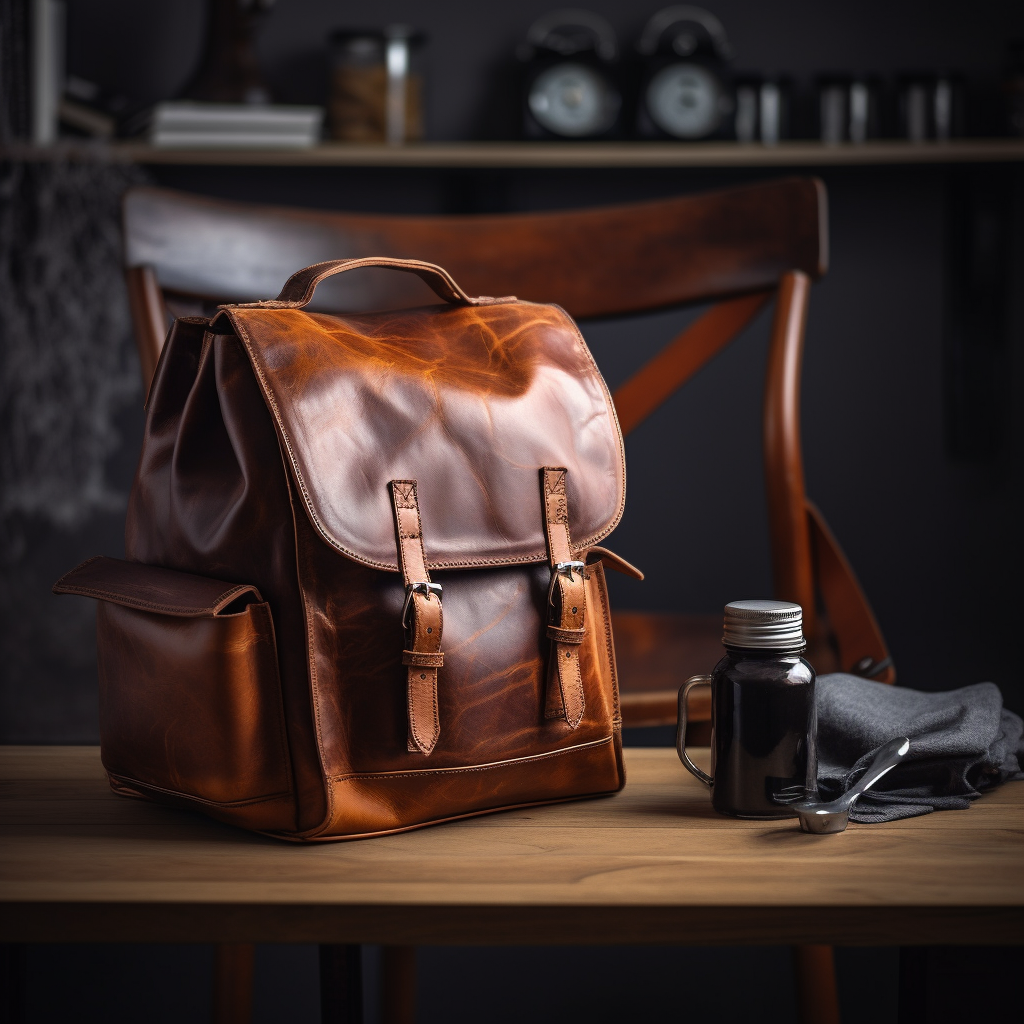
Using Wise Owl Furniture Salve On Leather
Using Wise Owl Furniture Salve on leather provides extra nourishment and durability. Consider it a spa treatment for your leather goods.
First, clean the leather with a damp cloth and let it dry.
Apply a small amount of Wise Owl Furniture Salve evenly using a soft cloth.
Allow the salve to soak in, ideally overnight, to deeply nourish the leather.
Buff the surface with a dry cloth to remove any excess salve and enhance the leather’s shine.
Regularly repeat this process for ongoing care, always spot test first, and avoid suede or unfinished leather.
Wise Owl Furniture Salve Reviews
Take a glimpse of what users are saying about the different Wise Owl Furniture salve options. Real-world testimonials are the best quality indicators.
Wise Owl products include a variety of furniture salves and tonics that are made from high-quality, all-natural ingredients. They also carry a variety of paint, painting supplies and candles.
Here’s a brief overview of a few of Wise Owl’s Furniture Salve products:
The Tobacco Flower variant offers a rich, rustic aroma. Users often associate it with sophistication and luxury. This salve is made with a blend of beeswax and natural oils and has a warm and inviting scent that’s perfect for cozy spaces. It helps to moisturize and protect the wood while also adding a subtle shine.
The Tobacco Flower variant offers a rich, rustic aroma. Users often associate it with sophistication and luxury. If you’re looking for a furniture polish that’s easy to apply and has a pleasant scent, Noir Moon is a great option.
It’s made with a blend of natural oils and waxes and helps to protect wood from scratches and other damage.
This unscented variant offers a subtle and natural approach to furniture care. This blend is perfect for those who prefer a non-intrusive, fragrance-free salve, while still reaping the robust conditioning benefits of hemp seed oil.
This unscented hemp version is ideal for maintaining the original look and feel of your bushcraft furniture, offering an understated solution to restoration and preservation.
Frequently Asked Questions
Can furniture salve be used on all types of wood?
Yes, Wise Owl Furniture Salve is safe to use on all types of wood, including hardwoods, softwoods, and even reclaimed or antique woods.
It is also safe to use on painted or stained wood surfaces.
Is furniture salve safe for indoor use?
Yes, Wise Owl Furniture Salve is safe for indoor use, as it is made from all-natural and non-toxic ingredients.
Also, it does not contain any harmful chemicals or fumes that could be harmful to you or your family.
Does furniture salve leave a greasy residue?
No, Wise Owl Furniture Salve does not leave a greasy residue on your furniture. It is designed to soak into the wood, leaving behind a protective layer that enhances the natural beauty of the wood.
How often should furniture salve be applied?
We recommend applying Wise Owl Furniture Salve every 6-12 months, depending on the level of use and exposure to environmental factors.
Regular application can help keep your furniture and leather goods looking its best and protect it from damage.
Wise Owl Furniture Salve: Key Takeaways
Wise Owl Furniture Salves offer an unmatched blend of preservation, restoration, and sensory delight. These are more than just maintenance products; they’re essential investments for anyone serious about home care.
If you’re looking for a natural way to protect and preserve your wooden furniture, Wise Owl Furniture Salve is a great product to consider.
Here are some key takeaways to keep in mind:
Made with all-natural ingredients: This furniture salve is made with a blend of beeswax, coconut oil, and essential oils, so you can feel good about using it in your home.
Provides long-lasting protection: Not only does Wise Owl Furniture Salve protect your furniture from scratches and water damage, but it also helps to bring out the natural beauty of the wood.
Easy to apply: Simply apply a small amount of the salve to a clean, dry cloth and rub it into your furniture in a circular motion. It’s that easy!
Versatile: This furniture salve can be used on a variety of wooden surfaces, including tables, chairs, cabinets, and more.
Wise Owl Furniture Salve is a great product for anyone looking to protect and preserve their wooden furniture in a natural and affordable way.
What are your thoughts about Wise Owl products? Have you used them? Comment your thoughts below!
Making emergency heaters can be as simple as arranging a few tea light candles on a heat-resistant surface, covering them with a ceramic flower pot, and using the pot to radiate heat.
If you want to learn more on emergency heaters you can make at home by using items you already have, read on.
In this guide, we’re going to cover 10 DIY solutions for heaters that you can whip up — with or without electricity. So, are you ready to master the art of makeshift emergency heaters? Dive in, and let’s get started.
Emergency heaters are devices used to generate heat during unexpected situations such as power outages, heating system failures, or extreme cold weather conditions.
They are not just a winter essential; they’re your line of defense in unforeseen situations like power outages or severe storms.
They can be commercial products or DIY creations, designed to provide warmth quickly and efficiently. From battery-powered units to makeshift candle heaters, they come in various types to meet different needs.
Now let’s proceed with the different emergency heaters you can make at home!
Flame-Based Heaters
Flame-based emergency heaters are a classic go-to, using open flames or combustion as their heat source, and are especially effective in well-ventilated spaces. They burn fuels like propane, natural gas, kerosene, or wood.
Examples include portable propane heaters, kerosene heaters, wood stoves, and candles.
These DIY survival heaters can be helpful in emergencies, especially when you have no electricity.
However, these have safety concerns. For one, open flames can cause fires, and combustion can produce harmful gases like carbon monoxide.
So always follow safety guidelines and ensure proper ventilation when using this type of heater.
Also, never leave flame-based heaters unattended, and extinguish them by smothering the flame with a non-flammable, heat-resistant cover.
1. Metal Can Heater
A metal can heater is an effective and low-tech solution that utilizes candles or alcohol as a heat source. The can serves as a container and heat distributor.
Materials:
Metal can (e.g., paint can or large soup can)
Toilet paper roll
70% isopropyl alcohol
Lighter or matches
Instructions:
Remove the label and clean the metal can.
2. Place the toilet paper roll inside the can, ensuring it fits snugly.
3. Pour isopropyl alcohol over the toilet paper roll until it is saturated.
4. Use a lighter or matches to ignite the alcohol-soaked toilet paper.
5. The metal can heater will produce heat for several hours.
2. Coffee Can Heater
Coffee can heaters are easy to make and work well with tea lights to generate sufficient warmth. The idea is to create a heat source by burning tea light candles inside the can and using the terracotta pots to absorb, store, and radiate the heat.
The pots are placed one inside the other, inverted over the lit candles, and the coffee can help contain the heat and direct it outward.
Materials:
Metal coffee can
2 terracotta pots (one smaller than the other)
3-4 tea light candles
Lighter or matches
Instructions:
Remove the label and clean the coffee can.
2. Place the tea light candles inside the coffee can and light them.
3. Invert the smaller terracotta pot over the candles and position it inside the can.
4. Invert the larger terracotta pot over the smaller one, creating a chamber between the two pots.
5. The coffee can heater will radiate heat for several hours.
3. Terra Cotta Pot Heater/ Flower Pot Heater
Terra cotta pot heaters, also known as flower pot heaters, rely on the pot’s heat retention capabilities to keep spaces warm.
This one is a great option for making a homemade emergency heaters with candles. Burning the candle under the inverted terra cotta pot absorbs and radiates the heat into the surrounding area.
The metal stand elevates the pot above the candle, allowing heat transfer.
Materials:
Terra cotta pot
Metal stand
Flat candle or tea light
Instructions:
Light the candle or tea light.
2. Place the lit candle on a stable, non-flammable surface.
3. Invert the terra cotta pot and place it over the lit candle using the metal stand to elevate it.
4. The terra-cotta pot will absorb and radiate heat from the candle.
Electric Heaters
Electric heaters are convenient and efficient, requiring only an electrical source to deliver immediate heat. These emergency heaters come in various types and sizes to suit different needs.
Some common electric heaters include space heaters, oil-filled radiators, and infrared heaters.
They are often portable and easy to use, making them popular for emergency heating situations.
1. Battery-Powered Heater
Battery-powered heaters offer portability and ease, making them a go-to for travelers and outdoor enthusiasts.
Materials:
12V DC heating pad
12V battery
Jumper cables or alligator clips
Instructions:
Connect the heating pad to the battery using jumper cables or alligator clips.
2. The heating pad will warm up, providing a portable heat source.
2. Rechargeable Hand Warmer Heater
Rechargeable hand warmer heaters are pocket-sized heat sources that provide instant warmth on-the-go.
Materials:
Rechargeable hand warmer
USB charger or power bank
Instructions:
Charge the hand warmer using the USB charger or a power bank.
2. Once charged, turn on the hand warmer and place it in your pocket or under a blanket to provide a portable heat source.
3. Hot Water Bottle Heater
Hot water bottle heaters are a traditional method, using sealed containers of hot water to provide radiant heat.
Materials:
Hot water bottle
Kettle or pot to heat water
Towel or blanket
Instructions:
Fill the kettle or pot with water and heat it to boiling. (You can heat the kettle using a stove or an electric kettle).
2. Carefully pour the hot water into the hot water bottle.
3. Wrap the hot water bottle in a towel or blanket to avoid burns and place it in the area you want to warm up.
Reflective Heaters
Reflective heaters work by radiating heat from a glowing element, maximizing efficiency by directing heat towards a specific area.
These utilize infrared radiation to produce heat. They emit infrared waves that nearby surfaces absorb and release as warmth. It’s a great alternative to make heat without electricity or fire.
They’re energy-efficient and ideal for targeted heating. Reflective heaters are popular for heating individual rooms or small spaces, providing immediate warmth and easy adjustability.
1. Insulation Heater
Insulation heaters focus on trapping warm air to maintain a comfortable temperature over time.
3. The reflective surface of the Mylar blanket will help retain heat in the room by reflecting it back.
Soda Can Solar Heater
A soda can solar heater is a DIY marvel, leveraging the sun’s rays to warm enclosed spaces. Creating a DIY solar heater from tin cans, also known as a soda can heater, is an eco-friendly way to harness solar energy for heating purposes.
Materials:
Empty tin cans or soda cans (enough to fill the desired size of your heater)
A wooden or metal frame (for holding the cans)
Black high-temperature spray paint
Plexiglas or glass sheet (to cover the front of the frame)
Insulation material (optional, for the back of the frame)
Aluminum foil (optional, for added reflection)
Screws or nails (for assembling the frame)
Duct tape or aluminum tape
Drill with a metal drill bit
Hose clamps
Silicone or heat-resistant adhesive
Screwdriver
Gloves and safety goggles
Instructions:
Clean and dry the cans thoroughly, removing any labels or adhesive residue.
2. Using a drill with a metal drill bit, make holes in the top and bottom of each can.
3. Spray paint the cans black with high-temperature paint.
4. Connect the cans by stacking them on top of each other and securing them with duct tape or aluminum tape, forming vertical columns.
5. Build a frame using wood or metal, sized to fit your columns of cans. If desired, insulate the back of the frame and add a layer of aluminum foil to enhance reflection.
6. Place the connected cans inside the frame, and secure them with hose clamps or adhesive.
7. Cover the front of the frame with Plexiglass or glass. Attach the cover using screws or nails, and seal the edges with silicone or heat-resistant adhesive to prevent heat loss.
8. Install the solar heater in a sun-facing location, such as an exterior wall or a sunny window.
9. Allow the sun to heat the cans and provide supplemental heating.
Practice safety when constructing and installing the heater, and use proper protective gear such as gloves and safety goggles.
Safety Points To Remember About Emergency Heaters
Safety is crucial when crafting homemade emergency heaters, follow these points to ensure you minimize risks:
Never leave a makeshift heater unattended.
Never leave candles or tea lights burning unattended, even if you’re using the heater to keep warm while asleep.
Use the heater in a well-ventilated area to prevent the buildup of harmful gases.
Place the heater on a non-flammable surface and keep it away from flammable objects like curtains, furniture, and paper products.
Always be careful when handling open flames. Keep a fire extinguisher nearby.
Use the heater as a temporary solution only. They are not intended as a primary source of heat and should not be used for prolonged periods.
FAQs About Emergency Heaters
How long will a coffee can heater last?
A coffee can heater can last for several hours, depending on the amount of fuel used.
For instance, one pint of alcohol might burn for about 3-5 hours. Keep in mind that this varies based on factors such as can size, air ventilation, and fuel concentration.
What is the best emergency heat source at home?
The best emergency heat source for your home will depend on your personal preference. Usually, a combination of heaters works best. It also depends on the supplies you have on hand.
If you’re outside, flame-based heaters will work, but if you are indoors or want to use alternatives because of heater failure, electric and reflective heaters are your best bet.
What is the cheapest emergency heat source?
Candles or homemade alcohol burners are generally the cheapest emergency heat sources. But they are the most dangerous. You need to monitor them when using them to prevent fire.
Can candles heat a room?
Yes, candles can provide some heat to a room, but they are not a highly efficient heat source.
Each candle produces about 80 to 100 watts of heat, which isn’t enough to warm a large space, especially if it’s drafty.
However, if used in a small, enclosed space, and if safety precautions are taken, several candles together could slightly raise the temperature or at least provide a perception of warmth.
Always remember, candles should never be left unattended due to the fire risk.
How can I heat my room without electricity?
Making a do-it-yourself emergency heater like the ones mentioned in this article can help heat a room without electricity. However, you must make multiple heaters to ensure it warms up a whole room.
Key Takeaways of Emergency Heaters You Can Make At Home
Mastering the art of using everyday items to create warmth is a game-changer during unexpected power outages or heating failures.
This skill boosts self-reliance and resilience in tough situations.
Making your heater is not only practical in emergencies but also encourages resourcefulness and creativity.
But remember, while these emergency heaters provide warmth in challenging situations, safety should be your top priority.
Never leave your DIY heaters unattended and ensure proper ventilation when in use.
These homemade heaters, born out of necessity, are temporary solutions, not replacements for your primary heating system.
However, they play a crucial role in emergency situations by helping keep you warm until power is restored or your heating system is repaired.
Safety is crucial, so always keep a close eye on homemade heaters, ensure proper ventilation, and avoid flammable materials. Stay warm, stay safe, and embrace the art of emergency heaters you can make at home.
Disclaimer: The following article is intended for informational purposes only and is not to be used as a practical guide for actual situations involving waterboarding. Waterboarding is considered a form of torture and is illegal and inhumane. The information provided is based on theoretical research and personal accounts and does not guarantee survival in a real-life situation.
The techniques discussed should not be practiced without professional guidance and supervision due to the potential for serious harm or fatality. The publisher does not endorse or encourage the practice or use of waterboarding in any form or situation. Always prioritize legal and ethical practices in all situations.
The first step in understanding how to survive waterboarding, a form of torture, is recognizing its grave implications. Waterboarding is a form of torture designed to break the human spirit. The fear of drowning and the uncertainty of escape are overwhelming, and you wonder how you could possibly survive.
In today’s unpredictable world, being prepared for anything is essential. This article delves into the dark realm of waterboarding, revealing crucial tips and strategies that could mean the difference between life and death.
Whether driven by curiosity or genuine concern, understanding how to survive waterboarding can arm you with invaluable knowledge and mental fortitude.
So read on, and unlock the secrets of survival in the face of this nightmarish experience.
Waterboarding is a form of interrogation often classified as torture. It simulates the sensation of drowning, inducing extreme psychological and physical distress.
Waterboarding is when someone makes you lie on your back, and places a wet rag over your face. Suddenly, cold water starts pouring over the cloth, making it difficult for you to breathe.
Panic attacks set in as you gasp for air, but the water keeps coming. At this point I bet you wish you had read up on an article on how to survive waterboarding.
So how does waterboarding work? Waterboarding is an extreme form of interrogation that has been widely debated for its ethical implications.
The cloth restricts breathing, and the sensation of water on the face creates a panic response in the person being interrogated.
The sensation of drowning is terrifying, and the person being waterboarded usually experiences extreme fear, panic, and a sense of suffocation.
Waterboarding has been used by various government agencies and military forces worldwide, but it’s now widely considered a form of torture.
It’s a cruel and inhumane practice.
Many countries, including the United States, have banned it, and organizations like the UN and Amnesty International have condemned it. But that doesn’t mean no one’s doing it.
Some people argue that it works for getting information. Still, research going back to World Wars I and II has shown that torture often leads to unreliable intelligence because victims might say anything to make it stop.
What Are The Effects Of Waterboarding?
The effects of waterboarding are debilitating, both psychologically and physically. Short-term impacts include panic, while long-term repercussions can be as severe as death or PTSD.
Waterboarding can damage a person, both physically and mentally. Some pretty infamous cases, like those involving Khalid Sheikh Mohammed and Abu Zubaydah, show just how bad it can get.
Khalid Sheikh Mohammed was waterboarded a whopping 183 times. He was instrumental in the 9/11 attacks, so take that as you may. It did cause him severe pain and distress, but it also led to many false confessions.
So, it makes you wonder if this torture technique is even helpful in getting reliable info.
Abu Zubaydah, another big name in al-Qaeda. Before being transferred to Guantánamo Bay, Zubaydah was tortured in various ways at CIA “black sites.” He went through waterboarding 83 times.
Just like with Khalid Sheikh Mohammed, this left some serious psychological trauma on him. We’re talking about PTSD, anxiety, and other mental health issues.
And guess what? Waterboarding him also led to false confessions, making you question the whole point of using such a brutal practice.
So, to sum it up, waterboarding can have some seriously effects including death. It can cause significant pain, suffocation, and long-lasting health problems.
On top of that, it can leave people with PTSD, anxiety, and other mental health disorders.
Considering the cases mentioned and others, it’s hard to believe that waterboarding is even effective in getting reliable information.
The experience of being waterboarded can be so traumatic that it stays with a person for the rest of their life, causing them to relive the fear and panic they experienced during the ordeal.
How To Survive WaterboardingTorture
Breathing control and mental resilience are your greatest assets in such situations. If you find yourself facing the grim reality of waterboarding, survival hinges on preparation and presence of mind.
Honestly, there is no surefire method to prepare for waterboarding.
You might even forget all your preparation when you suddenly feel like you’re drowning because you’ll be desperate to breathe.
Still, there are a few things you can do to try and make the experience a little more bearable:
1. Focus On Your Breathing
The key to surviving waterboarding lies in mastering your breath. Controlled breathing minimizes panic and can give you precious seconds to think.
Focus on your breathing, taking slow, deep breaths through your nasal cavity to create a small air pocket between your nostrils and the cloth. This can help you stay in control and prevent hyperventilation.
For example, practice slow, controlled breathing techniques like meditation or yoga. The more familiar you are with these methods, the more likely you’ll be able to use them during waterboarding.
2. Stay Calm
It’s essential to try to stay as calm as possible as panic will only worsen the situation, so try to keep a level head and remind yourself that the waterboarding will eventually end.
Focus on your breathing, taking slow, deep breaths through your nasal cavity to create a small air pocket between your nostrils and the cloth. This can help you stay in control and prevent hyperventilation.
One way to practice staying calm is to engage in activities that put you in high-pressure situations, such as participating in competitive sports.
The more accustomed you become to managing stress and anxiety, the better equipped you’ll be to remain calm during waterboarding.
3. Control Your Gag Reflex
Waterboarding can trigger your gag reflex, making you feel like you’re going to vomit. Controlling your gag reflex can mean the difference between panic and manageable discomfort.
If you can, try to suppress this reflex to avoid choking on your vomit. Swallowing at intervals can help control this reflex but it’s essential to be careful not to choke on saliva, either.
You can practice managing your gag reflex by placing a clean toothbrush or your finger on the back of your tongue for a few seconds every day.
Then gradually increase the duration to become more comfortable with suppressing the reflex.
4. Use Distraction Techniques
Using distraction techniques, like counting or recalling memories, can divert your mind from the immediate discomfort. These methods can help you maintain a semblance of control.
To help distract yourself from the sensation of drowning, try to focus on something else, like a happy memory, a loved one, or an image that brings you comfort.
This can help you mentally escape the situation, even if only for a brief moment.
For example, you could visualize yourself on a beautiful beach, hearing the waves crash and feeling the sun’s warmth on your skin.
The more vivid the image, the more effective the distraction technique.
5. Build Mental Resilience
Building mental resilience can significantly enhance your chances of surviving waterboarding. Repeatedly confronting and overcoming fear can fortify your mental defenses.
Work on mental resilience techniques like meditation and visualization to help you cope with extreme stress and fear.
Consider practicing mindfulness meditation daily, focusing on your breath, and allowing thoughts to come and go without judgment.
This can help increase your mental resilience and ability to stay present and calm in stressful situations.
6. Improve Physical Fitness
Physical fitness can also impact your survival chances. Cardiovascular exercises that improve lung capacity can be particularly beneficial.
A strong and healthy body can make it easier to endure waterboarding. Focus on building cardiovascular endurance and lung capacity through swimming, running, and yoga.
For example, incorporating interval training into your workout routine can help increase lung capacity and cardiovascular endurance.
Additionally, practicing yoga can improve your breath control and overall physical strength.
Can You Train For Waterboarding Torture?
While no preparation can completely mitigate the trauma, mental and physical training techniques can provide a marginal but crucial advantage. Keep in mind that it’s not ethical or legal to train or practice waterboarding as a form of torture.
Training or practicing waterboarding could result in severe legal consequences and cause significant harm to the individuals involved.
It’s essential to recognize that waterboarding is inhumane and has long-lasting physical and psychological effects on the victim.
Instead of seeking ways to train or practice surviving waterboarding, promoting more ethical and humane methods of gathering information and addressing conflict resolution is crucial.
If you’re interested in learning techniques to withstand extreme conditions or enhance mental resilience, consider exploring practices like meditation, mindfulness, and breathing exercises.
These methods can help develop mental strength and coping skills in high-stress situations without resorting to torture or causing harm to others.
FAQs About How To Survive Waterboarding
Is it possible to survive waterboarding?
Yes, it is possible to survive waterboarding, although it’s an incredibly difficult and terrifying experience.
This is because if you’re not getting enough oxygen for a long time, it can cause some serious damage to your organs.
And if the people holding you captive don’t let you catch your breath and clear the water from your nose and throat, things can go south real quick, which means you could die in a few minutes.
Does waterboarding work if you hold your breath?
Holding your breath during waterboarding might help for a short period, but it’s not a long-term solution.
The captors will continue pouring the water, and you’ll eventually need to take a breath. So, the best approach is to try to breathe slowly and calmly through your nose.
How long can you survive waterboarding?
The length of time a person can survive waterboarding varies depending on factors like the individual’s physical and mental resilience and the specific conditions of the waterboarding session.
It’s important to remember that waterboarding is a form of torture, and the goal is often to extract information rather than to kill the victim.
That being said, there have been instances where waterboarding has led to death, mainly when performed by individuals with little regard for the safety of the person being subjected to the ordeal.
Key Takeaways: How To Survive Waterboarding
Surviving waterboarding requires a complex interplay of physical and mental strategies. Preparation and presence of mind are your most valuable tools for navigating this nightmarish scenario.
The thought of facing a harrowing ordeal like waterboarding is spine-chilling. The sensation of drowning, the sheer panic, and the unknown leave you questioning your ability to survive such a horrifying experience.
The stark reality is that waterboarding has a dark and lasting impact on its victims. Gaining knowledge and understanding of how to endure waterboarding can give you the mental strength and the essential tools for survival.
The stakes have never been higher — false confessions, unreliable information, and a lifelong struggle with anxiety and PTSD are only a few of the consequences.
Surviving waterboarding isn’t just about staying alive; it’s about minimizing the long-lasting physical and emotional damage.
You need to learn how to remain calm, focus on your breathing, and build mental resilience.
But with the right knowledge and preparation, you can increase your chances of survival and help pave the way for a world that stands against such horrifying practices.
Don’t let fear paralyze you; use it to fuel your determination to survive and create a better, more compassionate future for us all.
DISCLAIMER: The content of this article is for informational and educational purposes only. It is intended to promote understanding and knowledge of various survival methods and strategies, not to encourage violence or illegal activities. The DIY homemade survival weapons discussed are meant for use in true survival situations where traditional forms of protection are not available.
Remember that misuse of these homemade survival weapons could result in harm, injury, or legal troubles. Always check your local laws regarding the creation and possession of homemade weapons. These tools should only be used responsibly, and in a manner consistent with self-defense and survival scenarios.
Never attempt to use these weapons against another person in a non-life-threatening situation. We strongly advocate for peaceful conflict resolution and respect for all human life. Safety and ethics should always be your top priority when dealing with survival situations. Always use your best judgment and act within your local laws and regulations.
We are not responsible for any harm or damage caused by the creation or use of these DIY weapons. It is your responsibility to ensure safety and legality in your actions.
DIY survival weapons are not just a cornerstone of survivalism; they’re a testament to human ingenuity. This guide doesn’t just arm you with tools, but with knowledge—your most vital survival gear.
What if the world has gone off the rails, and pandemonium is the new norm? In these dire times, having the right tools at your disposal can determine whether you and your family survive or succumb to the chaos.
That’s where our collection of 36 DIY homemade survival weapons come into play — giving you the edge you need to navigate the apocalypse.
The best part? These homemade survival weapons are not only effective, but they can also be crafted using everyday items you probably have lying around your home or garage.
Because when society crumbles and the chips are down, the only person you can truly rely on to safeguard you and your loved ones is a well-prepared survivor—like yourself.
So, let’s dive into this roundup and get ready to face the end of days, armed with an arsenal of DIY homemade survival weapons.
Never let your guard down; in a survival situation, awareness is your first line of defense. I always try to have something on me for personal defense. But you never know when things will go south. A quiet city or neighborhood can easily be enveloped in riots.
The government could decide to lock us down again. Heck, people get robbed inside their homes all the time. You never know where and when you might get caught out.
The key takeaway here is anything can become a household weapon. A fire extinguisher, a baseball bat, and a wood handle was broken the right way — these things can help you fend off an attacker when you don’t have your primary on you.
Creativity in weapon-making expands your survival toolkit and options. As I’ve said earlier, regular household items can easily be weapons in the right hands. But having that ability to think creatively is indispensable to survival.
It’s easy to put a knife at the end of a pole and call it a spear. But I would much rather bet my life on the guy who can make that same spear with a piece of wood and scrap metal from the dumpster.
Try to train your mind to look beyond the obvious. I’m not out here saying use a homemade shotgun instead of your primary firearm. But be the guy that can break all your guns, run out of ammo, and still have something to shoot with.
Another thing to keep in mind is, in a true SHTF scenario, any weapon you can make, you can use to barter with other survivors. That might come in handy in case you run out of certain supplies.
Mastering your DIY weapons ensures they’re more than just showpieces—they become extensions of your survival instinct. So if possible, train with your chosen weapon. This will give you confidence in making and using them in any situation.
Some of the weapons below can be aimed or thrown. You need to hone in these skills similar to shooting your gun to improve your accuracy. The best way to do this is through repetitive practice.
Discover 36 versatile DIY survival weapons you can craft from household items. You should be able to make almost every weapon on this list with junk or items lying around your house. Any material you need to buy should be extremely affordable.
But if you want to be extra thrifty, you can probably find some of the materials outside or while dumpster diving.
Disclaimer: Some of the items on this list can be dangerous and might even be illegal in some states. You should check your state laws before making or using them.
1. DIY Pipe Shotgun
A DIY Pipe Shotgun has a metal piping that serves as your main component, solidifying its usability. You probably know this as a slam fire shotgun, but this DIY pipe shotgun is your go-to buddy for close-range protection. It’s powerful, easy to assemble, and perfect for anyone needing quick, reliable defense.
Check out this video to give you an idea of how your shotgun will work and how to assemble it at the end.
H/T @PlastikGatz
2. Spiked Nail Bat
Clubs are spiked nail bats that are primitive but potent. Nails provide the teeth, and the bat serves as the body in this simple yet ferocious tool.
Sure a regular hammer or aluminum bat can do the job. But there’s just something intimidatingly scary about a spiked bat. It’s a great go-to weapon for a zombie apocalypse.
There are many versions of a spiked nail bat. The style, design, and accessories will depend on what kind of damage you’re looking to do.
H/T @loadedforbear9290
3. Flamethrower
A DIY flamethrower offers range and power, transforming gasoline and a metal tube into a fire-spewing mechanism. Flamethrowers are great for starting fires or burning out enemies off trenches. It’s a nice weapon that can get you out of a pinch.
I will show you two ways you can make a flamethrower at home.
All you need is a lighter and a can of aerosol. You can check it out below:
H/T @ModernRogue
But there’s a really easy way to make a “legit” flamethrower with some serious power and range.
H/T @TheKingofRandom
4. PVC Bow and Arrow
The PVC bow and arrow exemplify resourcefulness using a PVC pipe and string to make this classic long-range weapon.
Way before guns were invented, bows were the primary ranged weapon of choice. The fact that it’s still around today shows how effective a hunting weapon is.
In a survival scenario, I suggest creating a real wooden bow or even a half-decent plywood bow.
H/T @BackyardBowyer
5. Rebar Tomohawk
The Rebar Tomahawk combines aerodynamics and heft. It uses rebar and wood for throwing or hand-to-hand combat.
Tomohawks are one of the most versatile, time-tested survival tools you can have. Use it for chopping wood, building out your shelter and trench, hurling and hunting, or close-quarter combat.
If you can’t find rebar, you can use any thick piece of metal, like a pipe wrench.
You would probably use it to make other weapons as well.
Make this Rebax Tomohawk at home:
H/T @HTSTAAL
6. Spike Pit Booby Trap
The Spike pit booby trap is defense in landscape form. Wood spikes and camouflage make it an environmental snare. These booby traps were the nightmares of GIs during the Vietnam War. Known as punji traps in Vietnam, up to 11% of fatalities during the war were because of these nasty buggers.
Spike Pit Booby traps are cheap and easy to construct. Perfect for perimeter defense and trapping unfortunate animals.
Materials
Sticks, nails, glass (sharp pointy objects, for defense, the rustier, the better)
Leaves surrounding vegetation for camouflage.
Bamboo or plywood (for cover)
How to Make a DIY Spike Pit Booby Trap
Making Spike pit booby traps is as straightforward as it sounds.
Find strategic locations where intruders might pass, like a trail or false entryway.
2. Grab a sturdy stick or shovel and dig a hole with steep sides, at least 2 to 3 feet deep.
3. Search for solid and straight sticks and sharpen the ends with a knife. If you have long metal nails or broken glass bottles, they also work.
4. Arrange the sharpened sticks at the bottom of the pit, pointing upwards.
5. Gently cover the hole with very thin plywood or bamboo.
6. Camouflage the cover with branches, leaves, and other natural materials to blend it with the surroundings.
IMPORTANT: Mark the trap location on a map or with a discreet sign to avoid accidents.
Need more ideas? Check out some of these Vietnam War Punji Traps.
H/T @AdySetyawan
7. DIY Pepper Spray
DIY Pepper Spray adds a non-lethal, blinding option to your arsenal. You only need capsicum and a spray bottle. Pepper spray works as a great backup in situations where you can’t get access to more intimidating weapons when SHTF.
A potent spray in the face is enough to stop an animal or intruder in its tracks.
Materials
Spray Bottle (pressurized spray bottles work best)
Pepper (ghost pepper), pure capsaicin liquid, or chili powder (use this as your last option)
Oil
Alcohol
Cheesecloth or coffee filter
This guy is crazy, but he explains how to make your own pepper spray pretty well.
H/T @CanadianPrepper
8. Plywood Bow
Another version of a bow, the Plywood Bow adds stability. Its rigidity complements the bowstring’s tension. If you live in a dense city with very few trees around, a plywood bow might be more practical for you to make.
You can find plywood just about everywhere, and with a little ingenuity, you can fashion a decent bow out of one.
Materials:
Paracord
Plywood
Wood glue
Zip ties (optional)
Look at this brief video to learn how to make one at home. The trick is to layer your plywood to create enough draw weight without snapping your bow.
H/T @1stBurnmoorscouts
9. Survival Slingshot
The survival slingshot is a study of mechanical advantage. Elastic bands and a y-shaped frame make this weapon both simple and effective. Slingshots are perfect for hunting birds and small animals but also work well for protection and self-defense.
Materials:
Y-shaped branch (find one that fits well in your hand)
Optional: steel balls (these give your more consistent damage)
Optional: slingshot bands (if you want something that lasts a long time)
Make this at home and teach your kids how to have fun and hone in on some simple survival skills.
H/T @BlackScoutSurvival
10. Bullwhip
A bullwhip is made of leather and handle combined into a weapon that extends your reach. This ancient weapon isn’t just for show. It can help you fend off attackers, hunt small game, or even manage livestock.
This project will take some time to make and to get used to. Here’s a video to take you step by step on how to make your bullwhip at home.
H/T @caliberwhips9595
11. Throwing Stars / Throwing Spikes
From stealth to surprise, throwing stars or throwing spikes are lightweight yet lethal. Metal or wood serves as the base material. Regarding self-defense or hunting, throwing spikes/ stars pack a powerful punch in a small package. These easily concealed weapons are perfect for those looking to add extra security to their arsenal.
Materials:
16 gauge steel sheet
Metal file
Metal sander
Hack saw
The guys at TKOR have a really easy tutorial for you to try.
H/T @TheKingofRandom
12. DIY Caltrops
DIY Caltrops are metal pieces twisted into a tetrahedron shape that disrupt movement across an area. If you’re looking for a no-nonsense approach to deter pursuers, caltrops are a great DIY tool.
These small, spiked wonders are designed to puncture tires or injure the feet of anyone trying to follow you.
Add these to your survival pack ASAP:
H/T @5tonswguns219
13. Homemade Taser
The homemade taser requires batteries and wiring to transform it into stunning power and adds electrical force to your toolkit.
No one enjoys getting shocked, and this DIY weapon puts the power of electricity at your fingertips.
This homemade taser can stop an attacker in their tracks, perfect for personal protection.
The best part? You can find some of these components right at your home.
H/T @MaxImagination
14. DIY Shiv/ Knife
A DIY shiv or knife is simply made of metal or plastic, sharpened to a point, and becomes a close-quarters essential. This handy DIY shiv/ knife can be made from just about any item around your home. Great for hunting or as a backup tool for protection or DIY crafts.
Materials:
Hacksaw
Wooden stir stick
Duct tape
Aluminum can
Pliers
Scissors
With some creativity and ingenuity, you can turn scrap metal, glass, or plastic into a versatile cutting tool perfect for various uses.
Heavy and imposing, the war hammer combines a metal head and a wooden handle that offers brute force and a devastating impact. The war hammer is a powerful melee weapon that delivers bone-crushing blows and pierces through armor like a hot knife through butter. It’s a very versatile weapon to have in your arsenal.
Make this insane weapon yourself:
H/T @WeaponCollector
16. Pocket Dart Gun
Made of small tubes and darts, pocket dart guns add surreptitious striking power, offering a covert, ranged option. This little gadget can pack a serious punch in a compact and discreet design, making it the perfect companion for on-the-go protection or outdoor adventures.
Here’s a video showing you how to make one:
H/T @Nighthawkinlight
17. Laser-Assisted Blowgun
The Laser-assisted blowgun is both high-tech and primal. A laser sight improves the accuracy of this ancient weapon. Equipped with a laser sight for pinpoint accuracy, this stealthy and silent weapon takes your hunting game to the next level.
Perfect for pursuing small game or quietly eliminating targets from afar, you’ll enjoy the thrill of staying under the radar.
Make one by following the video guide below:
H/T @TheKingofRandom
18. Sheet Metal Self-Loading Pistol
The Sheet metal self-loading pistol is a feat of DIY engineering. Sheet metal and a firing pin assemble into a semi-automatic choice. While it may not boast the polish of its commercial counterparts, this DIY firearm means business when it matters most.
In capable hands, this rugged, self-loading pistol proves that sometimes, homemade can be just as effective.
H/T @clintonwestwood5498
19. DIY Naginata
The DIY Naginata offers the benefits of both spear and sword. A long shaft and blade bring versatility to your weapons cache. This ancient Japanese weapon masterfully combines a spear’s reach and a sword’s cutting power.
Perfect for self-defense, hunting, or crowd control, the Naginata offers flexibility and efficiency in one mighty package.
All you need is a machete or shiv.
H/T @NoBSSurvival
20. Medieval Sling
Medieval sling is a tribute to ancient warcraft that’s made of a simple loop and pouch that allow for rock-hurling precision. It is the ultimate blend of simplicity and effectiveness. Launch small rocks or any other makeshift ammo with this weapon!
It’s easy to make and requires only a few materials, making it the practical go-to for your survival arsenal.
You only need a cord and tape to make one:
H/T @tods_workshop
21. Bola
The Bola is as elegant as it is effective. Weighted ropes intertwine to immobilize your target. If you want a non-lethal solution for self-defense, hunting, or crowd control, here’s the bola — an ancient weapon with a modern twist!
Originating centuries ago, the Bola has been used to skillfully immobilize prey or foes by tangling their legs or wings.
Materials:
Rocks or stones of the same size
Paracord
Here’s a tutorial on how to make one:
H/T @BlackScoutSurvival
22. DIY Spear
The DIY spear is a hunting staple made of a wooden shaft and pointed tip, offering both range and penetration. The spear is a versatile weapon perfect for hunting and self-defense. Don’t let its straightforward design fool you. This handy tool is all about making life easier, one task at a time.
All you need is a knife, a piece of wood, and duct tape or paracord to assemble them.
Here’s a good video showing you how to make a survival spear:
Kubaton is a small, held rod that concentrates force into pressure points. They are easily concealed self-defense weapons. But these strike pressure points and deliver powerful blows. You can make this using various materials.
Below is a simple way to make one using a wood pallet:
H/T @dekeros-recreationalwoodwo6456
24. Homemade Stun Grenade/ DIY Flashbang
The homemade stun grenade offers shock and awe by using flash powder and casing to produce a stunning explosion. A homemade stun grenade or flashbang is a non-lethal explosive device that creates a bright flash and loud bang to disorient and temporarily incapacitate adversaries.
It’s ideal for self-defense, crowd control, or creating diversions.
Normally, I would suggest buying these and just keeping them well stored. But if you insist on making one or find yourself needing one ASAP, here’s a video to help you.
H/T @willitflash
25. Homemade Molotov
Homemade molotovs are made of a simple glass bottle and flammable liquid that bring fire to the frontline. This improvised incendiary weapon can create a burning barrier or cause significant damage to structures or vehicles. While dangerous, it can be an effective tool in desperate situations.
DIY rocket launcher adds explosive range by combining tubing and propellant. Consider this if time is on your hands and you’re looking for serious firepower. This improvised rocket launcher can launch projectiles with considerable force and range.
While not as refined as military-grade launchers, it can still provide a significant advantage in serious situations.
Make it at home!
H/T @patrickdickinson6492
27. PVC Pipe Gun
PVC pipe gun is another example of plumbing turned projectile. PVC and a basic firing mechanism create this simple firearm. The PVC pipe gun is technically an airgun but in the right hands, these weapons are accurate, can be as lethal as a 22, and are extremely quiet.
Use this gun for hunting, target practice, or as backup protection:
H/T @SiriHomemadeA2Z
28. Paper Bricks
Paper bricks serve as improvised ammunition that’s made of compacted paper, offering a unique, disposable projectile. Paper bricks are versatile and eco-friendly weapons for self-defense or for constructing makeshift barriers.
Compacting wet, shredded paper into a solid block can create a surprisingly strong and durable material.
Here’s a quick guide to making one using easily accessible items. Remember, this is for educational purposes only and to be used in emergencies. Follow your local laws and regulations.
Shred old newspapers or other paper products.
2. Soak the shredded paper in water until it becomes a pulp.
3. Press the pulp into a brick mold, and let it dry in the sun to create solid paper bricks.
29. DIY Duct tape Blowgun Dart
You can’t have a blowgun without the proper ammo. You can make these darts from tools you probably have in your survival kit.
These darts can be lethal to animals and potential attackers with the right coating.
H/T @BackyardBowyer
30. Shepherd Sling
The shepherd sling is made of a length of rope and pouch merged into an ancient missile launcher. During biblical times, this is the weapon David used to take down Goliath. This sling is a simple yet effective projectile weapon that can launch small rocks or improvised ammunition with considerable force.
All you need is some paracord.
H/T @TheWeaversofEternity
31. Spiked Fist Load
The spiked fist load turns your hand into a weapon with metal spikes and a gripping handle that makes your fist a mace. Fist loads, like brass knuckles, are tools held to improve the damage when punching. Common fist loads are lighters, a roll of quarters, or your usual metal brass knuckles.
However, you can make scary spiked fist loads at home to do serious damage.
H/T @GediminasDamasius
32. Loaded Umbrella
The loaded umbrella surprises with its dual function, concealing a weighted or bladed tip. This one’s not an umbrella with a hidden gun. Instead, it’s got weights. At first, it seems completely unaltered, properly when wielded as a club, it packs a devastating punch.
How to Make a DIY Loaded Umbrella
Obtain a sturdy full-sized umbrella with a solid handle and carefully disassemble the umbrella tip.
2. After that, lash the heavy objects around the pole’s center. If you have any extras, put them at the end and work your way in.
3. Depending on your umbrella’s design, you may need to remove the arms from the central slider piece to close it. Use the umbrella’s rap or leash to tie the arms over the shaft.
33. Glass Knapping Arrows and Blades
Glass knapping arrows bring an artisanal edge by using flint or glass shards to serve as the arrowheads in this delicate but deadly weapon. Create wickedly sharp arrows and blades, ensuring you’re always one step ahead in the wild! These trusty tools will be your go-to companions for hunting, protection, and thriving when the going gets tough.
Here’s a quick video that shows you how to do it:
H/T @TheKingofRandom
34. Slapjack/ Sap
The slapjack or sap is a concealable impact weapon that combines leather and metal, creating a blunt-force tool. Craft your own DIY slapjack or sap for a discreet and effective self-defense weapon to keep you safe in the great outdoors.
Using just a flexible material and some added weight, you’ll be well-prepared to handle unexpected challenges in the wild.
Here’s a quick and easy way how to make one:
H/T @primalpunch
35. Balloon Slingshots
Balloon slingshots offer light-hearted lethality using rubber balloons and a Y-frame. This balloon slingshot is a fun and versatile DIY weapon perfect for hurling projectiles or causing distractions in the wild.
With just a balloon and a sturdy frame, you’ll have a potent slingshot that’s easy on resources but big on impact!
H/T @PajenDIY
36. Rambo Spear Trap
The rambo spear trap is a Hollywood-inspired trap that makes use of a spring-loaded mechanism. This handy trap is great for camp security and food catching. When activated by an unwary animal or intruder, the spears impale or injure the victim.
Check out this video to learn how to make one:
H/T @cavemancody
Key Takeaways Making Your DIY Homemade Survival Weapons!
Learning to create DIY homemade survival weapons is a fun and engaging activity, but it also helps you build confidence and resourcefulness when facing unexpected challenges. Materials at hand and a creative mindset become life-saving tools.
Remember, these weapons are meant for true survival situations or educational purposes, so always prioritize safety and ethics. As you explore new skills and techniques, you’ll find yourself better prepared for whatever life throws at you.
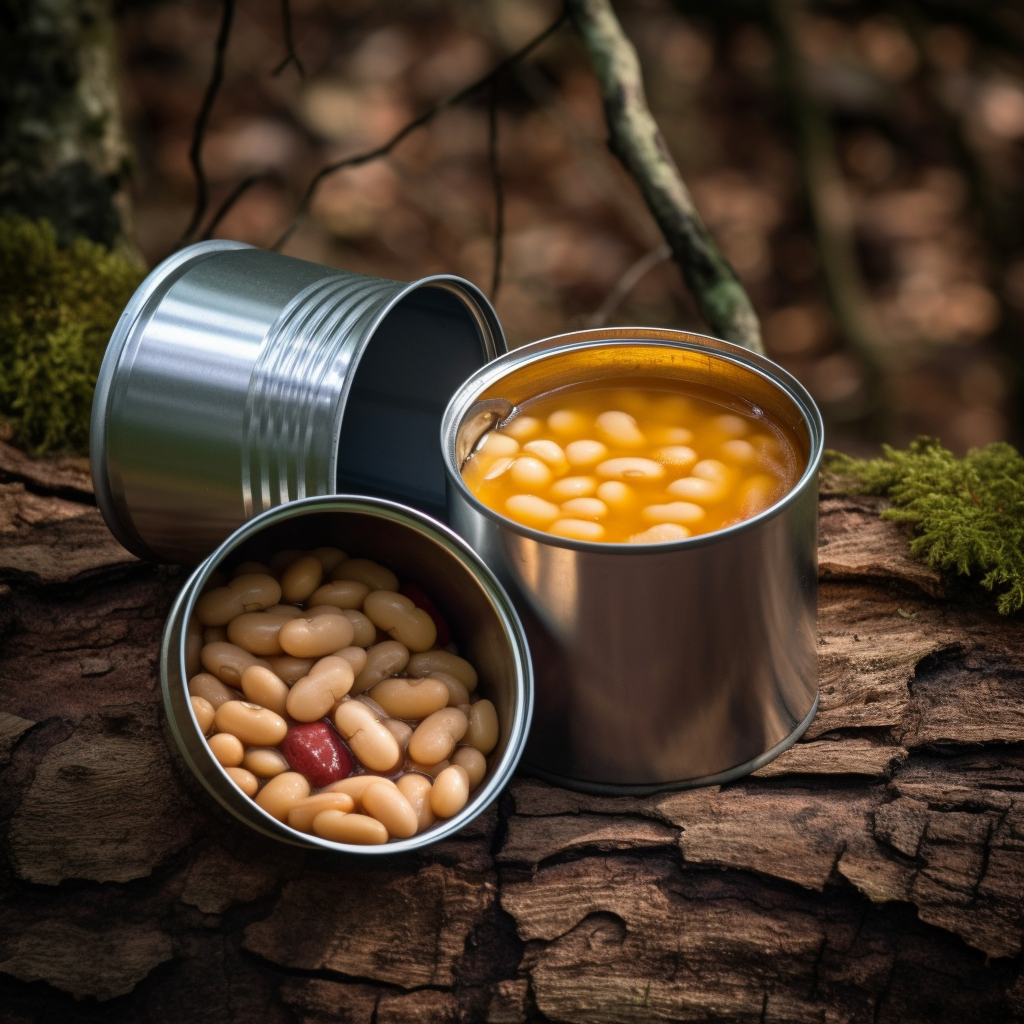
What if you’re in the middle of nowhere, stomach grumbling, and all you’ve got is a can of food. But where’s the can opener? Forgotten or lost, it doesn’t matter now. So, do you know how to open a can without a can opener?
Life can be unpredictable, right? Be it during an emergency situation or a wilderness escapade, adaptability is key.
What matters is the can that stands between you and your meal. It sounds daunting, I know. But believe me when I say, it’s entirely possible and quite handy to know how to open a can without a can opener.
Is It Possible to Open A Can Without A Can Opener?
Yes, it is possible to open a can without a can opener. There are many ways to open a can, but most take more effort and caution.
A can’s lid is only a thin sheet of metal, which is designed to be opened. So you can open it by using something stronger and thicker, like utensils, to puncture the surface. Read on to find out how to open a can without a can opener
14 Fast And Efficient Ways To Open A Can Without A Can Opener
1. Best Method: The Spoon Method
A spoon is more than a utensil for eating. With a little determination, it can become a makeshift can opener.
Hold the can firmly with one hand.
2. With your other hand, grip the spoon by the handle, positioning the tip of the spoon against the inner edge of the can’s lid.
3. Apply downward pressure and use a back-and-forth rocking motion to create a groove in the lid.
4. Continue working around the edge of the can until the groove is deep enough to puncture the lid.
5. Once the lid is punctured, pry the lid open by leveraging the spoon.
Here’s a video showing you how to do it:
H/T to @RiversideHomesteadLife for this video: How To Open A Can In An Emergency With A Spoon
2. Best Method for Wilderness: Concrete/Stone Rub Technique
When you’re out in the wild, a rough concrete or stone surface can be a lifesaver.
Find a patch of rough concrete or a large, abrasive rock.
2. Turn the can upside-down and rub it against the concrete in a circular motion.
3. The friction will gradually wear down the outer rim of the can’s lid.
4. Periodically check your progress. When you see moisture on the concrete, you’re close to breaking through the lid.
5. Using a knife, screwdriver, or another sturdy tool, pry the lid open.
Here’s a video:
H/T to @southernprepper1 for this video. Opening A Metal Can With No Can Opener
3. Fastest Method: The Knife Method
A sharp knife can make quick work of a stubborn can.
Place the can on a stable surface and hold it firmly with one hand.
2. Hold the knife with your other hand, pointing the blade away.
3. Position the tip of the knife at the inner edge of the can’s lid.
4. Gently tap the knife handle with a rock or another sturdy object to puncture the lid.
5. Carefully work around the edge of the can, puncturing and cutting the lid until it can be removed.
Here’s how to do it:
H/T to @CookingWithVianey for this video: How To Open A Can With A Knife
4. The Pliers Technique
A good set of pliers is a versatile tool that can help you open a can in no time.
Hold the can steady on a flat surface.
2. Use the flat-nose pliers to grip the edge of the can’s lid. Make sure you’ve got a secure grip.
3. Now, carefully bend and twist the lid back and forth. This should create a gap between the lid and the can.
4. Keep adjusting the pliers to different points around the edge of the lid, repeating the bending and twisting action.
5. Continue this process around the circumference of the can until the lid is loose enough to remove.
H/T to @maxlvledc for this video: How To Open A Can With Multitool Pliers
5. Screwdriver Method
You can use a flathead screwdriver to open a can if you’re careful and precise.
Place the can firmly on a stable surface or pin it upright between a solid wedge.
2. Take a flathead screwdriver and wedge it into the lip of the inner lid.
3. Tap on the screwdriver gently until an opening appears.
4. Repeat the process along the edge of the can.
5. Carefully peel back the lid with the screwdriver, or remove the lid completely.
H/T to @ALinsdau for this video: How To Open A Food Tin Can with Flathead Screwdriver
6. Use Scissors To Open A Can
To open a can with scissors, follow these steps:
Use strong scissors and safely open the scissors wide.
2. Then use one of the blades to puncture the can near the edge of the lid.
3. Once you’ve made the initial hole, use the tip of the scissors to cut around the lid.
4. It might be easier to cut a bit, then rotate the can, and cut some more, continuing this until you’ve gone around the entire can.
H/T to @ALinsdau for this video: How To Open A Food Tin Can With Scissors
7. The Swiss Army Knife Method
If you have a Swiss Army knife handy, you’re in luck! These versatile tools often include a can opener attachment which makes opening cans a breeze even without a traditional can opener.
Identify the can opener on your Swiss Army knife. It’s the tool that has a sharp, curved edge.
2. Hold the can securely on a flat, sturdy surface to avoid spills or accidents.
3. Position the tip of the can opener on the inner edge of the can, near the rim. The sharp, curved edge should be pointing towards the can.
4. Apply pressure to puncture the lid. This may take a bit of force, so be careful to avoid slipping and injuring yourself.
5. Once the can opener has pierced the lid, you can start to move it along the edge. Do this by lifting the handle up and pushing it forward, then pushing it down to cut more of the lid.
6. Continue this process—lift, push, down—until you have cut around the entire can. Then, use the tip of the can opener (or another tool on the Swiss Army knife) to lift and remove the lid.
H/T to @hoohoohoblin for this video: How To Open A Can With A Pocket Knife
8. The Chef’s Knife Method
This method requires caution as the blade is sharp, but it’s a surefire way to open a can.
Place the can on a stable surface.
2. Position the heel of the knife on the edge of the can.
3. Apply a little pressure to puncture the lid.
4. Repeat this action around the top of the can until you cut through the lid completely.
Remember to use caution while applying pressure to prevent the knife from slipping.
9. The Metal File Method
This common tool is not just for shaping and smoothing; it can help you gain access to your canned goods too!
Secure the can on a stable surface.
2. Use the file to grind away at the edge of the can’s lid.
3. Continue filing until you puncture through the lid.
4. Repeat around the perimeter until the lid is free.
H/T to @mavicustech3350 for this video: How To Open Can With File
10. The Pocket Knife Method
A pocket knife isn’t just a handy tool for outdoor survival. It can double as a handy can opener in a pinch.
Stabilize the can on a steady surface.
2. Apply the knife blade to the edge of the can lid. Rub it back and forth to make it easier to pierce.
3. With careful pressure, puncture the lid.
4. Repeat the puncture around the lid until it’s removed.
11. The Butter Knife Method
A butter knife’s serrated edge can be used as an improvised saw to open a can:
Hold the can firmly on a sturdy surface.
2. Position the serrated edge of the knife on the edge of the can’s lid.
3. Apply gentle pressure and move the knife back and forth, cutting through the lid.
4,. Continue until you’ve cut around the entire lid, and it can be removed.
H/T to @ALinsdau for this video: How to Open a Food Tin Can with Butter Knife/Survival
12. The Axe Method
With an axe, you can open a can without a traditional can opener. However, this method requires caution as the axe is sharp and heavy.
Hold the can firmly on a solid surface.
2. Use the back of the axe to pierce the edge of the can’s lid gently.
3. Slowly work the edge of the blade around the lid’s perimeter.
4. The lid should start loosening after a few hits, allowing you to pry it open with the axe’s edge.
13. The Machete Method
A machete can be quite effective when it comes to opening a can. You’ll need to be extra careful with this method due to the size and sharpness of the machete.
Secure the can on a solid, flat surface.
2. Hold the machete firmly and carefully strike the edge of the can’s lid with the blunt side, going around the lid’s perimeter.
3. After a few rounds, the lid will start to loosen. You can then use the edge of the machete to pry the lid open.
14. The Tin SnipsMethod
Tin snips are like scissors but much stronger and capable of cutting through metal. If you have a pair around, they can be quite useful.
Hold the can firmly on a solid surface.
2. Use the tin snips to cut along the edge of the lid.
3. Continue cutting around the lid until it’s completely detached from the can.
Safety Tips When Using These Methods
When opening a can without a can opener, it is crucial to take some precautions to minimize the risk of injury or accidents.
Wearing cut-resistant gloves can help protect your hands from sharp edges or any metal shavings that might be produced during the process.
Use Appropriate Tools
Choose sturdy and appropriate tools for the task, like a strong knife, spoon, or pair of scissors. Avoid using sharp objects that can easily slip and cause injury.
Work On A Stable Surface
Make sure the can is placed on a stable, non-slip surface to prevent it from moving around while you’re trying to open it.
Keep A Firm Grip
Maintain a secure grip on the can and the tool you are using to ensure they don’t slip out of your hand.
Apply Even Pressure
When using a tool like a knife or a spoon, apply even pressure to reduce the risk of the tool slipping or causing the lid to bend or break unevenly.
Be Patient
Opening a can without a can opener may take longer than using one, so be patient and take your time to avoid accidents.
Watch For Sharp Edges
As you create an opening in the can, be mindful of any sharp edges that may form. Handle the can and lid carefully to avoid cuts.
Clean The Can’s Rim
After opening the can, check for any metal shavings or sharp edges along the rim. You can use a cloth or paper towel to wipe around the edge to remove any debris before using the contents.
Store Safely
If you don’t use all the contents of the can, transfer the remaining food to an airtight container for storage. Storing food in an open can with a sharp edge may lead to injury when reaching for it later
FAQ About How To Open A Can Without A Can Opener
How do you open a can without a pull tab and a can opener?
You can open a can using the spoon method or knife method. Just position the knife or spoon on the inner edge of the lid and apply downward pressure and work your way around the lid.
What else can I use if I don’t have a can opener?
Aside from a knife and spoon, you can also use a fork, a multi-tool or Swiss army knife, or anything you can get from your toolbox like a screwdriver, box cutter, or pliers.
Wrap Up of How To Open A Can Without A Can Opener
Being equipped with the know-how to pop open a can without a can opener? That’s a survival skill you never knew you needed!
But life’s full of surprises, and you never know when this trick might come in handy.
These techniques are your ticket to enjoying canned goods without the luxury of a can opener.
So roll up your sleeves as it’s time to practice! But remember, as with any makeshift solution, safety should be your top priority.
Do you have a preferred method on how to open a can without a can opener? Let us know what works for you in the comments below.
When it comes to surviving in the wild, one of the most important skills is knowing how to find and prepare food. Snare traps are one of the most successful and time-tested means of catching small game.
To make a snare trap, find a game trail, then gather a strong, thin cord or snare trap wire. Create a small noose, and attach it to a bent sapling or branch for tension. Secure the trap near an animal’s head height, and camouflage it. Check regularly for captured prey.
Hunters and trappers have used snare traps for centuries to catch animals for food, fur, or protection. These smart devices are simple but work well, and they can be made with few tools and materials. It can capture rabbits, squirrels, and other small wildlife.
In this guide, we’ll explore the art of crafting snare traps. We’ll focus on the practical knowledge, methods, and suggestions to help you become proficient at making and setting them. So continue reading if you want to learn more.
What is a Snare Trap?
A snare trap is a simple yet effective trapping device for capturing animals, primarily for food or pest control. They work by tightening a loop around the animal as it moves through the snare, preventing its escape.
Parts of a Snare Trap
Before teaching you how to build a snare trap, you must be familiar with its different components.
Snare Loop. Noose-like circle, made of wire or cordage, that tightens around the animal.
Main Line. The length of wire or cordage that extends from the snare loop to the anchor.
Anchor Point. A sturdy object, such as a tree or stake, that secures the snare and prevents the animal from escaping.
Trigger System. A mechanism, typically a notched stick or twig that holds the snare loop in place and releases it when disturbed. It is hooked onto a stake or other piece of wood that is staked to the ground.
Camouflage. Natural materials, like leaves or branches, used to disguise the trap and blend it into the environment.
Choosing the Right Materials for Your Snare Trap
Some common options for making a snare trap include:
Wire
A snare trap wire is a flexible yet strong wire, made from aircraft cable or steel wire. It’s durable, easy to work with, and holds its shape well.
Rope or Cordage
You can use rope or cordage to create a snare trap in a pinch. Choose a material strong enough to hold the intended animal and withstand exposure to the elements.
Natural Materials
If you don’t have access to wire or rope, you can use natural materials like vines or roots to make a snare trap. Just be aware that these materials may not be as durable or effective as wire or rope.
Selecting the Perfect Location
Location is crucial when setting up a snare trap. Look for areas with signs of animal activity, such as tracks, droppings, or feeding sites.
Setting up your trap along well-used trails or narrow passages where animals are likely to pass through will increase your chances of success.
Step-by-Step Guide on How to Build a Snare Trap
Here’s how to make a basic snare trap in four easy steps:
Prepare the snare loop: First, create a loop by bending the wire or cordage and twisting the end around the main line. The loop should be large enough to accommodate the intended animal’s head or limb.
Attach the snare to an anchor: Secure the other end of the wire or cordage to a sturdy anchor, such as a tree or stake in the ground. This anchor will prevent the trapped animal from running off with the snare.
Create a trigger system: Construct a simple trigger system using a small stick or twig. This can be done by whittling a notch into the stick, where the snare loop will be held in place. When the animal disturbs the trigger, the loop will tighten around it.
Set the trap: Place the snare loop along the animal’s path at the desired height and position. Ensure the trigger system is set up correctly. Now, gather leaves, branches, or other natural materials to mix in with the surroundings. Arrange these materials around the trap to help it blend in with the environment. Be careful to do it sparingly, as excessive materials may make the trap more noticeable or hinder its function.
To make a rabbit snare trap, follow the steps above. You only need to build a basic snare trap and adjust the loop to approximately 3 to 4 inches in diameter to accommodate a rabbit’s head or limb. Also, position the snare loop about 3 inches above the ground along the rabbit’s path.
How to Setup Different Types of Snare Traps
Ground Snare
A ground snare is the simplest type of snare trap. It is set up directly on the ground, with the snare loop positioned at the height of the target animal’s head or limb. Ground snares work well for smaller animals like rabbits and squirrels.
H/T to @clayhayeshunter for this video: Rabbit Snaring 101
Spring Snare
A spring snare incorporates a bent sapling or branch as a spring mechanism to lift the trapped animal off the ground. This helps to prevent the animal from chewing through the snare or attracting other predators.
To make a spring snare, attach the snare loop to a bent sapling or branch, and set up a trigger system to release the tension when the animal enters the snare.
Keep in mind if using a spring snare, the branch could lose its spring if set for a long period of time or freeze in place during cold weather. This would prevent it from springing up and keeping your catch up off the ground away from other scavengers.
H/T to @SurvivalLilly for this video: How To Build A Spring Snare
Trail-Set Snare
Trail-set snares are designed for use along well-traveled animal trails. They consist of multiple snares set up at intervals along the trail, increasing the likelihood of capturing an animal.
To make these, just follow the steps for making a simple snare trap, and set up several traps along the trail.
H/T to @opencountryhunter for this video: How To Set A Trail Set Snare
Safety Precautions on How to Make a Snare Trap
When working with snare traps, always keep the following safety precautions in mind:
Be mindful of your surroundings and avoid setting traps near areas frequented by people or pets.
Use gloves when handling wire or rope to avoid injury.
Check your traps regularly to minimize the suffering of trapped animals and release any unintended catches.
Legal Considerations
Understanding and complying with local and federal laws regarding trapping is essential. Some jurisdictions may need a license or permit for trapping.
Others may have specific regulations about trap types, locations, and target species. Always check the regulations in your area before setting up snare traps.
Ethical Trapping Practices
To ensure ethical trapping, follow these guidelines:
Use the target species’ appropriate trap size and type to minimize injury or suffering.
Check traps frequently to release non-target animals or dispatch trapped animals humanely and promptly.
Dispose of traps responsibly when they are no longer in use.
Checking and Maintaining Your Traps
Regularly check your traps to ensure they are functioning correctly and have not been tampered with or damaged. Also, when you catch an animal, handle it carefully and humanely. If the animal is not your target, release it as quickly and gently as possible.
FAQs About Survival Snare Traps
How do I choose the right snare size for my target animal?
To choose the right snare size, consider the size of the animal’s head or limb you’re trying to catch. A small loop should suffice for smaller animals like rabbits or squirrels. A larger loop is necessary for larger animals like deer.
Remember that the snare material should also be strong enough to hold the animal securely without breaking.
How often should I check my snare traps?
It’s best to check your snare traps at least once a day to ensure they function correctly and minimize the suffering of trapped animals. In some jurisdictions, there may be legal requirements for how often traps must be checked.
How can I increase the success rate of my snare traps?
To increase the success rate of your snare traps, you can add bait to your traps, choose the right materials and set up your traps in locations with clear signs of animal activity. Camouflage your traps with natural materials. Also, use multiple traps to increase the chances of capturing an animal.
Can snare traps harm the environment?
Snare traps can potentially harm the environment if not used responsibly. To minimize environmental impact, follow ethical trapping practices, such as using appropriate trap sizes, checking traps frequently, and releasing non-target animals promptly.
And when you’re finished using your traps, remove them from the environment and dispose of them properly.
Can I use snare traps for self-defense or home security?
While snare traps are primarily designed for capturing animals, you can use them for self-defense or home security in certain situations.
However, it’s essential to consider the legality and potential hazards of using traps in this manner. More effective and safer methods are available for home security, such as alarm systems or surveillance cameras.
Wrap Up on How to Set a Snare
Knowing how to make a snare trap can be valuable for survival. You can create an effective and efficient trap with the right materials, location, and setup. Follow safety precautions, legal considerations, and ethical trapping practices.
Pro Tip: If using a spring snare, be aware that branches could freeze into place if its cold enough or saplings may lose their spring from being bent into position for a long period of time. This means you need to check your traps often so you don’t lose your catch to other scavengers.