Freeze dryer machines have revolutionized food preservation by employing advanced sublimation techniques. By efficiently removing moisture while maintaining food’s structure, they play a critical role in extending shelf life.
When it comes to food preservation and emergency preparedness, freeze drying is a game-changer in my opinion. Not only does it preserve food for up to 25 years, but it also helps retain flavor, nutrients, and texture.
As home freeze drying machines become increasingly popular, preserving food at home is becoming easier and more efficient than ever.
Top 3 Best Freeze Dryer Machines for Home Use
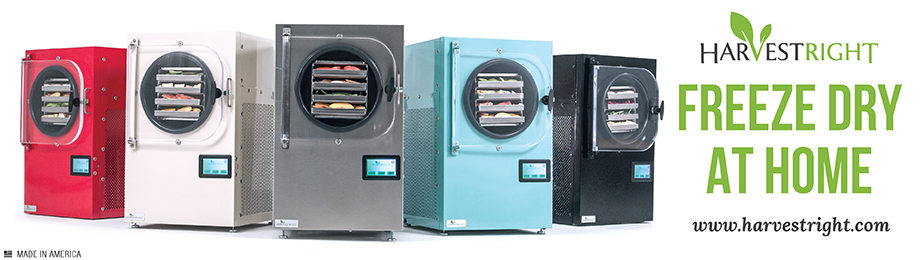
When it comes to home freeze dryer machines, there is one clear stand out on the market. HARVESTRIGHT Freeze dryer machines are the top choice, but they are not cheap.
That being said, at the time of writing this article the company offers a layaway plan making it more affordable for everyone. These heavy duty freeze dryers are made with high-quality materials and components that can withstand years of use and they come with a limited 3 year warranty.
Plus, they are easy to operate, with user-friendly controls and intuitive interfaces that make freeze drying food a breeze. Again, they are expensive, but they are built to last and are a great investment for anyone committed to food preservation.
The medium-sized HARVESTRIGHT machine is great for families or individuals who want to preserve larger quantities of food. It can process up to 8-13 pounds of food per batch and freeze dry up to 312 gallons in a year.
It’s only a bit bigger than the small version of the freeze dryer and comes with 4 trays. So, it’s still compact and will fit your countertop. (Dimensions: 19″W x 25″D x 29″H) 112lbs.
HARVESTRIGHT’s Small Freeze Dryer is the perfect freeze dryer machine for home use. Its slim build also ensures it can fit into any kitchen without taking up too much space.
This freeze dryer is ideal for those with a small family or who wish to make smaller batches. It also has three trays and can process up to 4-7 pounds per batch – making it an ideal choice for limited households. (Dimensions: 17.4″W x2 1.5″ D x 26.8″H) 61lbs.
The Large HARVESTRIGHT Freeze Dryer is a must-have for those who need to store and preserve food for a larger household. Its capacity makes it ideal for preserving large quantities of your favorite dishes.
It can process up to 15-23 pounds of food per batch and freeze dry 546 gallons of food in a year. (Dimensions: 21.3″W x 27.5″D x 31.3″H) 138lbs.
Freeze dryers are machines used to preserve food for long-term storage. They can preserve fruits, vegetables, meats, dairy products, herbs, and spices.
How Does a Freeze Dryer Machine Work?
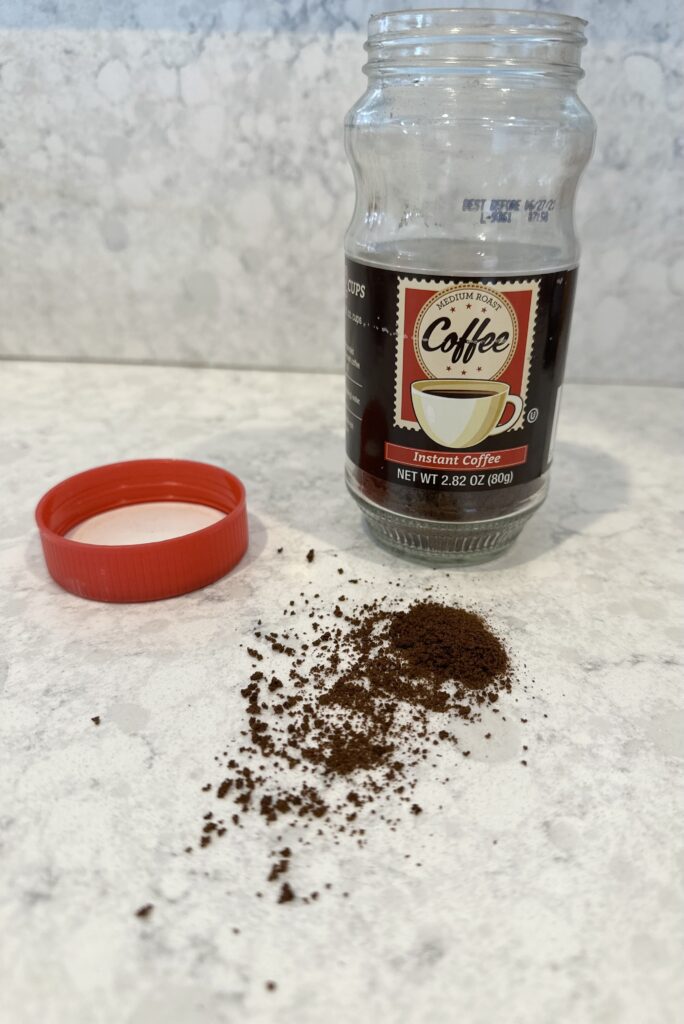
Freeze dryers work by dehydrating food through the process of sublimation. This removes all the moisture from food or other items you want to preserve.
First, you put the food in the machine, then the machine freezes it.
Next, the machine uses a special process called sublimation to remove all the ice crystals from the food. This process takes several hours, even a day, depending on how much food you put in the machine.
Once the process is complete, you can store the freeze dried food in mylar bags or jars.
Choosing the Right Home Freeze Dryer
Here are some of the most important factors to consider when purchasing a home freeze dryers:
Size
Consider the space in your home when choosing a freeze dryer machine. The size must align with available space for optimal operation and convenience.
The freeze dryer should fit easily into your kitchen. Measure the space you have available before deciding on the size of the freeze dryer machine.
Capacity
Contemplate the volume of food you intend to preserve. A suitable capacity ensures your dehydration needs are consistently met.
If you have a large family or plan to store a lot of food, you will need a machine with a larger capacity. HARVESTRIGHT for example, offers freeze dryers with sizes ranging from small to extra large. Decide how much food you’ll be freeze drying before making your choice.
Ease of Use
Home freeze dryers should have user-friendly features. Look for freeze dryers with intuitive controls, clear instructions, and helpful features such as a timer or auto-shutoff.
Also, check the noise levels when selecting a freeze dryer machine. Some models can be very loud when running.
Temperature Regulation
Since freeze drying requires precise temperature regulation, choose a freeze dryer machine with accurate temperature control features. This will ensure that freeze dried foods maintain their quality and texture.
Quality
Look for a machine that is made with high-quality materials and has a solid performance. Also, check the warranty offered by the manufacturer.
HARVESTRIGHT offers a three-year limited warranty on its machines, which gives customers peace of mind knowing they can rely on their investment.
Price
Home freeze drying machines vary in their cost, depending on the size and features. It’s important to consider the features you need and how often you plan to use the freeze dryer before deciding.
Customer Support
Lastly, consider the customer support services provided by the manufacturer. If you have any questions or concerns about your freeze dryer machine, you should be able reach out to the manufacturer for assistance.
Benefits of Using Home Freeze Dryer Machines to Preserve Food
Extended Shelf-Life
Freeze dried food has an extended shelf life, which is significantly longer than other preservation methods. This means you can stock up on food for emergencies or extend the shelf life of your everyday groceries.
When food is freeze dried, all of the moisture is removed, which helps prevent the growth of bacteria and other harmful organisms. As a result, freeze dried food can last up to 25 years when stored properly.
Maintained Flavor and Nutrition
During freeze drying, the food is carefully preserved at a low temperature and under a vacuum. This nutritional preservation allows the food to retain its natural flavor, texture, and nutritional content, including important vitamins and minerals.
Unlike canned or dehydrated food, freeze dried food doesn’t lose its taste or texture over time. This means you can enjoy the same delicious and nutritious meals you love, even years later.
Versatility
With a freeze dryer machine, you can choose which foods to preserve, how much to preserve, and how to store them. You can freeze dry various foods, including fruits, vegetables, meats, and even entire meals. This allows you to create a stockpile of food that meets your specific dietary needs and preferences.
Convenience
A well-designed freeze dryer machine simplifies the preservation process. Once you have prepared your food for preservation, place it in the machine and let it work. There is no need to constantly check on the food or rotate it, as you would with other preservation methods.
Additionally, freeze dried food is lightweight and easy to store, making it ideal for camping trips, road trips, and other outdoor activities.
Cost Savings
By preserving seasonal produce, meats, and other foods, you can avoid paying higher prices for out-of-season or imported items.
Also, you can buy food in bulk when it is on sale or in season and then preserve it for later use. This can help reduce your overall food costs and allow you to stretch your budget further.
Effective Storage for Freeze-Dried Food
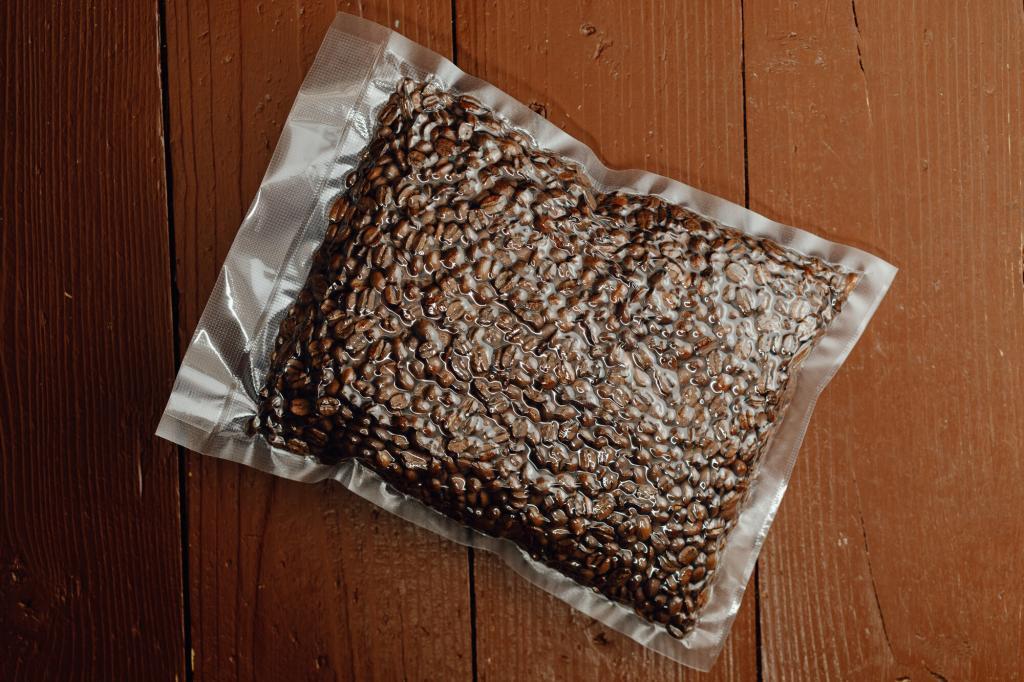
Some prefer vacuum sealing dried food as a storage option to remove the air and protect food. However, you can store freeze dried food in mason jars, vacuum-sealed bags, or mylar bags with oxygen absorbers.
If you order directly from HARVESTRIGHT they include a starter pack of 50 mylar bags, 50 oxygen absorbers, sealer and a guide to freeze drying so you have everything you need to start storing food.
Mason jars are the most popular option because they provide an easy way to check on the food without opening it. However, they take up too much space.
Vacuum-sealed bags help keep the food more secure, and mylar bags and oxygen absorbers create an airtight seal that locks in the freeze dried food’s freshness.
How Much is a Freeze Dryer Machine?
Freeze dryers can range in price depending on their size and features. The HARVESTRIGHT medium home freeze dryer costs around $2,895 at the time of this article. Larger commercial freeze dryers can cost more. There is also the cost of running the machine. The video below gives you a good idea of this additional cost.
H/T to @1870s for this video: Understanding The Cost Of Using A Freeze Dryer.
What Can You Freeze Dry?
You can freeze dry almost any food, including fruits, vegetables, meats, cheese, rice, pasta, soups and even meals. Focus on foods that don’t require additional cooking or seasoning.
How Long Does Freeze Dried Food Last?
As mentioned, freeze dried food can last up to 25 years without losing flavor or nutrition. Freeze drying also helps retain the colors and shapes of foods, which makes freeze dried food more attractive than canned or frozen items.
Key Takeaways of the Best Freeze Dryer Machines
Always follow safety precautions when freeze drying food and keep your freeze dryer in a cool, dry place. Doing so will help ensure your freeze dried food is as nutritious and delicious as possible.
Prepping 101: Mastering Essential Survival Skills for Modern Challenges
Equip yourself with vital knowledge in emergency management, resource allocation, and sustainable living to confidently face unexpected events.
Our comprehensive guide delves into the core aspects of prepping, including strategic planning, stockpiling essentials, and developing self-sufficiency to safeguard your and your loved ones’ future.
Explore key areas such as emergency kits, food preservation, water purification, and energy independence. Learn to navigate natural disasters, financial crises, and global uncertainties with our expert tips.
Prepping 101 isn’t just about survival; it’s about thriving in any circumstance with foresight and preparedness.
Key Takeaways
Prepping is a practical approach to ensuring your safety in emergencies. It involves taking steps to be financially prepared and stocking up on essential supplies.
Building a bug out bag and developing survival skills are crucial for unexpected situations.
It’s important to note that prepping is not just for extremists or conspiracy theorists. It’s a sensible way to be prepared for any situation.
Don’t wait for disaster to strike. Start prepping today to secure a safe future for yourself and your loved ones.
Photo of a tornado in the background of a neighborhood.
There are numerous reasons why you should start prepping without delay. In today’s world, where the frequency of natural disasters is increasing, the ongoing pandemic is a constant concern, and unexpected emergencies can occur at any time, it’s crucial to be prepared.
Prepping isn’t limited to beginners; it’s a practice that benefits anyone who prioritizes their safety and aims to acquire essential survival skills. Watching preppers TV series provides you with valuable knowledge and insights on how to effectively prepare for various scenarios.
By stockpiling necessary supplies and developing self-reliance and problem-solving skills, prepping equips you with the tools needed to navigate through unpredictable situations.
Don’t wait for disaster to strike; take action today and ensure your readiness for whatever challenges may come your way.
Start your prepping journey now and gain the peace of mind that comes with being prepared for the unknown.
Financial Preparedness Tips
Financial preparedness is crucial for your financial well-being and security. One key aspect of being financially prepared is to save an emergency starter fund of at least $1,000. This fund acts as a safety net to protect you from unexpected expenses or income loss.
It’s recommended to aim for long-term financial security by saving three to six months’ worth of expenses. Creating a budget is essential in disaster preparedness as it helps you keep track of your spending and prioritize saving.
Following the advice of financial expert Dave Ramsey, who suggests the ‘baby steps’ approach to building an emergency fund, can be beneficial. By adopting sound financial habits, such as budgeting and consistently saving, you can achieve financial preparedness and gain peace of mind.
Building a strong financial safety net for emergencies is an important step towards ensuring your financial stability.
Adopting Sound Financial Habits
Adopt sound financial habits in your prepping journey to ensure stability and resilience.
By incorporating these habits, such as budgeting, bulk buying, and cost consideration, you can effectively prepare for emergencies while managing your everyday expenses.
Create a detailed budget that includes your income, expenses, and savings goals. Track your spending and make adjustments as needed to stay on track with your financial objectives.
Take advantage of sales and discounts by buying essential prepping items in bulk. This not only saves you money in the long run but also ensures you have an ample supply of necessary items.
When prepping, consider the cost of the items you purchase. Look for affordable options that meet your needs and prioritize essential items over non-essential ones.
By adopting these sound financial habits, you can navigate your prepping journey with responsibility and effectiveness.
Start today and take control of your financial future, ensuring you’re well-prepared for any situation that may arise.
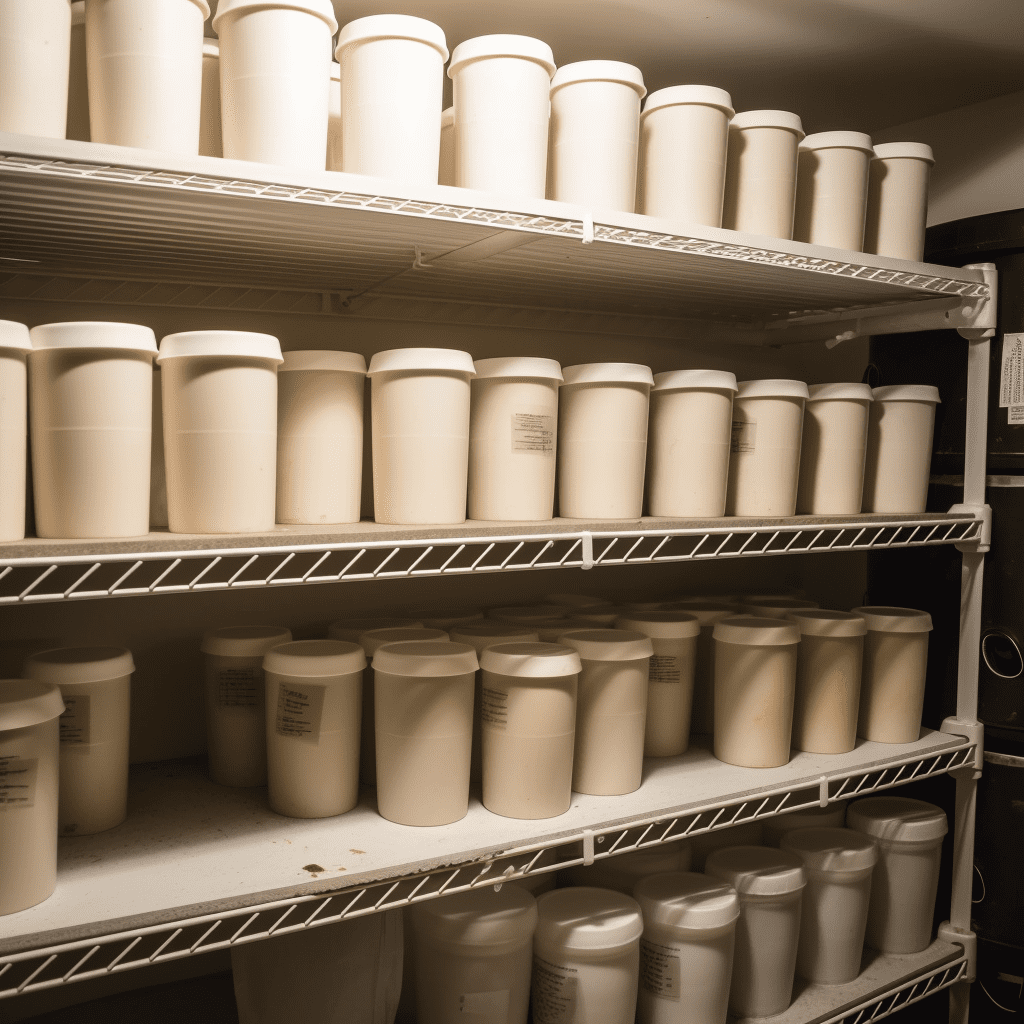
Photo of our food pantry stocked with #10 cans.
Essential Supplies for Prepping
To be well-prepared for emergencies, it’s essential to have a stockpile of necessary supplies. Investing in essential prepping supplies will ensure your safety and survival in times of crisis.
Here are three main categories of supplies that you should prioritize:
1. Food, Water And Shelter:
Food water and shelter are at the top of the list because they are a must to survive.
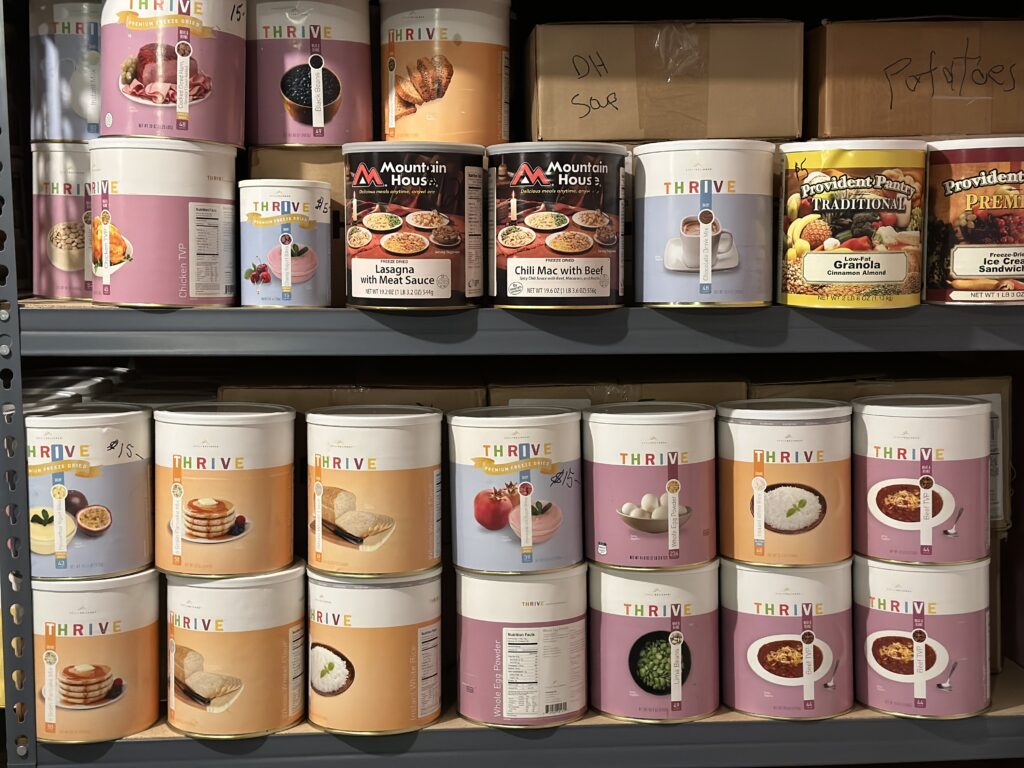
To be well-prepared for emergencies, stocking up on non-perishable food items and having a proper shelter is crucial. Fill your survival kit with long-lasting supplies such as canned goods, dried fruits, rice, grains, dehydrated foods, and protein bars.
Don’t forget to ensure a reliable and ample water supply as well. Consider investing in water purification tablets or a filtration system to guarantee access to clean and safe water.
Shelter is paramount in any survival situation, as it serves as a fundamental element of the survival hierarchy, right alongside the essentials of food and water.
A well-constructed shelter provides protection from the elements, be it extreme temperatures, precipitation, or wind.
Shelter also plays a crucial role in preserving your mental and emotional well-being, providing a safe haven, sense of security and stability in an otherwise chaotic environment.
Moreover, a properly designed shelter can help you maintain a low profile and avoid detection in case you need to evade potential threats.
Whether it’s a temporary tarp lean-to, a makeshift debris hut, or a well-stocked bug-out location, understanding the principles of shelter-building and having the necessary tools and materials can be a lifesaving skill in times of crisis.
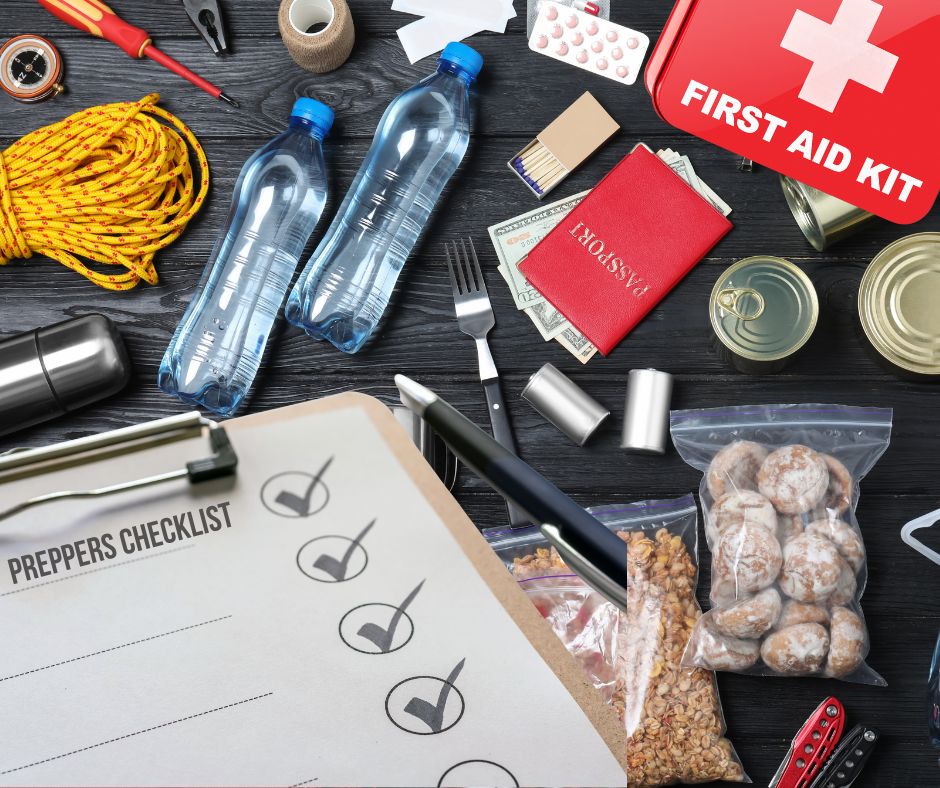
2. Medical and Hygiene Supplies:
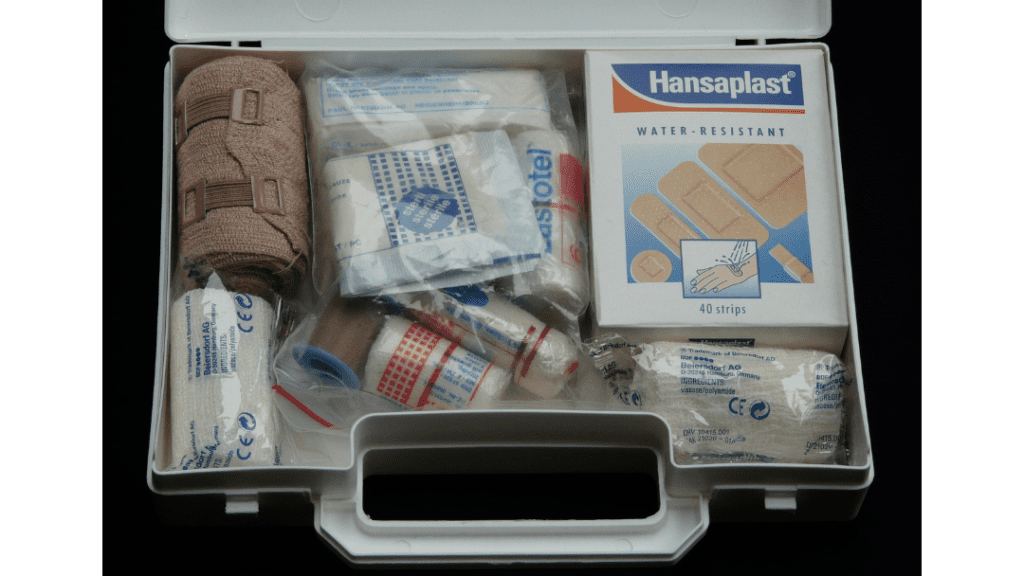
Access to medical services can be limited during emergencies, making it vital to have a comprehensive first aid kit on hand. Include essentials like adhesive bandages, sterile gauze, antiseptic wipes, and common medications.
Pay attention to hygiene as well, stocking up on items like soap, toothpaste, and toilet paper. Maintaining cleanliness is crucial for preventing the spread of diseases.
Photo of a first aid kit supplies. Bandages, gauze and band aids.
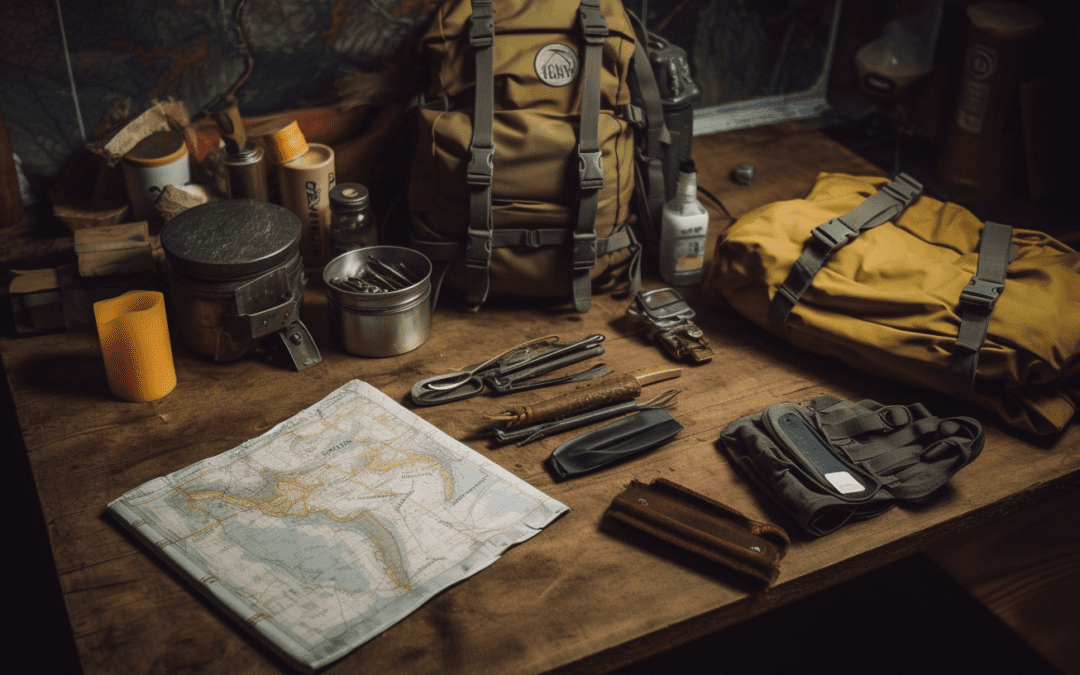
3. Tools and Equipment:
Equipping yourself with essential tools and equipment is fundamental in emergency situations. A reliable flashlight is a must-have for illumination, especially in the dark. Waterproof matches will come in handy for fire-starting purposes, and extra batteries will ensure your devices remain powered.
A multi-tool is a versatile accessory that serves multiple functions. Additionally, having a portable radio or communication device will keep you connected and informed when critical information is necessary.
By focusing on these three main categories of supplies, you will significantly enhance your preparedness and increase your chances of successfully navigating through any crisis.
Remember to regularly check and replenish your supplies, ensuring that they are always up-to-date and readily available when needed.
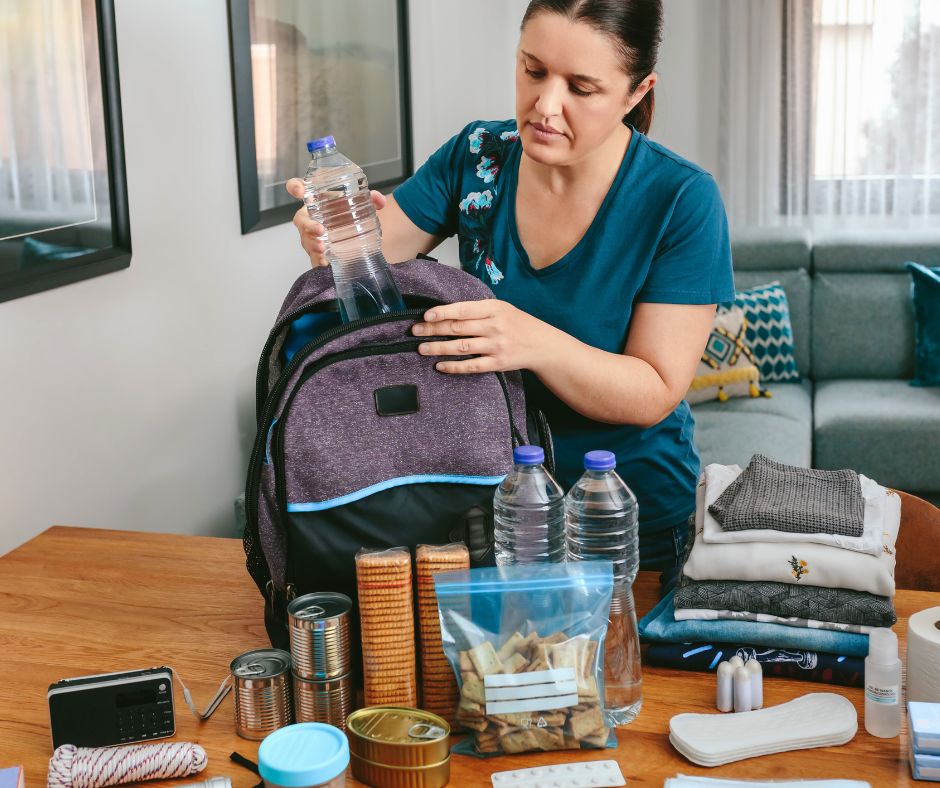
Importance of a Bug Out Bag
A bug out bag is an essential item for quick and efficient evacuation during emergencies. It ensures self-sufficiency and survival for at least 72 hours, providing you with the necessary supplies for food, water, shelter, and first aid.
A bug out bag allows for mobility and adaptability in unpredictable situations, making it a crucial component of your emergency preparedness.
By having a bug out bag ready, you can confidently face any emergency and have the necessary resources to overcome challenges. It provides you with the means to survive during a crisis, giving you peace of mind knowing that you’re well-prepared.
Having a bug out bag ensures that you’re ready to leave your home at a moment’s notice, enabling quick evacuation when needed. It’s a portable bag filled with essential supplies that are carefully selected to sustain you during an emergency situation.
Whether it’s a natural disaster, power outage, or any other unforeseen event, having a bug out bag ensures that you have the tools and resources to navigate through the crisis.
Man wearing a backpack sitting on a rock with his dog looking out at a lake.
Must-Have Survival Skills
Mastering survival skills is imperative for effectively navigating through emergencies and guaranteeing your safety and well-being. As a skilled prepper, it is vital to possess a diverse range of abilities to handle any unforeseen circumstance that may arise.
To this end, there are three essential survival skills that you must cultivate:
Disaster Preparedness: Developing the ability to assess potential dangers and create comprehensive emergency plans is indispensable.
Acquiring knowledge in first aid and CPR will enable you to provide immediate medical assistance when required. In addition, understanding how to identify and procure safe food and water sources during a crisis is critical for survival.
To find a CPR class near you, go to the American Red Cross for training services.
Self-Defense: Becoming proficient in self-defense techniques will allow you to safeguard yourself and your loved ones in times of peril. It is essential to familiarize yourself with different types of self-defense weapons and learn their effective utilization.
Cultivating situational awareness will enable you to anticipate and evade potential threats proactively.
Communication: Acquiring proficiency in using various communication devices, such as ham radios and walkie-talkies, is crucial for staying connected during emergencies.
Developing effective communication strategies will enable you to transmit vital information to others efficiently. Enhancing your ability to actively listen and convey messages clearly and succinctly is also paramount.
By honing these fundamental survival skills, you will be well-prepared to navigate any emergency situation that comes your way.
Whether it involves assessing dangers, defending yourself, or communicating effectively, these skills will empower you to remain safe and take control during challenging times.
Building a Support Network
Building a support network and collaborating with individuals that have different skillsets and expertise will ensure a well-rounded group. When disaster strikes, joining forces with others allows you to combine resources, skills, and knowledge to effectively navigate through unpredictable situations.
By working together, you can increase your chances of survival and thrive in the face of adversity. Seek out people who have knowledge in areas such as first aid, navigation, food preservation, and self-defense.
One of the key benefits of collaboration during emergencies is the shared pool of resources. When you collaborate with others, you can combine your prepping supplies, ensuring that everyone has access to essential items like food, water, and medical supplies.
This shared resource pool not only increases your chances of survival but also minimizes the strain on any one individual or group.
Another advantage of collaboration is the diverse range of skills that each person brings to the table.
During emergencies, tapping into a diverse set of skills such as first aid, navigation, communication, and problem-solving can be invaluable.
By collaborating with others, you can leverage this collective knowledge and expertise to tackle challenges more effectively.
Furthermore, collaboration provides essential emotional support during difficult times. Emergencies can be overwhelming, and having a support network is crucial for your mental and emotional well-being. Be sure to establish reliable communication channels, such as a group chat or designated meeting spot, this will facilitate effective coordination and information sharing.
It is important to foster a sense of trust and cooperation within the group, so that everyone feels comfortable asking for and offering help when needed.
Remember, building a support network is not just about preparing for emergencies, but also about forming meaningful connections with others who share a common goal of readiness and resilience.
Bugging Out Vs. Sheltering in Place
When faced with an emergency situation, it’s crucial to carefully consider whether to bug out or shelter in place. Your circumstances and level of preparedness play a significant role in this decision-making process.
Factors to consider when contemplating a bug out scenario include mobility, the availability of survival gear, and having a designated safe location to retreat to.
It’s important to assess your ability to quickly and efficiently move to a safer area if necessary.
On the other hand, sheltering in place can be a viable option if you have a well-stocked and secure location.
Prioritize your comfort by ensuring you have ample survival supplies, including non-perishable food, water, and medical necessities. Take steps to secure your home, such as reinforcing doors and windows, and consider acquiring basic self-defense skills to protect yourself and your loved ones.
Ultimately, your decision should be based on your available resources, capabilities, and the potential risks you may face during an emergency.
It’s essential to make a realistic assessment of your situation, taking into account factors such as the severity of the crisis, the duration of the event, and the availability of support systems.
Remember, there is no one-size-fits-all answer to this question. It’s important to evaluate your circumstances and preparedness level carefully.
By doing so, you can make an informed decision that maximizes your chances of survival and minimizes risks during a crisis.
Prepping in Small Spaces
Prepping in small spaces? No problem! With the right strategies, you can effectively prepare for emergencies even in compact living spaces like apartments or dorm rooms.
Take advantage of under-the-bed storage, deep cabinets, bookshelves, and bins in the garage to maximize your space. To save even more space and extend the shelf life of your supplies, consider vacuum packing items like clothing and bedding.
And don’t forget the versatility of tin foil, which can be used to wrap and protect delicate items.
When it comes to water storage, opt for gallon bottles or 5-gallon water containers as they are easy to store and manage.
Remember to prioritize your needs and get creative with your storage solutions in small spaces.
By utilizing the available space efficiently and thinking outside the box, you can effectively prep for emergencies, no matter the size of your living space.
H/T to @TheUrbanSentinelChannel for this video on small prepping spaces.
Food Storage Basics
To maximize your food storage efforts, consider these essential strategies:
Vacuum sealing: Extend the shelf life of your food by removing air through vacuum sealing. Use a vacuum sealer to keep dried fruits and nuts fresh.
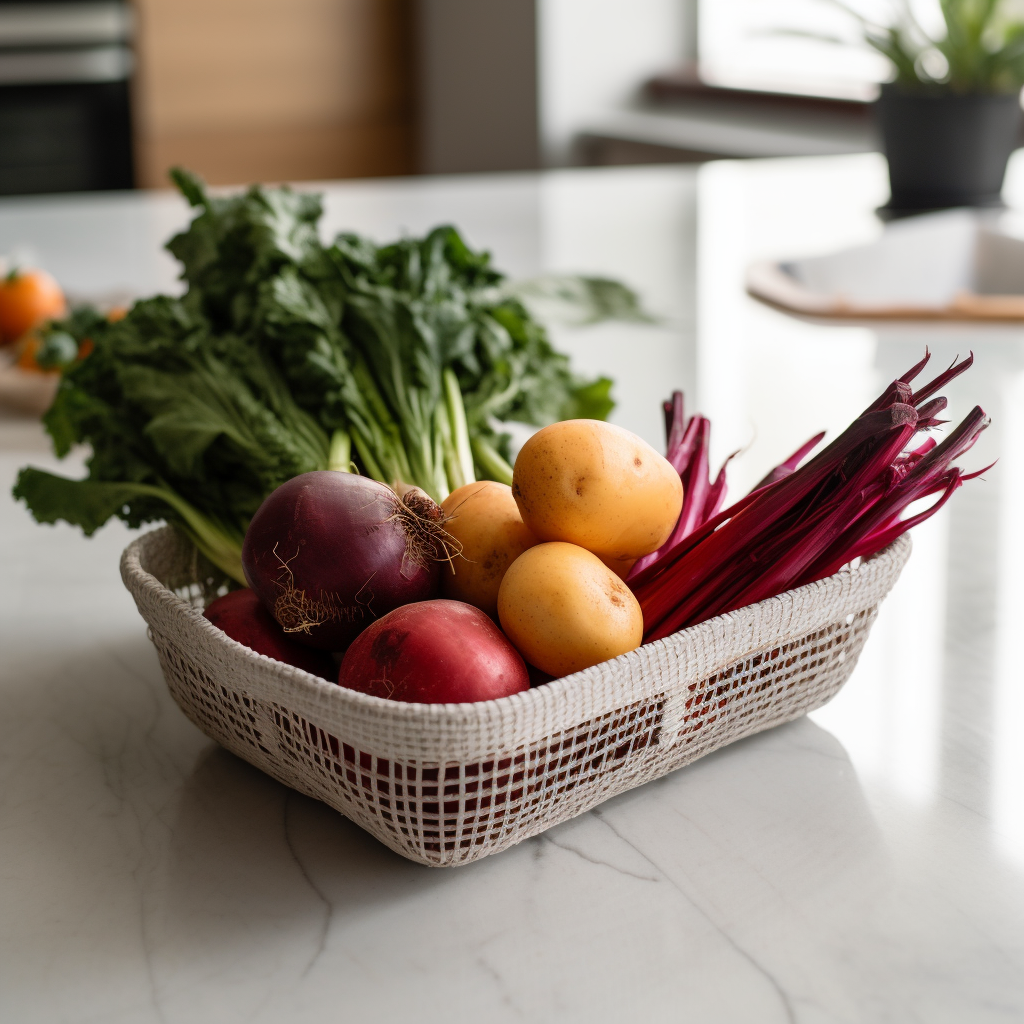
Root cellaring: Store root vegetables like carrots, potatoes, and beets in a root cellar. This cool and stable environment helps extend their freshness.
Curing and smoking: Preserve and enhance the flavors of meats by curing and smoking them. Invest in a smoker to enjoy homemade bacon, jerky, and sausages.
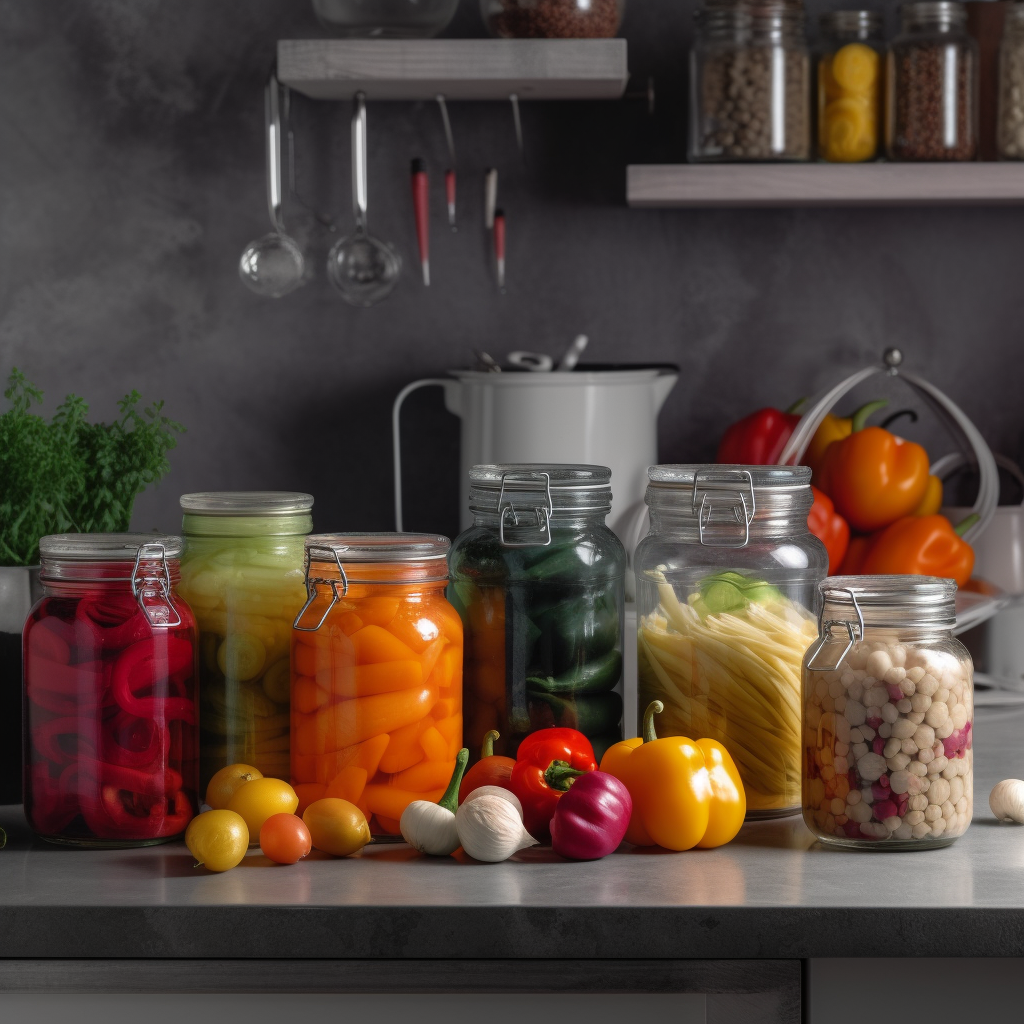
Fermentation: Increase the shelf life of vegetables and enjoy tangy flavors through fermentation. Make sauerkraut or pickles to have a source of probiotics and nutrients.
Bulk storage: Save money by buying in bulk and store essentials like rice, pasta, and beans. Keep them fresh and pest-free in airtight containers.
Preserving herbs: Dry herbs such as basil, rosemary, and thyme to have flavors all year round. Hang them in a cool, dry place or use a dehydrator for long-lasting herbs.
Preserving dairy: Extend the shelf life of dairy products and have control over ingredients by making your own cheese or yogurt. Enjoy homemade dairy products with added freshness.
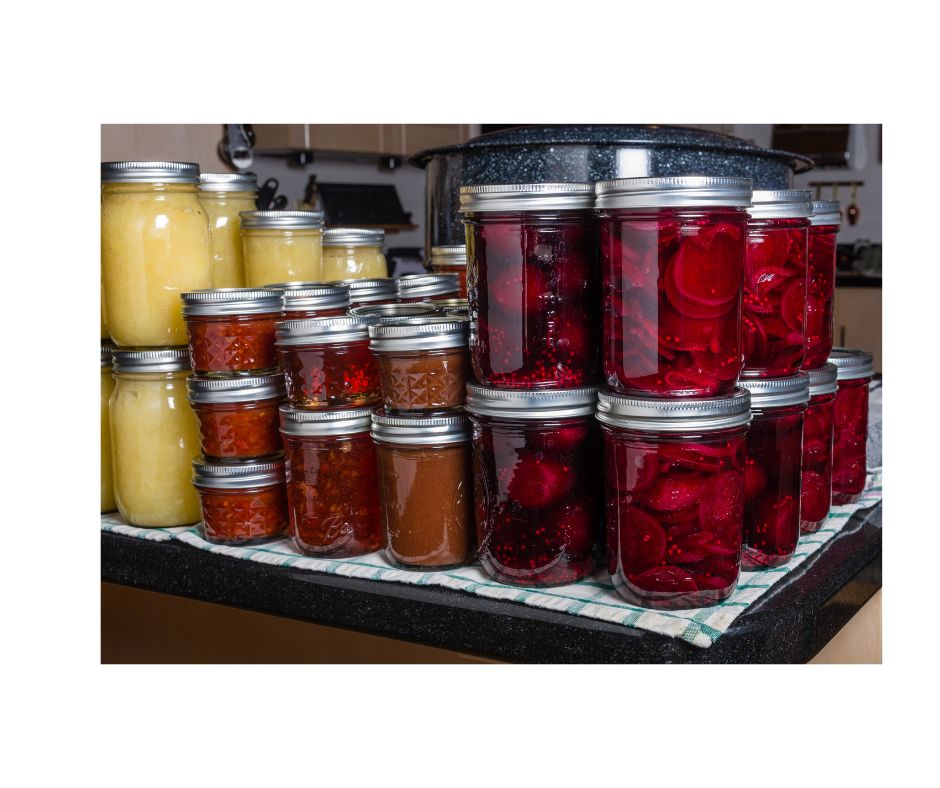
Canning: If you have a garden or access to affordable fruits and vegetables, canning is a great skill to learn. By canning your fresh food you are extending the shelf life and you can enjoy out of season fruits and veggies throughout the year.
Freeze Drying: If you own a freeze dryer, you know it is a great way to prep and store food. It prolongs your foods shelf life as well as making it light weight and easily tucked in a bug out bag. A great skill and option to have to get your emergency food storage prepared.
By incorporating these strategies into your food storage plan, you can ensure a diverse range of nutritious options, even in limited space.
Regularly rotate your supplies to maintain freshness and minimize waste for an effective food storage system.
Water Filtration and Storage Methods
To ensure a reliable supply of clean drinking water in emergency situations, it’s important to have effective water filtration and storage methods.
One option for water filtration is using water purification drops, which effectively treat large quantities of water. These drops are specially designed to eliminate harmful bacteria, protozoa, and viruses, making the water safe for consumption.
This system includes water treatment chemicals, a hand pump, and a water storage drum with a capacity of 55 gallons. With a shelf life of up to 4 years, it offers a long-term solution for water purification and storage.
When it comes to storing water, it is crucial to have suitable containers that are specifically designed for food storage. Gallon bottles or 5-gallon water containers made of food-grade plastic are ideal options.
They are easy to handle and convenient to store. It is recommended to label the containers with the date of storage so that you can easily track and rotate your water supply to maintain its freshness.
Water jugs for emergency storage.
For emergency situations, it is advisable to have at least one gallon of water per person per day for a minimum of three days.
However, for longer-term emergencies, it is recommended to have a two-week supply of water stored. This ensures that you have an adequate supply to meet your hydration and sanitation needs.
It is also important to consider the quality of the water you are storing. If you are collecting water from natural sources such as rivers or lakes, it is necessary to filter and disinfect it before storage.
Portable water filters, like the LifeStraw Personal Water Filter, are effective in removing bacteria and parasites from water, ensuring its safety for consumption.
In addition to filtration and storage, it is crucial to plan for potential emergencies by identifying alternative water sources. Rainwater harvesting systems equipped with filters and storage tanks can provide a sustainable supply of water.
Additionally, understanding the location of nearby water sources and having the necessary tools for collecting and treating water from these sources is essential.
Preparing for emergencies includes being knowledgeable about waterborne contaminants specific to your area.
It’s important to be aware of potential pollutants and to select appropriate filtration methods to address them. Regularly maintaining and inspecting your filtration and storage systems will help ensure their effectiveness when needed.
By following these water filtration and storage methods, you can be well-prepared to meet your water needs during emergencies.
Remember to regularly rotate and replenish your water supply, stay informed about potential water sources in your area, and invest in reliable filtration systems to safeguard the health and well-being of you and your loved ones.
Check out this video from @homesteadonomics on a step by step rainwater harvesting set up.
Learning Core Survival Skills
Learn the essential survival skills necessary to be prepared for any emergency situation. Mastering core survival skills is crucial for preppers who want to effectively navigate unexpected circumstances.
Here are three lists of skills to focus on and develop:
Wilderness Medical Emergency Skills:
Gain proficiency in basic first aid techniques, including cardiopulmonary resuscitation (CPR) and wound treatment.
Learn how to identify and treat common medical emergencies that may occur in wilderness settings, such as dehydration, hypothermia, and snake bites.
Acquire the knowledge needed to improvise medical supplies and create makeshift splints or bandages.
H/T to @GrayBeardedGreenBeret for this video on wilderness medical.
2. Shelter and Fire Skills:
Learn how to construct shelters using natural materials like branches and leaves, understanding the principles of insulation and weather protection.
Master different fire-making techniques, such as using flint and steel, fire-starters, or friction methods.
Familiarize yourself with various fire structures, including teepee fires or log cabin fires, and their specific purposes.
H/T to @BUSHCRAFTTOOLS for this video on survival tips.
3. Navigation and Orientation Skills:
Develop proficiency in using a compass and reading maps accurately, allowing you to navigate effectively in different terrains.
Learn basic celestial navigation techniques, such as using the North Star as a point of reference for determining direction.
Acquire skills in orienteering, including understanding map symbols, route planning, and using landmarks to guide your way.
By focusing on these core survival skills, you will enhance your ability to handle emergencies and successfully navigate challenging situations.
Remember to practice and refine these skills regularly to maintain proficiency.
H/T to @TheMapReadingCompany for this video.
Frequently Asked Questions
How Can I Incorporate Prepping Into My Daily Life?
To incorporate prepping into your daily life, start by assessing your needs and creating a plan. Set aside money for emergencies, stock up on essential supplies, learn survival skills, and build a support network.
What Are Some Cost-Effective Ways to Prepare for Emergencies?
To prepare for emergencies on a budget, focus on essential supplies like food, water, and lighting. Look for cost-effective options, buy in bulk, and prioritize long-term storage. It’s all about being resourceful and efficient.
How Do I Customize a Bug Out Bag to Suit My Specific Needs?
To customize your bug out bag, assess your specific needs. Consider factors like climate, terrain, and duration of survival. Pack essential items like food, water, shelter, tools, and first aid supplies accordingly.
What Are Some Essential Survival Skills That Every Prepper Should Learn?
Learn essential survival skills for prepping: knot tying, CPR, and wound treatment. These skills are crucial for your safety and the well-being of your loved ones in emergency situations.
Start mastering them today.
How Can I Build a Support Network for Emergencies While Still Maintaining Self-Reliance?
To build a support network for emergencies while maintaining self-reliance, start by making a list of dependable people.
Be willing to reciprocate help and create a community of support for navigating unpredictable situations. Collaboration is essential for survival.
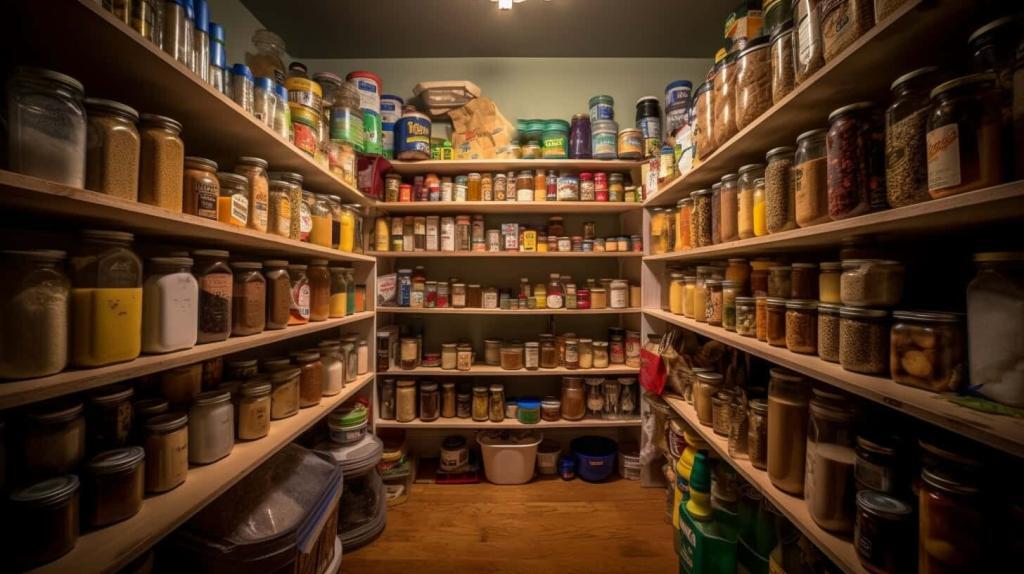
Photo of a stocked pantry.
Conclusion
In conclusion, prepping isn’t just for extremists or conspiracy theorists. It’s a practical approach to ensuring the safety and well-being of yourself and your loved ones in the face of emergencies.
By taking steps to be financially prepared, stocking up on essential supplies, building a bug out bag, and developing survival skills, you can take control of your future and be ready for the unexpected.
Don’t wait for disaster to strike – start prepping today.
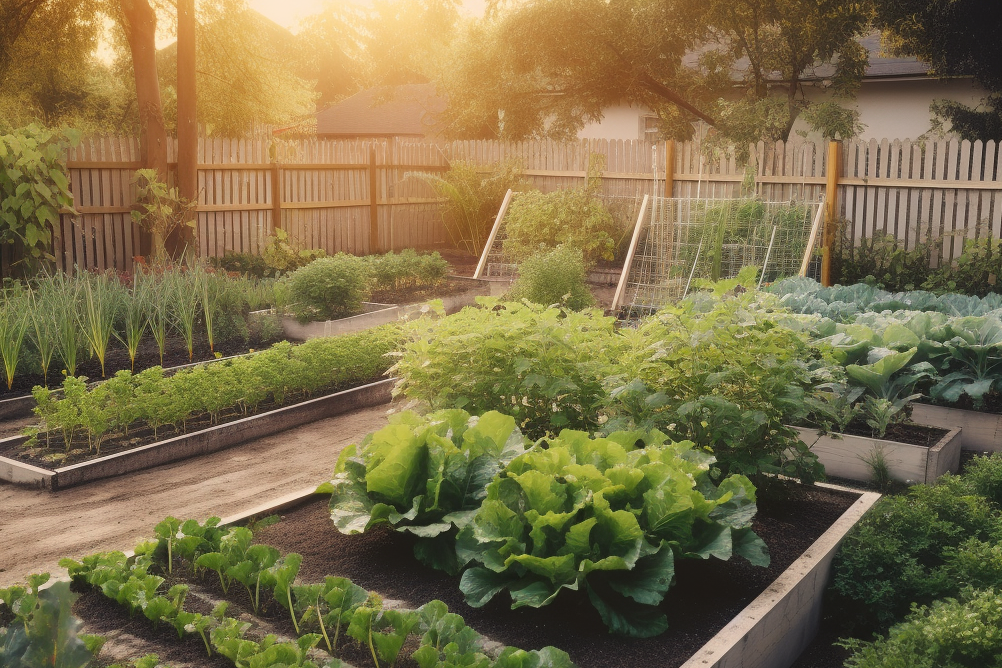
Have you ever wondered what are the best survival crops to plant in your garden in order to create long-lasting food security. Cultivating these staple foods not only enhances self-sufficiency but also ensures robust health.
It’s one way to secure your food supply by transforming your backyard garden into a survival grocery store — filled with the best survival crops that could keep you and your loved ones nourished, even in the toughest of times.
It sounds like a task, I know, but believe me, it’s easier than you think. It’s about making smart choices, focusing on nutritious crops that are easy to grow and capable of storing for longer periods.
These are the 31 best crops to grow in your home garden to create food security.
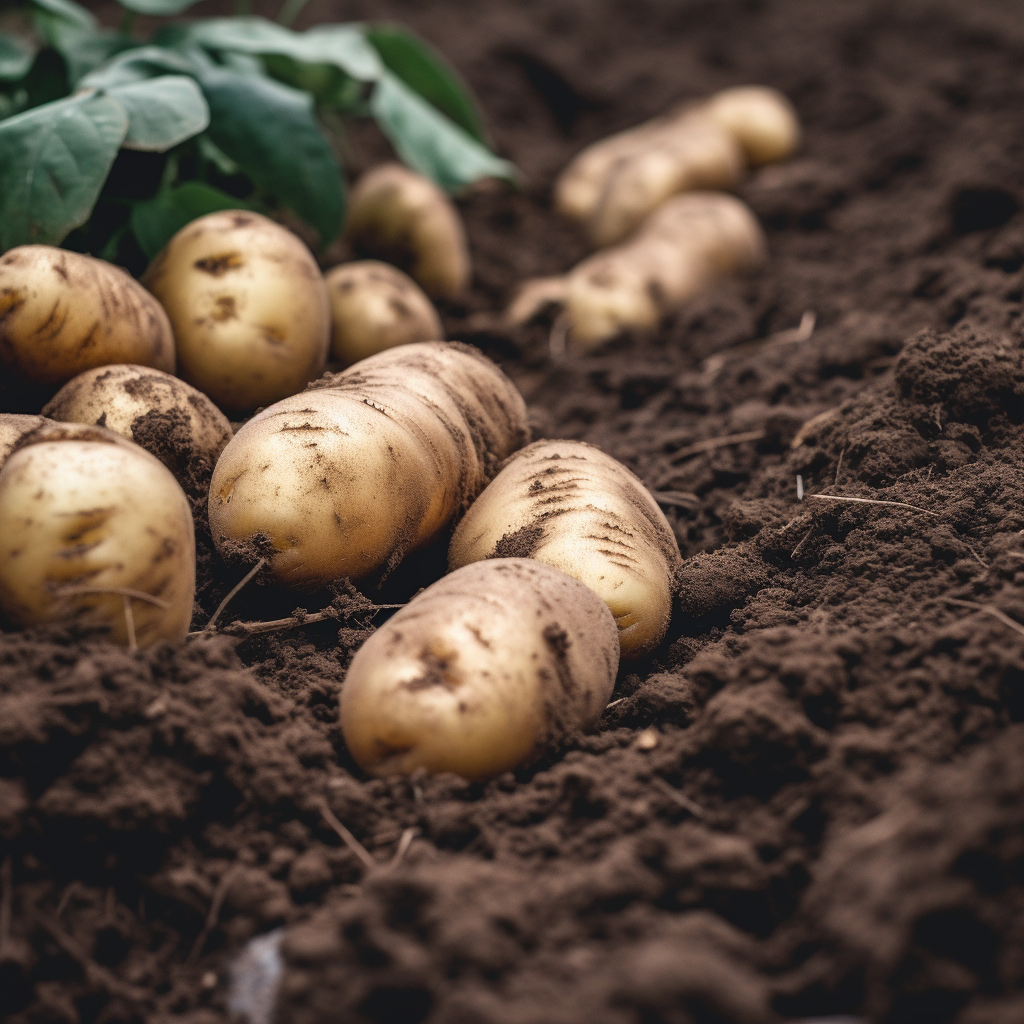
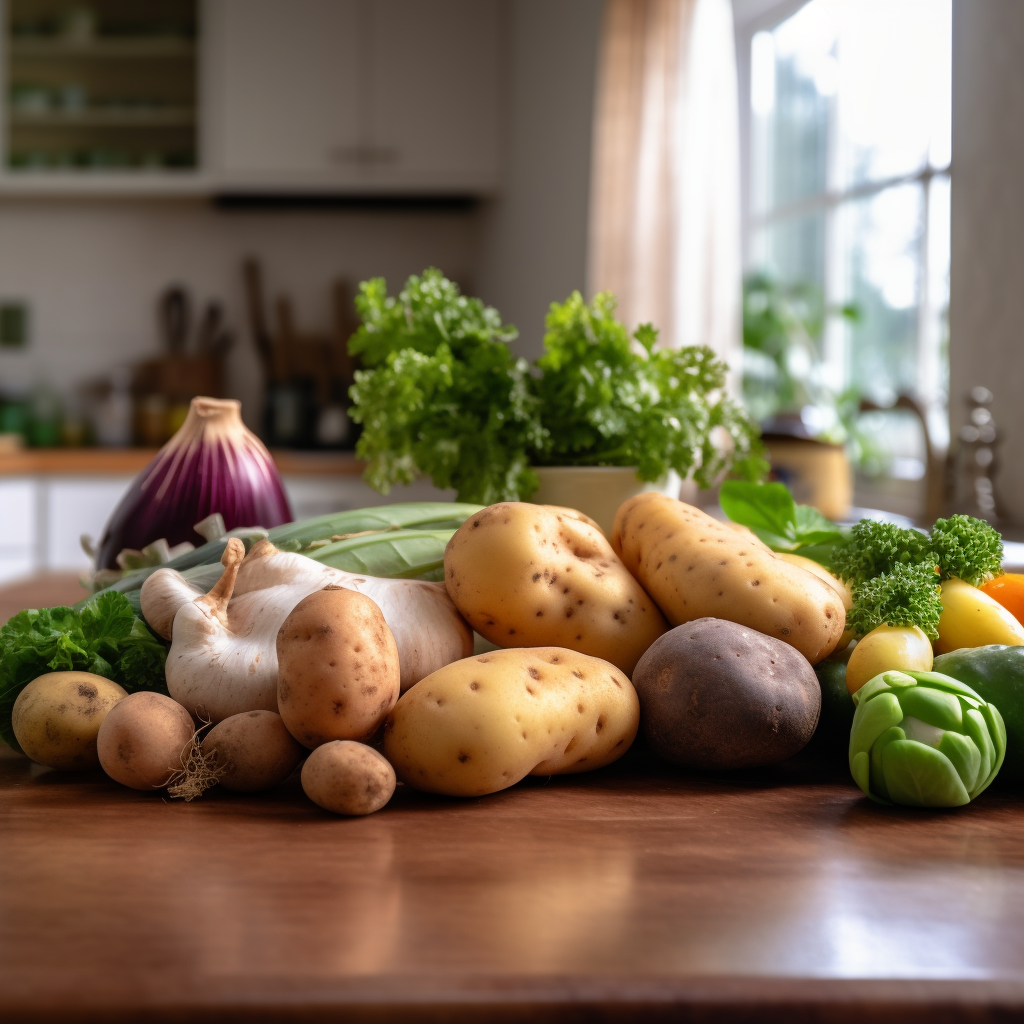
1. Potatoes
Potatoes offer high-calorie sustenance and grow in diverse climates. These all-time favorite are stacked with vitamin C, which is great for the immune system, and they also contain fiber and potassium.
Cut a seed potato into pieces, each with an ‘eye’, and plant them.
Then all you need is well-drained soil and plenty of sunlight. In a few months, you’ll be harvesting them.
You can store potatoes for months in a cool, dark place. One thing, though –- don’t store them near apples. Apples give off a gas that can make your potatoes sprout faster.
2. Beans
Beans are protein-rich and require minimal care. Whether we’re talking bush beans, pole beans, or fava beans, they’re all jam-packed with protein, vitamin B, and fiber.
They love soaking up the sun in a warm climate, and late spring is their prime time to get planted and start sprouting.
Plant beans about an inch deep, and in a few weeks, you’ll see them sprout. They’re easy to store, too, just let them dry on the vine, and they can last for years.
They’re perfect for soups, stews, or even salads. Plus, as a bonus, they improve soil fertility by fixing nitrogen — a perfect vegetable for crop rotation.
3. Corn
Corn serves as a versatile crop with various culinary uses. It isn’t just for summer barbecues. It’s a survival crop packed with fiber and antioxidants. It’s a good source of fiber, plus it’s loaded with B vitamins and antioxidants.
It’s a warm-season crop that needs lots of sunlight and fertile, well-drained soil. Plant the seeds about 1 inch deep and 4 inches apart in rows, and in about 60 – 100 days, you’ll be harvesting.
Dry the kernels, and you can store them for years. You can grind them into flour, make cornmeal, or simply cook and eat them.
And here’s a fun fact: Did you know you can also use corn as a companion plant? It provides tall stalks for climbing plants like beans –- even fava beans or bush beans — to grow on. A survival garden dynamic duo right there!
4. Squash
Squash provides abundant yield and long shelf-life. Whether winter squash or summer squash, these versatile veggies pack a nutritional punch. They’re loaded with vitamins A, C, and E and full of antioxidants, making them a real health booster.
Squash is super easy. They love a sunny spot and well-drained soil. And remember, give them some space with mounds to sprawl on. They usually take around 60 – 100 days to grow, depending on the variety.
Storing squash is simple. Winter squash can last for months in a cool, dark place, while summer squash needs to be used up a bit quicker.
Roast them, make soup or even pie, and enjoy their nutritious benefits.
5. Kale
Kale is nutrient-dense and frost-resistant. It is a nutritional powerhouse that’s hardy and can withstand frost and even snow. It grows best in cool weather, in well-drained, fertile soil.
You can start them as seeds indoors and transplant them or directly sow them 1/2 inch deep. It takes about 55 – 75 days to mature, but you can start harvesting leaves as soon as they’re big enough to eat.
Storing kale is straightforward. Just wrap it loosely in a damp paper towel and pop it in the fridge. It’ll last about a week.
Saute it, add it to soups, or make a salad; it’s a versatile green that will keep you healthy.
6. Sweet Potatoes
Sweet potatoes offer complex carbohydrates and adaptability to soil types. These tubers are rich in vitamins A and C, fiber, and potassium and can be stored for weeks. They prefer a warm climate and well-drained, sandy soil.
Plant sweet potato slips (young sweet potato plants) about 12 inches apart, and in about 90 – 170 days, they’re ready to harvest.
Bake them, roast them, or make a stew; their sweet taste will be a comfort in challenging times.
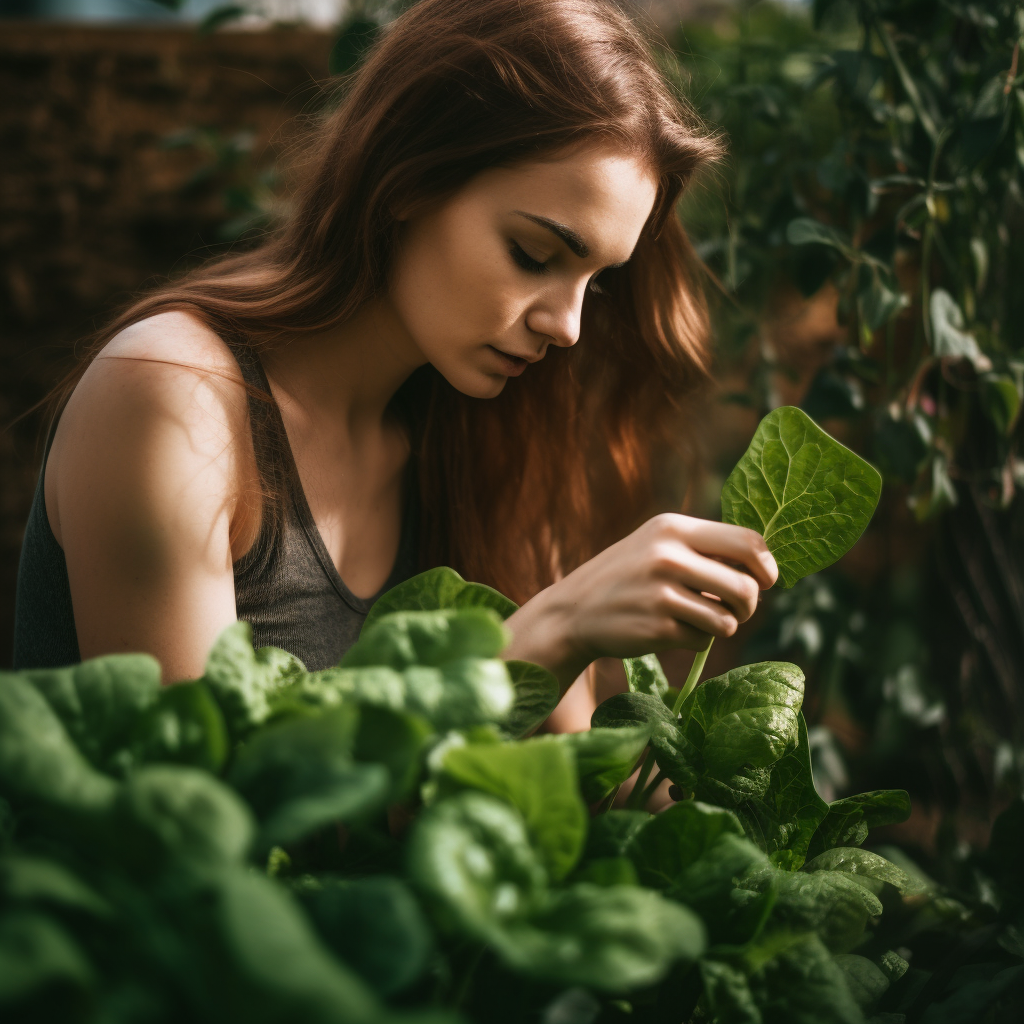
7. Spinach
Spinach grows quickly and is rich in vitamins A, C, and K and a bunch of essential minerals.
It is a nutrient-dense leafy green that’s easy to grow and can thrive in a wide range of climates. It’s also a great source of iron and other essential nutrients.
It prefers cold weather and fertile, well-drained soil so it’s best planted in early spring or late summer for a fall harvest.
Use spinach fresh in salads, steamed, or added to soups and stews.
Plant the seeds 1/2 inch deep and 2 – 3 inches apart. In just 4 – 6 weeks, you can start harvesting.
To store them, just keep them in a plastic bag in the fridge, and they’ll stay fresh for about a week. Use it in salads, saute it, or add it to soups for a nutritional boost.
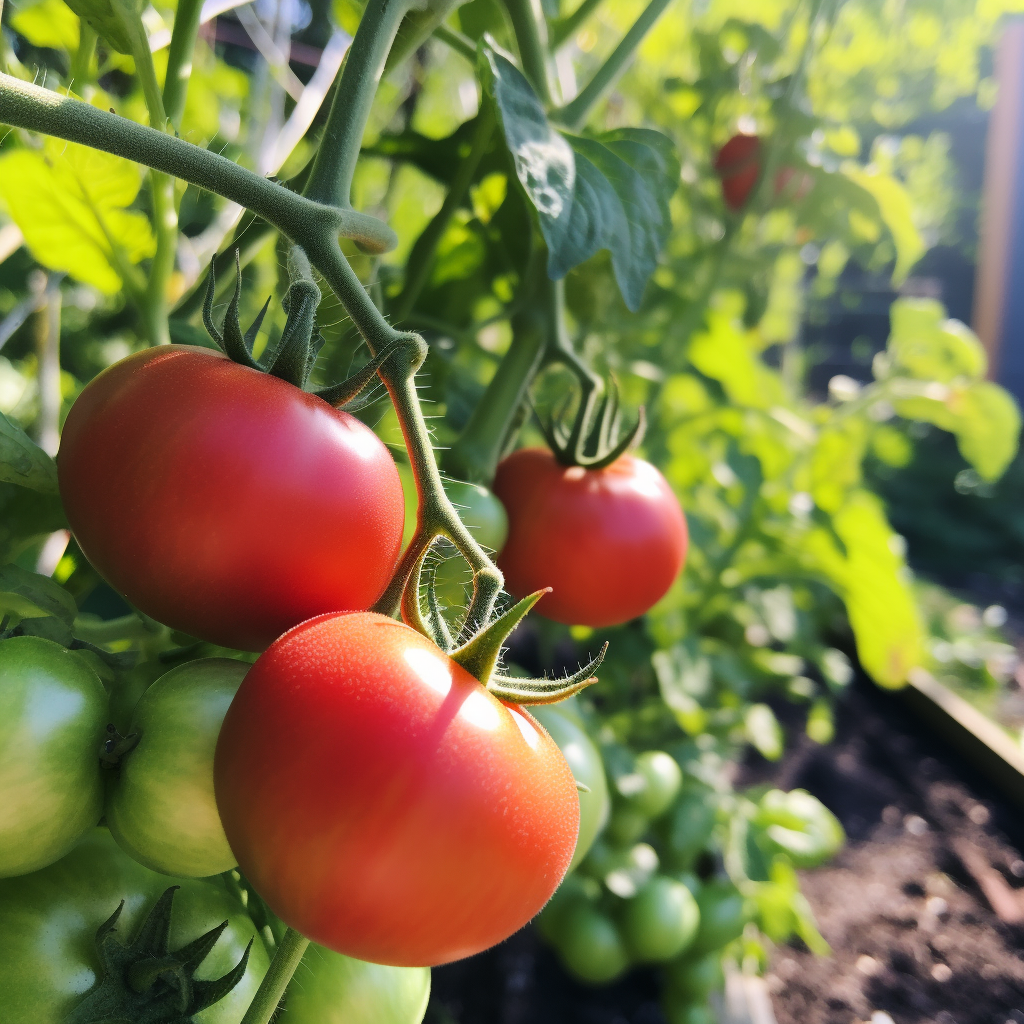
8. Tomatoes
Tomatoes are versatile for cooking and rich in antioxidants. Few things beat the taste of a freshly plucked tomato. They’re packed with vitamins and antioxidants and grow well in most climates, although they prefer warm weather.
Plant them in fertile, well-drained soil and keep them in full sun. From seed to harvest takes about 60 – 80 days.
Store them fresh for a few days, or keep them at room temperature until they’re fully ripe, and they’ll be good for about a week. Use them in salads, sauces, or just eat them fresh.
9. Peppers
Peppers yield high returns and offer a variety of flavors. Both bell and hot peppers can provide essential vitamins and add flavor to your meals. They love warm, well-drained soil and plenty of sunshine. It takes about 60 – 90 days for them to bear fruit.
When it comes to storage, just pop peppers in the fridge, and they’ll stay crisp for a week or two.
Peppers are real culinary chameleons. Use them in stir-fries, stuff them, grill them, or just slice them up for a zingy salad.
10. Cabbage
Cabbage is durable and provides vitamin K. You can store for it long periods and provides many health benefits. Cabbage prefers cooler weather and fertile, well-drained soil.
Plant cabbage seeds 1/2 inch deep and 12 – 24 inches apart. They’re ready to harvest in about 70 – 120 days.
Store them in a cool, humid place, and they can last for months. Use them in salads and soups, or ferment them to make sauerkraut.
11. Carrots
Carrots are easy to grow and beneficial for eyesight. Carrots are nutrient-packed, easy to grow, and can be stored for months. They prefer cool weather and deep, loose soil.
Plant the seeds about 1/4 inch deep and thin the seedlings to about 2 inches apart. In about 2 – 4 months, you’ll be harvesting them.
Store them in a cool, humid place to last for months. Eat them raw, steam them, or use them in soups and stews.
12. Beets
Beets are hardy and support liver health. They are an excellent source of nutrients. Plus, you can eat both the roots and the leaves. They prefer cool weather and well-drained, loose soil.
Plant the seeds 1/2 inch deep and about 1 inch apart, then thin the seedlings to about 3 inches apart. They’re ready to harvest in about 50 – 70 days.
Store the roots in a cool, humid place, and they’ll last for months. Roast them, boil them, or pickle them — they’re versatile and nutritious.
13. Onions
Onions are storage-friendly and have antibacterial properties. They are easy to store and an essential flavor base for many meals. They can grow in a wide range of climates but prefer cooler weather.
Plant them in fertile, well-drained soil. Use sets (small bulbs) for easy planting, and they’ll be ready to harvest in about 3 – 5 months.
Store them in a cool, dry place, and they can last for several months. Use them in almost any savory dish for added flavor.
14. Garlic
Garlic is medicinal and serves as a natural pest deterrent. As one of those “plant it and forget it” perennial plants, garlic loves cooler weather and well-drained soil. This little bulb is loaded with vitamin C, B6, and manganese, and its antioxidant abilities are off the charts.
Plant the cloves about 2 inches deep and 4 inches apart. They’re ready to harvest in about 9 months.
Store them in a cool, dry place, lasting for months. Use them in a variety of dishes to boost both flavor and nutrition.
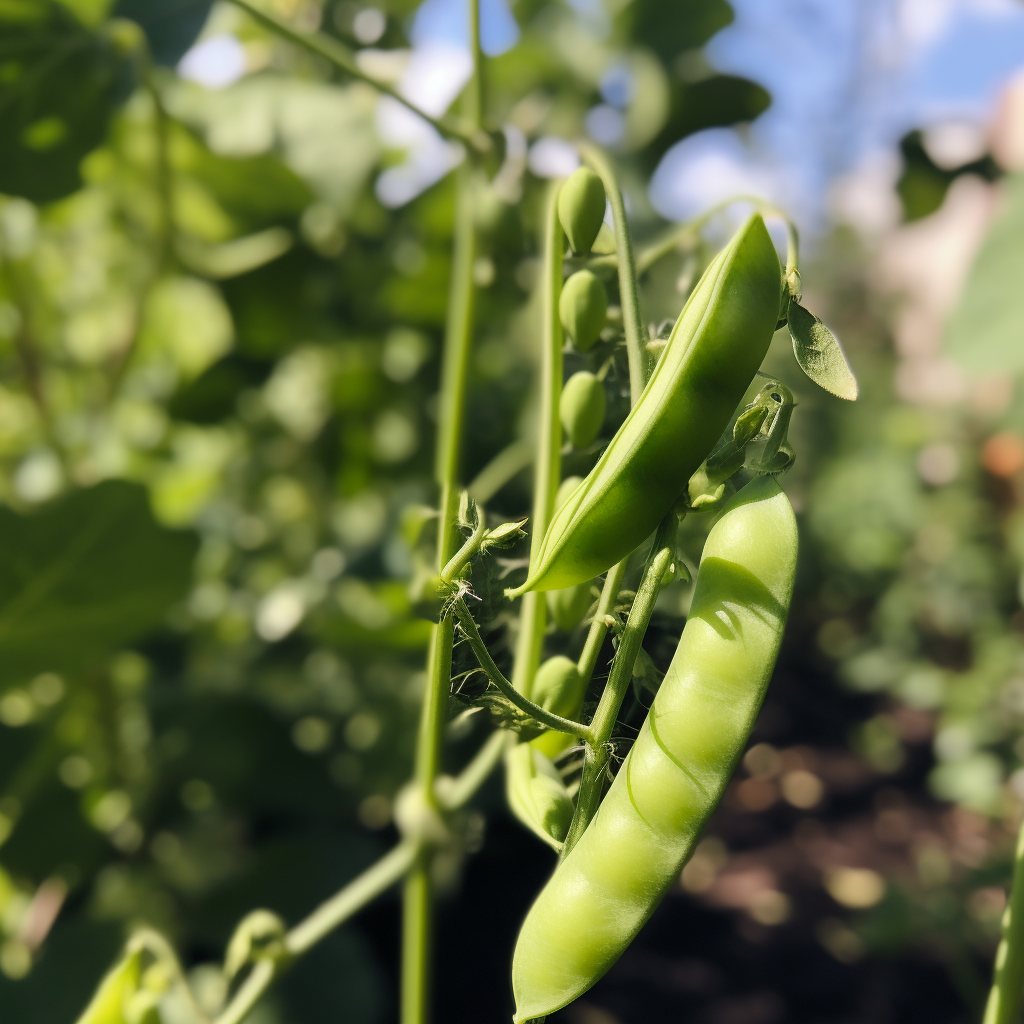
15. Peas
Peas enrich soil and are a fantastic source of protein and fiber.
Peas are a great source of protein, fiber, and vitamins and minerals, including vitamin K and manganese.
They like well-drained soil and can handle a bit of frost.
Plant the seeds about an inch deep and a few inches apart. In about 60 – 70 days, you’ll be harvesting.
Fresh peas can be stored in the fridge for a few days, or you can freeze or dry them for long-term storage.
Eat them fresh, add them to salads, or cook them in soups and stews.
16. Zucchini
Zucchini grows abundantly and offers various culinary applications. This fast-growing vegetable is low in calories but high in essential nutrients. It thrives in warm weather and well-drained, fertile soil.
Plant the seeds about an inch deep and give them plenty of space to grow. You’ll be harvesting them in just 45 – 55 days.
You can store fresh zucchini in the fridge for a couple of weeks or freeze them for long-term storage. Grill, saute or bake them into delicious zucchini bread.
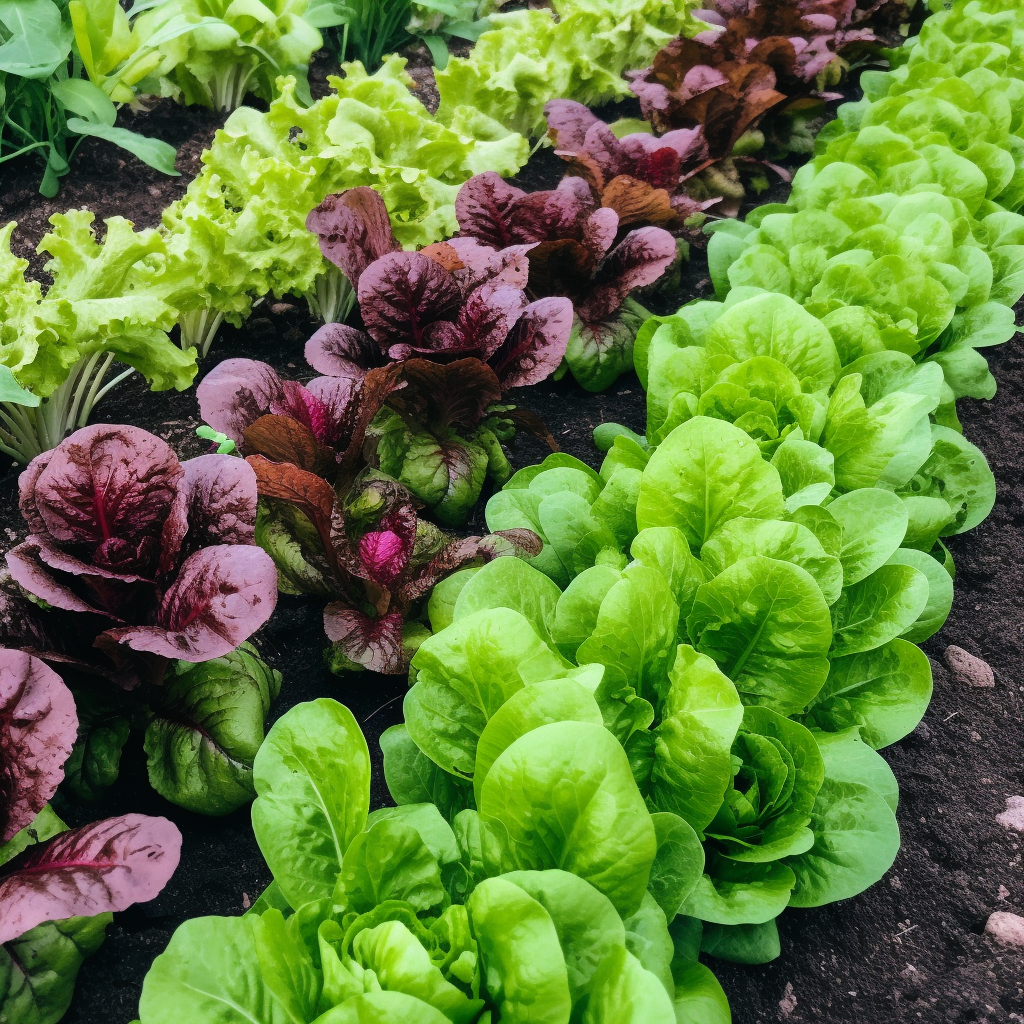
17. Lettuce
Lettuce is quick to harvest and low in calories. It also takes up very little space, making it an ideal survival crop. It prefers cool weather and moist, fertile soil.
Plant the seeds about 1/4 inch deep and a few inches apart. You’ll harvest them in just 30 – 60 days.
Store fresh lettuce in the fridge for a few days. Use it in salads or add it to sandwiches for a fresh, crispy bite.
18. Radishes
Radishes mature quickly and can break compacted soil. Radishes are one of the fastest-growing vegetables, and the roots and the leaves can be eaten.
They love cool weather and well-drained soil. And talk about speedy -– you can harvest them in as little as three weeks! Just plant the seeds about 1/2 inch deep and an inch apart.
Fresh radishes can be stored in the fridge for a few weeks. Eat them raw, add them to salads, or pickle them for a tangy treat.
19. Swiss Chard
Swiss Chard is nutrient-rich and grows well in partial shade. This vegetable is a nutrient-dense leafy green that can tolerate cool and warm weather. It’s a cool-weather crop that enjoys well-drained soil.
Plant the seeds about 1/2 inch deep and a few inches apart. In about 50 – 60 days, you’ll be harvesting them.
Fresh chard can be stored in the fridge for a few days. Saute it, add it to soups, or use it in salads.
20. Cucumbers
Cucumbers are hydrating and suitable for trellising. They are packed with nutrients. They love warm weather and fertile, well-drained soil.
When planting, just pop the seeds about 1 inch under the soil and give them plenty of space to climb. You’ll be enjoying your own crisp, homegrown cucumbers in just 50 – 70 days.
You can store fresh cucumbers in the fridge for a week, or you can pickle them for long-term storage. Eat them fresh, add them to salads, or pickle them for a crunchy snack.
21. Yams
Yams are calorie-dense and store well. They are root vegetables known for their starchy content and versatility in the kitchen. They prefer a tropical climate and well-drained soil, making them ideal for areas with a lot of rainfall.
Yams can be a bit tricky to grow as they require a long growing season (up to 11 months) and have specific temperature needs. Despite this, they’re highly beneficial as a survival crop due to their high caloric content and long storage potential.
You can roast, boil, fry, or mash yams, and they can even be used in baking as a healthier alternative to regular flour.
22. Okra
Okra thrives in heat and is rich in fiber. It has a unique texture and mild flavor and is a favorite in many southern and tropical cuisines. It’s a warm-weather crop that loves the sun and well-drained soil.
Okra can be a bit tricky to start from seed, but once established, the plants are fairly low-maintenance. The pods are best harvested when small and tender, usually about 2 – 3 inches long.
Okra is a good source of vitamins and fiber and can be fried, stewed, or pickled for a tangy treat.
23. Amaranth
Amaranth is drought-resistant and a source of complete protein. It is a lesser-known but super impressive crop. It’s a great source of protein, fiber, and micronutrients like manganese, magnesium, and phosphorus.
It thrives in warm weather and is tolerant of poor soil conditions –- talk about a hardy plant! It takes about 90 – 120 days to mature.
To store amaranth, keep the seeds in a cool, dark place, and they can last for years.
You can cook amaranth leaves like spinach, and you can pop the seeds like popcorn. You can also cook it into cereal or ground it into flour.
24. Melons
Melons offer hydration and are a source of vitamins. Melons, including watermelons, cantaloupes, and honeydews, are a sweet treat that can be grown in your survival garden
They prefer warm weather and plenty of space to spread out, although some smaller varieties can be grown vertically to save space.
They require a bit of care to ensure a good harvest, including regular watering and protection from pests.
But the reward –- sweet, juicy fruit –- is well worth the effort.
25. Berries
Berries are antioxidant-rich and attract beneficial wildlife. Berries, including strawberries, raspberries, and blueberries, are one of the best foods to grow in a garden. They’re packed with vitamins and antioxidants, and they’re also a real treat to eat.
Berries can be a bit challenging to establish as they have specific soil and care requirements, but once they’re established, they can produce fruit for many years.
Berries are great for fresh eating, in desserts, or preserved as jam or jelly.
26. Herbs
Herbs offer medicinal properties and culinary versatility. They are an essential part of any survival garden. They take up little space, are easy to grow, and can add flavor and nutrition to your meals. Some common herbs include basil, rosemary, thyme, and parsley.
Plus, you can grow them in the ground or in containers. And they’re fast growers — you can start harvesting as soon as the plant has enough foliage to maintain growth.
Herbs are great for fresh use in cooking. Plus, many double as medicinal plants, which can be invaluable in a survival situation. Think of chamomile for calming tea or mint for digestion.
Storing herbs is easy. Just dry them out, and they can last for months, even years.
27. Oranges
Oranges provide vitamin C and are long-lasting when stored. They grow best in tropical and subtropical climates, needing plenty of sunlight and well-drained soil.
While growing fruit trees like oranges can take a few years to produce fruit, the wait is worth it, providing fresh, nutritious fruit right from your backyard. They require regular watering and occasional feeding to thrive.
Oranges can be enjoyed fresh, juiced, or even preserved in marmalades.
28. Lemons
Lemons are multi-purpose and rich in vitamin C. Similar to oranges, lemons thrive in warmer climates with plenty of sunlight. They provide a great source of Vitamin C and add a bright, tangy flavor to foods.
Lemons require well-draining soil and regular watering to produce well.
They’re perfect for use in various dishes, from savory to sweet, and the zest can add extra flavor to meals. Furthermore, lemons have numerous health benefits and can be used in natural cleaning solutions.
29. Avocados
Avocados offer healthy fats and grow well in warm climates. They are a source of healthy fats and are extremely versatile in the kitchen. They thrive in warm climates with mild winters and require well-draining soil.
Avocado trees can be finicky and require a fair amount of care, but the yield is worth the effort.
Fresh avocados can be used in salads, made into guacamole, or even used as a healthier substitute for butter in some recipes.
30. Plums
Plums are easy to preserve and high in antioxidants. They are an excellent source of vitamins, minerals, fiber, and antioxidants. They grow well in a variety of climates, but they do prefer well-drained soil and plenty of sunlight.
Plum trees require pruning to maintain shape and encourage better fruit production.
Fresh plums are a sweet treat, but they can also be used in baking, preserved as jam or jelly, or dried into prunes for long-term storage.
31. Broccoli
Broccoli is nutrient-rich and grows well in cooler climates. It is a great source of vitamin C, iron, potassium and fiber. It’s also a good way to add a little more protein to your diet during a survival situation when protein may be scarce.
Plant broccoli seeds 1/4″ to 1/2″ down into the soil leaving 12″-18″ of space between plants so there is plenty of room to grow.
Usually, the seeds will start to sprout in 4-7 days in cool climate. (45-85 F)
Broccoli can be eaten fresh, steamed or sautéed. It is delicious added to soups, stir fry, pasta and rice and makes a great addition to your food supply.
What Makes The Best Survival Crops
The best survival crops offer a balance of essential nutrients, ease of growth, and longevity. When selecting the best crops for your survival garden, there are several key factors to consider.
Nutrient-Dense
Nutrient-dense options fortify health and require less consumption. In a survival situation, every calorie counts. You want crops that pack a lot of calories into a small serving.
Foods that are high in calories can provide the energy needed to perform essential tasks.
Crops like potatoes, beans, and sweet corn are high in calories and can provide the energy you need.
Leafy greens like spinach and kale are packed with essential vitamins and minerals.
Easy To Grow
Easy-to-grow crops minimize the need for intensive care and specialized knowledge. Crops that are easy to grow reduce the need for constant tending. You don’t want to rely on a crop that requires a lot of care or has a high chance of failure. Crops like radishes, zucchini, and peas are relatively low-maintenance and are a good choice, especially for beginner gardeners.
Versatile To Cook
Versatile crops can be prepared in multiple ways, offering culinary variety. The best survival foods can be used in various dishes. This not only prevents “menu fatigue” but also allows you to make the most of the ingredients you have on hand.
Corn, for example, can be used in everything from soups and stews to bread and desserts.
Good Storage Potential
Crops with good storage potential can last through off-seasons, ensuring year-round availability. In many climates, you can’t grow fresh produce year-round. Crops like onions, garlic, and winter squash can be stored for months without refrigeration, providing food in the winter months or during times of scarcity.
Seed-Saving Potential
Crops with seed-saving potential can be replanted, reducing dependence on external sources. Consider whether you can save and successfully germinate seeds from your crops. This allows you to sustain your garden year after year without relying on outside sources for seeds.
Heirloom tomatoes, peppers, and beans are known for their reliable seed-saving potential.
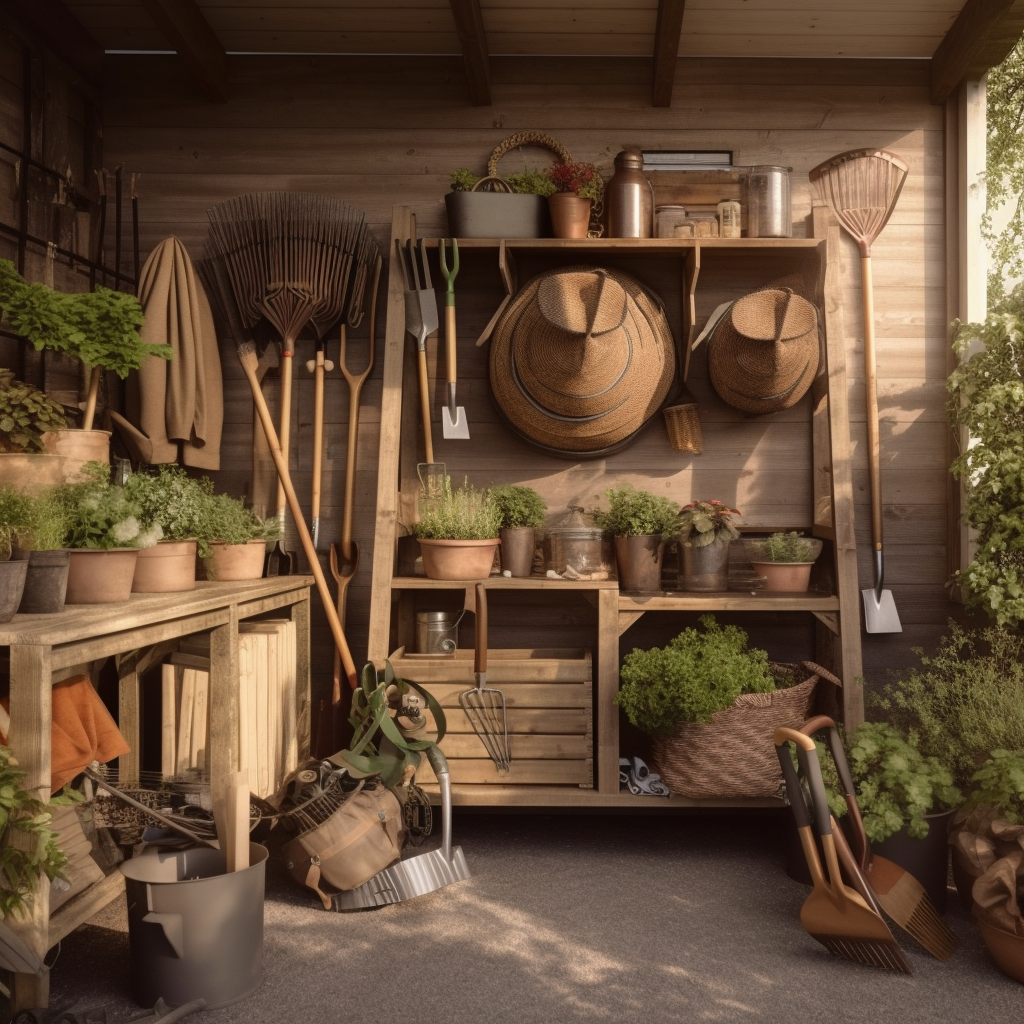
Essential Tools For Your Survival Garden
Essential tools elevate the efficiency and productivity of your survival garden. To ensure your survival garden thrives and gives you the best yield, you’ll need a few essential tools. Here’s a list with a brief rundown of each:
Spades or garden forks help loosen the soil, making it easier for plant roots to penetrate deeper.
Hoes or trowels are perfect for weeding and maintaining the garden. A sharp hoe can cut through weeds, while a trowel is excellent for planting smaller crops and herbs.
Garden rakes are essential for leveling the soil after turning it. A leveled garden will ensure an even distribution of water.
Pruning shears are for keeping your plants in check and removing any dead or diseased branches, pruning shears are a must.
Watering can or garden hose will help you deliver water to your plants. Depending on the size of your garden, a simple watering can may suffice, or a garden hose might be more efficient.
Wheelbarrow is an ideal tool for larger gardens. It’s handy for moving soil, compost, or harvested crops.
Gloves and boots will help protect your hands and feet, especially when dealing with thorny plants or rocky soil.
Remember, your tools are an investment. Good quality tools, well cared for, can last for many growing seasons.
How to Grow, Plant, And Store The Best Survival Crops At Home
Knowing how to grow, plant, and store your crops ensures a perpetual food supply and is crucial for self-sufficiency.
1. Plan Your Survival Garden
Planning your survival garden involves choosing the right crops and mapping out your space. Start by assessing the available space you have.
Remember, you don’t necessarily need a huge backyard –- many crops can be grown in containers on a balcony or even indoors.
Next, consider your climate and soil type. Some crops prefer cool weather, others prefer warm. Some like sandy soil, while others prefer clay. Choose crops well-suited to your conditions for the best chance of success.
Also, think about your dietary needs and preferences. There’s no point in growing a crop you or your family won’t eat.
Finally, draw up a garden plan. This will help you maximize your space and ensure each plant has the room it needs to grow. Remember to account for crop rotation to maintain soil health and prevent the buildup of pests and diseases.
2. Prepare the Soil for Your Survival Garden
Proper soil preparation sets the foundation for crop health and yield. This determines the nutrient density of your crops. Don’t plant anything in poor soil. Remember that good soil is the foundation of a healthy garden. Start by clearing the area of any grass or weeds. Then turn the soil with a shovel or a garden fork, breaking up large clods and removing rocks.
Next, enrich the soil with organic matter. Compost, aged manure, or leaf mold can improve soil fertility, structure, and drainage. These organic materials provide the nutrients your crops need to grow and thrive.
Consider testing your soil to determine its pH and nutrient levels. Many extension services offer soil testing, or you can purchase a do-it-yourself kit.
If your soil is too acidic or alkaline, you can adjust the pH with lime or sulfur. If it lacks certain nutrients, you can add specific fertilizers to address the deficiencies.
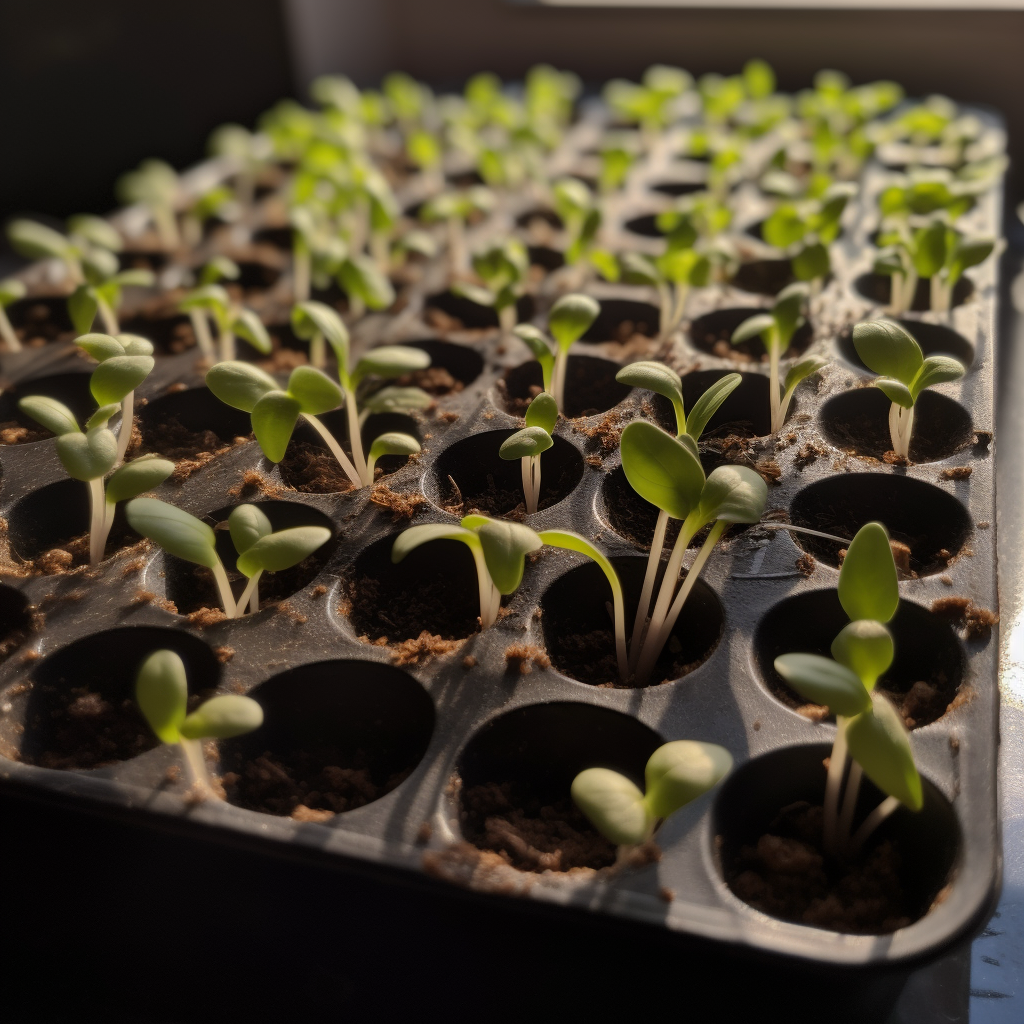
3. Plant Your Survival Crops
Planting the best survival crops at the right time and depth maximizes their potential. Once your soil is prepared, you’re ready to plant. Follow your garden plan and the specific planting instructions for each crop.
Some crops are best started from seeds directly sown in the garden, while others should be started indoors or bought as seedlings.
Remember to water your crops regularly, especially during dry periods. Most vegetables prefer a consistent supply of moisture.
However, be careful not to overwater, as this can lead to root rot and other problems.
4. Maintain Your Survival Garden
Regular maintenance includes watering, fertilizing, and warding off pests. A survival garden is not a set-it-and-forget-it project. You need to give it consistent care and attention. Regular watering, weeding, and pest control are all necessary to maintain a healthy garden.
As your crops grow, they may need additional support. Tomatoes, peas, and cucumbers, for instance, will benefit from trellises or stakes to support their growth and keep the fruit off the ground.
But don’t worry, the rewards — fresh, nutritious food — are well worth the effort.
5. Harvest Your Survival Crops
Harvesting at peak ripeness ensures optimal flavor and nutrient retention. Harvesting your crops is one of the most rewarding parts of survival gardening. It’s a tangible result of your hard work, bringing you one step closer to food independence.
Each crop has its signs of ripeness. Tomatoes, for instance, are best picked when fully colored and slightly soft to the touch.
Root crops like carrots and beets can be harvested when they reach a usable size. Leafy greens can be harvested a few leaves at a time, allowing the plant to continue growing.
Remember to be gentle when harvesting your crops. Rough handling can cause bruising or damage that reduces the storage life of your produce. Also, use a sharp knife or pruner for clean cuts, and handle the produce carefully.
6. Store Your Survival Crops
Proper storage techniques extend the shelf life of your crops. Preservation methods like canning and drying allow for long-term storage.Once you’ve harvested your crops, proper storage is crucial to extend their shelf life and ensure you have enough food supply.
Many root crops like potatoes, onions, and garlic can be stored in a cool, dark, and well-ventilated place for several months.
Crops like tomatoes and peppers should be eaten fresh or can be preserved by canning, drying, or freezing. Certain crops, like beans and corn, can be dried for long-term storage.
Drying is a simple and effective way to preserve food, and it doesn’t require any special equipment or energy input.
7. Preserve Your Survival Crops
Preservation methods like canning and drying allow for long-term storage. Canning, pickling, freeze drying and fermenting are all traditional methods of preservation that can extend the life of your crops and add variety to your diet.
For instance, cucumbers can be pickled, tomatoes can be canned, and cabbage can be fermented into sauerkraut.
Preserving your food can be a rewarding and practical skill in a survival situation. It allows you to make the most of your harvest and ensures you have nutritious food year-round.
FAQ About the Best Survival Crops
What is the best survival food to grow?
The best survival crops to grow will keep you nourished and healthy during difficult times. Potatoes, my friend, are the answer to your survival food dilemma.
Why potatoes? They’re packed with carbohydrates, providing the energy you’ll need to face challenges head-on. Not only are they incredibly nutritious, but they’re also easy to grow and have a high yield.
What is crop rotation?
Crop rotation is the practice of planting different crops in the same area over sequential seasons. It’s an important part of maintaining soil health and ensuring a good yield.
By rotating crops, you can prevent the buildup of pests and diseases and enhance soil fertility.
What vegetables are best for survival?
Kale and spinach are your green saviors! These nutrient-dense leafy greens will provide essential vitamins and minerals, ensuring you stay healthy and strong even in the most uncertain times.
Beans and peas, on the other hand, are packed with protein and fiber, offering you the energy and sustenance you need to face any challenges. They also fix nitrogen in the soil, improving its fertility for future crops.
Carrots and beets are resilient root vegetables that can withstand harsh conditions, making them ideal for survival situations. Their high yields and ability to store well ensure that you’ll have a consistent food supply.
What is the most resilient vegetable to grow?
Potatoes are not only incredibly hardy, but they’re also incredibly versatile. They can grow in various climates and soil types, from the arid deserts to the frosty mountains.
These tubers are packed with essential nutrients, such as vitamin C, potassium, and complex carbohydrates, which offer you energy and nourishment during tough times.
Moreover, potatoes can be stored for months without refrigeration, ensuring a reliable food source throughout the year.
What is the easiest crop to farm?
One of the best survival crops for beginner farmers to plant is lettuce.
It’s a game-changer when it comes to effortless gardening and survival as it’s adaptable to various soil types and weather conditions.
Wrap UpOn The Best Survival Crops
Each day that passes without you taking action is a day closer to potential food scarcity. Remember, time is of the essence.
And in a world that’s changing as quickly as ours, securing your food supply is no longer a luxury – it’s a necessity.
So why wait? Start planning the best survival crops in your garden today and take a step towards a more secure and sustainable future.
Bushcraft hats serve essential functions like sun protection and thermal insulation when you’re out in the wilderness.
When you’re out there in the wilderness, navigating through the brush, or setting up a shelter, the right gear is vital. But which bushcraft hats or caps should you pick when there are so many options out there?
Luckily, you’re in the right place. The search can be daunting. But rest assured. We’ve done the legwork for you. This guide is your one-stop resource for understanding the ins and outs of these quintessential outdoor accessories.
Here, we have compiled the 20 best bushcraft hats and caps for wilderness survival. They’ve been chosen because they excel in their primary job — protecting you from the elements, whether that’s the blazing sun, the pouring rain, or the chilly wind.
Read on to find the right hat for your needs.
The 3 Best Bushcraft Hats/Caps You Need In Your Survival Bag
Canadian brand Tilley is famous for its line of bushcraft hats known for their exceptional durability and lifetime guarantee.
Many bushcraft enthusiasts swear by the Tilley LTM6 Airflo Hat, which features a wide brim for sun protection, breathable construction, and a secret pocket for small essentials.
This Tilley bush hat is machine washable and comes with a pull-on closure for easy wearing. It also has a durable water-repellent finish to keep you dry in unexpected showers.
It also features moisture-wicking hydrofil that keeps you dry and comfortable even when you’re breaking a sweat.
Add in the rated UPF 50+ sun protection, and you have a hat that safeguards your skin from the harsh sun.
This felt hat features a generous 3-inch brim that shields your eyes from the sun, helping you keep a clear vision of your outdoor activities.
With the comfortable wool felt material, it’s got that function and style that only quality materials can give.
But here’s where things get really interesting: these bushcraft hats are crushable and packable. That means you can roll it up, tuck it away, and when you’re ready to use it again, a quick shake brings it back to life — perfect for travelers and adventurers who value convenience.
On top of that, it’s water-repellent. So come rain or shine, this hat has your back. With a faux-leather band and feather accent, you’ll look so good you won’t want to take it off — and with its protective features, you won’t need to!
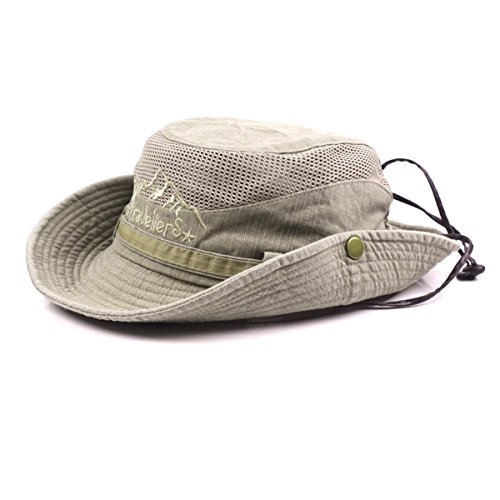
The Outback Hat is an essential piece of gear built for the outdoors made of a balanced blend of 52% cotton for breathability and 48% polyester for strength and durability.
This hat stands up to heat, wrinkles, and tears while keeping you comfortable. It also provides optimal sun protection with its UPF 50+ rating, defending you from harmful ultraviolet rays.
But the benefits don’t stop there. Its interior sweatband and lining are built to absorb sweat, keeping you dry even on the most sweltering days. Plus, it provides a smooth surface to avoid any skin irritation.
The hat’s 2.7-inch rim is shapeable, offering you customizable shade from all angles. Bend it to your liking for maximum comfort and protection for your face, ears, and neck.
And if you’re worried about your hat flying off in the wind or rain, fret not. An adjustable chin strap ensures it stays put.
The Carhartt Beanie is a reliable ally in your battle against the cold. It’s composed of 100% acrylic rib knit and boasts a soft and lightweight feel — perfect for all-day wear.
This beanie has a lightweight profile, so it’s effortless to take with you wherever you go. Pop it in your backpack, your coat pocket, or even your handbag.
Plus, its stretchy material provides a snug and cozy fit for different head sizes, enhancing your comfort further.
The Colombia Bona Boonet is a high-performance, 100% nylon, imported accessory meticulously designed for ultimate comfort and sun protection.
With a well-engineered Omni-Shade, these bushcraft hats aren’t messing around when it comes to sun protection. It offers robust UV shielding to fend off both UVA and UVB rays, preventing potential sunburns and long-term skin damage.
A full 3-inch brim gives it a stylish touch, while an adjustable drawcord and a toggle size adjustment at the back ensure that this hat fits you just right.
And if you’re worried about those windy days, don’t be. The hat comes with a chin strap that keeps it firmly in place.
The Swift Cap is not your ordinary baseball cap. It’s thoughtfully designed with a full mesh liner, providing you with superior ventilation on those hot summer days.
With its UPF 50+ protection, this cap doesn’t take the sun’s harmful rays lightly. It ensures that you stay protected while you enjoy your favorite outdoor activities.
The Swift Cap also comes with breathable mesh panels that keep you cool all day long.
And here’s the kicker, the cap’s quick-drying and wicking fabric, so you can say farewell to annoying sweat dripping into your eyes.
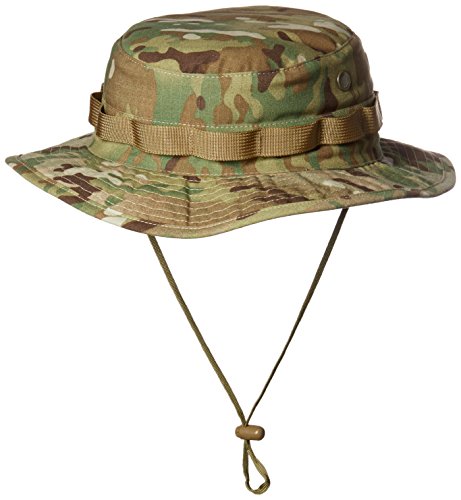
These bushcraft hats have been constructed to meet US military specs, made from a 50/50 blend of nylon and cotton rip-stop. It features a flexible chin strap with a cord lock, ensuring a custom fit and comfort.
Additionally, it comes with nylon loops, perfect for adding extra camouflage or carrying small items.
It also has brass screen vents, which means, come rain or shine, your head stays dry, keeping your comfort in mind.
And it doesn’t stop there. The high-quality Bemis seam tapes and the wide brim not only provide protection from the sun but also include a built-in internal map pocket.
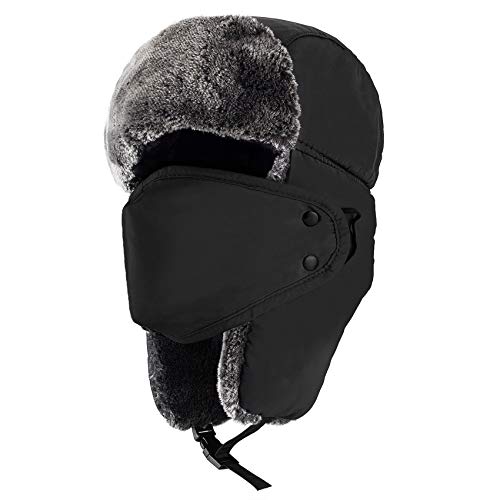
This hat is engineered using a high-quality insulated polyester shell, forming an impressive waterproof and breathable barrier.
It keeps you cozy and shielded from the chilly external winds while maintaining your comfort.
This hat is outfitted with high-quality, plush faux fur, providing consistent warmth. The mask integrated into the hat is detachable and can be used on its own.
However, when used together, they provide all-encompassing protection for your head, ears, and face.
Cleaning it is a breeze too. Simply throw it in the washing machine, and it’s good as new.
This soft, ultra-comfortable beanie features cutting-edge easy-care technology, meaning it’s both machine washable and dryable.
With its fusion of comfort, warmth, and breathability, these bushcraft hats become an essential piece of your outdoor gear. Designed as a one-size-fits-most item, it incorporates double fabric for extra warmth while maintaining a simple, stylish aesthetic.
Plus, it’s lightweight and packable, so you can fit it under a helmet. It also efficiently wicks away moisture, keeping you dry while continuing to provide insulation even when wet.
Designed for multi-season use, this beanie provides a snug fit and covers the whole ear — a key feature for those sensitive to cold and wind.
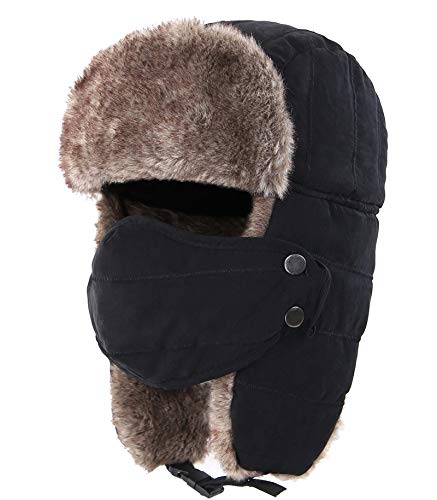
Made of polyester with a warm plush inner lining, this hat boasts superior warmth. It fits most head sizes and features an adjustable chin strap for a customized fit.
It’s also durable and thick, offering unbeatable windproof qualities. With removable windproof masks and large ear flaps, this hat ensures your face, ears, and neck are fully protected and warm in cold weather.
This hat is most praised for its effectiveness in blocking wind and insulating against the cold during tasks like snow clearing.
This bucket hat boasts an impressive cooling activation feature. So if you’re out hiking or doing yard work, and the heat is starting to get to you, all you need to do is wet this hat, wring it, and wave it.
It will then cool down to 30 degrees below your average body temperature in less than a minute. And this isn’t just a fleeting chill — the cooling effect lasts up to two hours!
With a 3-inch brim and UPF 50 fabric, this hat provides excellent sun protection for your face, ears, and neck.
This hat is also a great travel companion. It’s lightweight and foldable, meaning you can easily pack it in your bag or even stick it in your back pocket.
And for the perfect fit, there’s an adjustable elastic string chin strap.
Crafted from 100% cotton, this low-profile six-panel baseball cap ensures durability and a lightweight feel, delivering an optimal combination of breathability and sturdiness.
It sits comfortably on your head, so it’s comfortable even during long hours of wear.
Plus, the front of the cap is designed to allow patch customization, giving you the freedom to personalize your headgear according to your style and needs.
The unconstructed design also means that this cap can easily be packed away in your bag when not in use. It won’t take much space, and it won’t lose its shape, ready for when you need it next.
The cap is made from 100% cotton washed canvas, a robust material known for its resilience in diverse weather conditions.
Its Force technology and FastDry feature work tirelessly to wick away sweat and keep odors at bay, ensuring you remain cool, dry, and comfortable throughout your bushcraft endeavors.
Additionally, the pre-curved visor is designed to provide shade, protecting your face and eyes from harsh sunlight, a factor of utmost importance in preventing discomfort or potential health risks like sunburn or heatstroke.
Plus, its medium-profile structure ensures stability on your head, while the adjustable strap caters to a snug fit for any head size.
This Large Brim Sun Hat, built with 100% cotton and fitted with a sturdy drawstring closure offers crucial shade with its wide brim, keeping the harmful rays off your face.
Its large size offers a generous fit with ample room to adjust, so you can comfortably wear it.
This hat also sports a drawstring closure, ensuring a secure fit and preventing it from being blown away in the wind, a handy feature when you’re out there braving the elements.
Some users have mentioned the adjustment strap feels a bit cheaply made. But hey, no product is perfect, and it’s something worth considering.
Yet, overall, the benefits significantly outweigh the slight cons, given the hat’s robust and functional design that adds value to your outdoor gear.
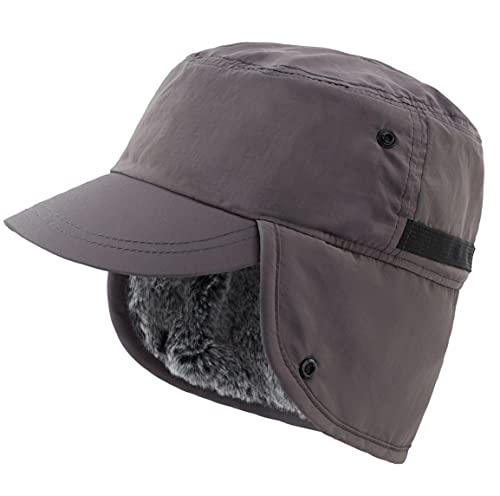
Constructed with a water-repellent nylon shell, this hat ensures that rain and snow slide right off, keeping your head dry and secure, even on those extremely chilly days.
On the inside, its plush lining provides remarkable warmth and a smooth touch that feels good against your skin, making the cold days not only bearable but comfortable too.
Its earflaps, conveniently placed on either side of the hat, can be buttoned up or worn down. Also, an adjustable belt at the back of the hat helps you find your snug fit.
Now, nothing is perfect, and this hat is no exception. The inside material, while soft, is a bit slippery, causing the hat to slide off when bending over. But hey, that’s a small price to pay for such comfort.
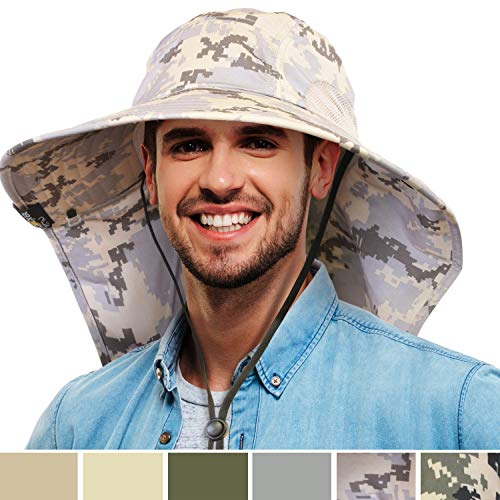
This full-coverage hat is constructed with an impressive 4-inch wide brim and a long back flap that provides all-around protection from the sun’s harsh rays.
It features a drawstring closure and an adjustable chin cord to secure the hat in place, even in windy conditions.
The hat’s real magic lies in its superb ventilation. The two mesh side panels, coupled with a moisture-dispersing sweatband, work together to keep your head and neck cool and comfortable.
This hat is also foldable, making it easily storable in your luggage, backpack, or even your pocket.
Crafted with 100% polyester, this hat assures breathability, rapid drying, lightness, and comfort in any weather.
A versatile piece, it offers an adjustable or removable chin strap for a personalized fit.
The hat comes with a broad brim, while the mesh openings in the crown and rear flap to allow a cooling breeze to flow through.
It also comes with an impressive UPF 50+ rating, warding off 98% or more of harmful UVA/UVB solar radiation – an indispensable asset for those frequently under the sun.
Made from 100% nylon, this imported hat carries an impressive UPF 50+ rating, so you’re shielded from the sun’s harmful rays.
The hat is fitted with removable flaps, granting you flexibility in how you choose to protect yourself.
If your face is getting a little too much sun, just use the face shield. And if your neck is feeling the sun’s intensity, the neck flap has you covered, literally. And when the sun dips low, you can either tuck them into the hat or remove them entirely.
The hat is also designed with mesh side panels, which, together with two large meshed brass eyelets, allow for excellent ventilation. This keeps your head remaining cool, even in the heat of the day.
It’s also windproof and quick-drying, making it an excellent choice for a range of weather conditions.
The size of the hat? It’s designed to fit all. The lightweight design and fine collapsibility make it a breeze to carry.
The KeepSa Sun Hat is your reliable shield against the sun. Thanks to its retractable brim, it keeps your face, eyes, and neck well protected from those harsh sun rays.
Plus, it’s cotton, so on those extra hot days, you can dampen it for some evaporative cooling.
These bushcraft hats serve as your shield against the sun, and it’s an ideal companion for your outdoor escapades.
Crafted with breathability, compactness, and portability in mind, you can conveniently tuck it into your backpack or pocket, so you can have it on hand whenever you need it.
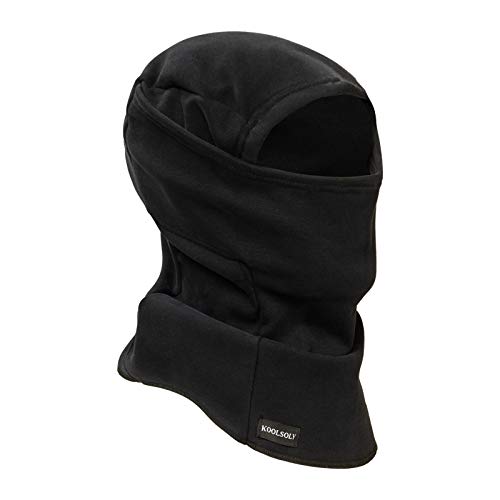
The KOOLSOLY Ski Mask isn’t just about keeping you warm; it offers excellent protection against the wind, dust, rain, snow, sleet, and harmful UV rays.
Constructed with a warm and windproof fleece thermal, this balaclava not only feels extremely soft but also ensures you remain toasty no matter your activity.
This fleece hood doubles down on warmth and comfort, designed with soft, breathable, and skin-friendly material. It keeps you cozy throughout the winter months without causing any irritation or discomfort.
Plus, it’s versatile enough to wear as a full-face mask, open balaclava, half mask, ski mask, neckerchief, or under a helmet or hat with goggles or glasses.
What Is A Bushcraft Hat?
Bushcraft hats are an essential piece of gear designed to protect the wearer from various environmental factors while engaging in bushcraft activities.
Bushcraft, a term primarily used to describe wilderness survival skills, involves activities such as firecraft, tracking, hunting, shelter-building, and navigation.
During these activities, one can face diverse weather and environmental conditions, and the right hat can be instrumental in providing protection and comfort.
They come in various styles and materials, each with its own set of benefits. They can offer protection from harsh sunlight, insulate against cold weather, keep the rain off, or even act as an emergency water container or signal flag in survival situations.
Types Of Bushcraft Hats
Now lets explore the different varieties of bushcraft hats designed for various outdoor adventures.
Wide-Brimmed Bushcraft Hats
Wide-brim bushcraft hats offer optimal sun protection for long days outdoors. It is commonly associated with the Australian outback, is a classic choice for bushcraft hats. These hats provide protection from extreme heat, shading not only your head but also your neck and shoulders.
Many new products in this style include a chin strap for windy situations, making them a superb choice for your backpacking trips.
Beanie Style Bushcraft Hats
Beanie style hats are ideal for cold weather and lightweight packing. Beanies are an essential piece of bushcraft gear in colder climates. They provide excellent warmth, as they’re designed to cover your ears and trap heat that would otherwise escape from your head.
Merino wool is a preferred material due to its exceptional warmth and breathability.
Boonie Bushcraft Hats
Boonie hats offer a blend of comfort and tactical utility. These hats were made popular by the military, and their practicality has seen them adopted by bushcrafters worldwide.
They feature a medium-sized brim that offers sun protection without obstructing visibility. They also often include ventilation eyelets and a chin strap.
Bushcraft Hats/Caps
Bushcraft caps are your everyday go-to. While they might not offer as much protection as other bushcraft hats, caps are lightweight and convenient for temperate weather. They usually have a small brim at the front to shield your eyes from the sun.
Trapper Style Bushcraft Hats
Trapper hats feature side flaps for cold climates that can be tied up to the crown of the hat or lowered to protect the ears, neck, and chin from the cold. Pair them with thermal gloves to beat the chill. Trapper hats are excellent for bushcraft in frigid environments.
Felt Bushcraft Hats
Felt hats are an excellent choice for bushcraft hats due to their durability, water resistance, and thermal properties. Made from tightly matted wool or fur fibers, these hats can retain heat in cold weather and also provide shade during sunny days.
Bucket Style Bushcraft Hats
Bucket hats are ideal for casual adventures. Pair them with lightweight clothing for optimum comfort. Bucket hats or bush hats are similar to boonie hats but with a more casual style. These can be useful for light bushcraft activities.
They offer 360-degree shade and are usually made of cotton or polyester, making them lightweight and easily packable.
BalaclavasBushcraft Hats
Balaclavas offer full-face protection. Use them in tandem with goggles for extreme cold or windy conditions. For extreme cold weather and wind, a balaclava is the best option. Covering most of the face and neck, they offer maximum protection against freezing temperatures.
Oilskin Bushcraft Hats
Oilskin hats repel water. It’s best to combine them with a raincoat for wet outdoor activities. Originally made from sailcloth treated with oils, modern oilskin bushcraft hats are crafted from durable cotton fabric infused with a proprietary blend of oils and waxes, making them water and wind-resistant.
Packable Bushcraft Rain Hats
These hats are lightweight and waterproof, and complement a raincoat and water-resistant boots. For those venturing into wet environments, packable rain hats are a must-have.
Made from waterproof materials like nylon or Gore-Tex, they provide excellent protection from rain and can be easily stowed away when not in use.
Insulated Bushcraft Hats
Insulated hats keep your head warm, which is perfect with thermal wear for snowy adventures. Insulated bushcraft hats, often filled with materials like down or synthetic fibers, offer excellent warmth for bushcraft in frigid temperatures.
Legionnaire Bushcraft Hats
These hats offer neck coverage. Named after the headgear worn by the soldiers of Ancient Rome, Legionnaire hats offer formidable protection from harsh sunlight, making them ideal for bushcraft in sunny and hot climates. Pair them with long sleeves for sun protection.
The hallmark feature of a Legionnaire hat is its distinctive flap that extends down the back, safeguarding the neck from sun exposure.
Leather Bushcraft Hats
Leather hats combine style, durability, and practical weather resistance, making them a go-to choice for many bushcraft practitioners.
With the inherent toughness of leather, these hats are designed to withstand the test of time, enduring exposure to elements and gradually developing a distinct, rugged patina.
Fur Bushcraft Hats
Fur hats offer the ultimate in cold protection. They’re an unrivaled choice when it comes to surviving frigid temperatures. Pair them with a down jacket for Arctic adventures.
Whether lined with real or faux fur, these hats provide maximum insulation, making them indispensable for bushcraft in Arctic conditions or during bitter winters.
Waxed Canvas Bushcraft Hats
Waxed canvas hats are water-resistant and durable, making them perfectly suited for bushcraft in areas prone to rain and snow. These bushcraft hats owe their resilience to the wax finish, which creates a sturdy barrier against moisture, keeping your head dry in damp conditions.
Deerstalker Bushcraft Hat
Deerstalker hats are best-suited for hunting trips, especially when paired with camo gear. This hat is an incredibly versatile piece of headgear, suitable for a wide range of outdoor activities.
It has a double-brimmed design with a projecting visor at both the front and rear, providing ample shield from the sun and rain.
Typically, it’s crafted from heavy-weight or woolen fabric for durability and warmth. A signature feature of the deerstalker is its flexible earflaps, which can be fastened up to the crown or let down to protect the ears during colder climates.
What To Consider When Buying The Best Bushcraft Hats & Caps
Before you invest in a bushcraft hat, consider several key factors. Material and durability top the list, followed by design and functionality. Aside from these two, below are the essential features you need to look for in detail:
Material
The material of your bushcraft hat plays a pivotal role in its durability and comfort. Natural fibers like wool offer breathability. Whether you opt for leather, waxed canvas, or synthetic fabric, it can significantly impact your comfort, protection, and the hat’s longevity.
For instance, a leather hat can withstand years of use, gaining character with time, while a waxed canvas hat offers superior rain resistance, keeping your head dry during unexpected showers.
Also, consider the environment you’ll be in.
For colder climates, a fur or wool hat might be your best bet, providing warmth and insulation.
On the other hand, a lightweight, breathable material like cotton or nylon is suitable for warmer, sunnier locations.
Understanding your needs and matching them to the right material ensures a hat that is both comfortable and functional.
Durability
Durable hats not only last longer but, also maintain their shape and functionality after repeated use.
If you’re navigating through thick, overgrown foliage, and your hat constantly scrapes against branches and twigs, a hat made from a flimsy material won’t last long in these conditions. That’s why durability is a critical factor to consider.
Materials like waxed canvas and leather are known for their robustness and ability to withstand harsh conditions.
So whether you’re hiking up a rocky hill or fording a fast-flowing stream, durable bushcraft hats will stand the test of time.
Breathability
For activities like hiking, opt for breathable fabrics. These include cotton and synthetics. A breathable hat allows for air circulation, helping to evaporate sweat and keep your head cool. Look for bushcraft hats with ventilation features such as mesh panels or ventilation eyelets.
When the going gets hot, a breathable hat will ensure your comfort, letting you enjoy your bushcraft expedition without feeling like you’re in a sauna.
Brim Width
The width of the hat’s brim can affect how much sun and rain protection you get. Wider brims are ideal for desert conditions. They are your best friend in sunny weather.
It shades your face, neck, and even shoulders, reducing the risk of sunburn and heatstroke.
But if you’re traipsing through dense forest or high winds, a hat with a narrower brim or even a cap might be more practical, as it’s less likely to catch on branches or get blown away.
Remember, finding the right balance between protection and practicality is key when choosing the brim width.
Fit and Comfort
Getting the right fit is crucial when buying bushcraft hats as comfort is also essential. Ensure the hat fits well and doesn’t chafe.
Too tight, and it can cause discomfort or headaches. Too loose, and you risk losing your hat to a gust of wind.
Many bushcraft hats come with adjustable straps or bands for a more custom fit. Remember, comfort is king. You want a hat that you can wear for hours without feeling any discomfort.
A well-fitted hat should feel snug but not tight and sit comfortably on your head without sliding down or constricting your forehead.
Design and Functionality
Check if there are ventilation holes for breathability. Also, see if your hat comes with a chin strap to secure it in windy conditions. Another is to check if there’s a neck flap for added sun protection.
For example, a Legionnaire hat, with its distinctive neck flap, offers superior sun protection, making it a suitable choice for bushcraft in intense sunlight.
The design elements of a hat can significantly enhance its usefulness in different conditions and scenarios. Always look for a design that aligns with your needs and the challenges you’ll be facing in the wilderness.
UV Protection
Bushcraft hats aren’t just about style or keeping the rain off; they should also provide UV protection. This is crucial as prolonged exposure to sunlight can lead to sunburn, heat stroke, or even long-term skin damage.
A good bunch of hats out there boast a UPF (Ultraviolet Protection Factor) rating. This number measures the amount of UV radiation that penetrates the fabric.
A hat with a high UPF rating, such as UPF 50, can block 98% of harmful UV rays. Having a hat with UV protection will significantly reduce the risk of sunburn, allowing you to enjoy your adventures without worrying about the harsh sunlight.
Weather Resistance
A waxed canvas or waterproof synthetic hat can keep your head dry during a downpour, while a fur hat provides warmth in icy conditions.
Bushcraft means being out in all sorts of weather conditions — the blazing sun, torrential rain, or heavy snowfall. That’s why bushcraft hats must be weather-resistant.
Consider the weather patterns of your usual outdoor destinations and pick a hat accordingly.
If you’re preparing for an unexpected shower in the wilderness, you’ll appreciate a hat that’s not just water-repellent but also quick-drying.
Weight and Packability
Weight is a crucial factor to consider, especially for longer expeditions. A heavy hat can weigh you down and cause discomfort over time. Materials like nylon are ideal.
You need something lightweight yet sturdy enough to retain its shape after being stuffed into your pack. Bushcraft hats made from lightweight materials like nylon or thin leather can be ideal.
Care and Maintenance
While it might not be the first thing on your mind, the ease of care and maintenance of bushcraft hats is important. Understanding how to care for your bushcraft hat can extend its lifespan. Most hats come with specific care instructions. You don’t want a hat that requires professional cleaning after each trip.
Many hats can simply be wiped clean with a damp cloth or are even machine-washable. And when it comes to maintenance, a little bit of wax can go a long way in preserving a waxed canvas or leather hat.
You want a hat that not only protects you from the elements but also one that doesn’t add to your workload when you return from your adventures.
How-To Guide: Accurately Measuring Your Head for Bushcraft Hats
Getting the right fit is crucial for both comfort and function. Here’s how to measure your head accurately.
1. Gather Your Tools
Start by gathering the tools you’ll need. A flexible measuring tape is crucial. If you don’t have one, a piece of string and a ruler will work just fine.
2. Find Your Head Circumference
Measure your head’s circumference. This will guide you in choosing the right size. Take your measuring tape or string and wrap it around your head where your hat would naturally rest. It’s usually about an inch above your ears and across the mid-forehead.
Hold the tape firmly, but not too tight, you don’t want to leave a mark or skew the measurement. Once you have that number, congratulations, you’ve got your head circumference!
If you used a string, mark the circumference length and then measure the string using a ruler.
3. Refer to a Size Chart
Refer to the brand’s size chart for an accurate fit. Always measure more than once for best results. Most hat makers will provide a sizing chart — use this to find the equivalent hat size for your head circumference.
Remember, hat sizes can vary by brand or style, so always check the size chart for each hat you’re interested in.
4. Consider the Hat’s Material and Adjust Accordingly
Leather or waxed canvas bushcraft hats, for example, may be stiff initially but usually break in and mold to your head shape over time, whereas a knitted wool hat will have a lot of stretch from the get-go. Different materials may stretch or shrink. Adjust your size choice accordingly.
Now, let’s say you find yourself caught between two sizes. The golden rule is to always size up.
A slightly larger hat is better than one that’s too tight, and you can often adjust the fit with hat-sizing tape or a hat band.
FAQs About The Best Bushcraft Hats
Can I wear bushcraft hats in other scenarios beyond wilderness survival?
Absolutely. Bushcraft hats are incredibly versatile. They’re suitable for fishing, hunting, hiking, or simply as protection against the sun during outdoor activities. Some designs are stylish enough to be worn casually.
Are there specific bushcraft hats for winter or summer?
Yes, different designs and materials cater to different weather conditions.
For example, insulated bushcraft hats with a fleece lining are better for winter, while lightweight, breathable hats are ideal for summer. Some hats are built to be versatile for year-round use.
Is it better to have a lighter or darker colored hat?
This can depend on your specific needs. Lighter colored bushcraft hats can reflect more sunlight, keeping your head cooler in hot climates.
Darker bushcraft hats may not reflect light as well, but can often hide dirt and stains better, a practical consideration in the wilderness.
What if my hat gets damaged while in the wilderness?
Some minor repairs might be possible with a needle and thread or some duct tape, which are handy to have in your survival kit.
However, the best way to avoid this situation is to invest in a high-quality, durable hat that can withstand rough conditions.
Selecting the Best Bushcraft Hats & Caps: Key Takeaways
From your hat’s water resistance to its cache cap’s ability to stash away small items, surviving in a survival situation can depend on the headgear you choose.
Whether it’s a cowboy hat, a sun hat, a wide-brimmed hat, or a bent-brim cap, ensure it matches your specific needs and the environmental challenges you’ll encounter in the wilderness.
After all, the best bushcraft hats are the ones that not only looks good on you but also offers protection and comfort for a long time, no matter the weather conditions you face.
Coffee holds a place in our daily rituals, but knowing how to store coffee for long-term storage ensures you never compromise on taste or quality.
Proper storage methods not only maintain the coffee’s freshness but also uphold its integrity and flavor profile. This is especially true if you can’t imagine starting your day without a hot cup of coffee.
In this guide, we’ll talk about how to store coffee long term. We’ll also discuss the factors that affect their shelf-life so you’ll know how to keep your coffee fresh and flavorful for months.
So read on to learn how to ensure a delicious and comforting cup of coffee no matter the situation.
Proper storage secures the full-bodied richness and aroma of your coffee. You need to store coffee in an airtight, opaque container at room temperature (68F – 77F or 20C – 25C) and away from light, heat, and moisture. Store whole beans instead of ground coffee for optimal freshness.
You can freeze it for extended storage, but use vacuum-sealed bags to prevent freezer burn. Consume within 3-6 months for the best flavor.
Importance of Coffee Storage
Overlooking proper storage diminishes the quality of your coffee. Freshness is important to a coffee’s overall taste and aroma. Here’s why:
Preserving Freshness
Storing coffee properly keeps it fresh for a longer period, so you can enjoy the best flavor possible years after harvest. Preserving the freshness of your coffee starts with understanding the role of oxidation. Introduce vacuum-sealing into your storage routine to combat this element-degrading process.
Coffee beans start to lose freshness right after roasting. Grinding coffee accelerates this process. Fresh coffee has a rich, full-bodied flavor, while stale coffee can taste flat and lifeless.
Retaining Flavor
The flavor of coffee is influenced by the oiliness of the beans. These oils, coupled with volatile compounds within the beans, give rise to distinctive tastes and aromas unique to different coffee types.
However, these oils and compounds are very susceptible to degradation over time. Maintaining flavor requires protecting coffee from outside influences.
Oxygen, ever-present, significantly challenges the depth of coffee’s taste. The right storage techniques protect and preserve the coffee’s unique flavor profile.
Maximizing Shelf Life
Coffee can remain fresh and flavorful for up to years, depending on the type of coffee and your storage conditions.
This gives you the option of buying coffee in bulk without worrying about it going stale before you can use it. It also lets you keep “emergency” coffee for years without having it lose freshness.
Does Coffee Go Bad?
Coffee doesn’t “go bad” in the traditional sense, it becomes stale and loses flavor. Monitoring your coffee’s age ensures you’re consuming it at its peak. Knowing the signs of spoilage, like mold and off-smells, helps you avoid health risks.
Signs of stale coffee include a lack of aroma, cardboard-like taste, and an absence of full-bodied flavor. If you notice these signs, it may be time to buy a new batch of coffee.
Shelf Life of Coffee
The shelf life of your coffee varies by form, each requiring distinct storage approaches. From whole beans to instant varieties, let’s explore how each fares over time.
Here’s a breakdown of the shelf life for different types of coffee:
Whole Coffee Beans
Whole coffee beans have a longer shelf life than ground coffee, lasting two to four weeks after opening. It can also last anywhere from six months to a year when unopened. Investing in nitrogen-flushed bags can extend this period even further.
The protective shell of the coffee bean helps to preserve the oils and flavors inside. But how long can you store coffee beans? They can last up to twelve months when stored well. And an opened bag can last for up to one wee
Ground Coffee
Ground coffee has a short shelf life compared to other types of coffee. This is because it has more surface area than whole beans, making them more exposed to the elements.
But you can keep ground coffee fresh for months when stored properly. Its typical shelf-life lasts between five months when unopened and one and two weeks when opened. The best way to store ground coffee? Just place it on a pantry shelf and use opaque, airtight containers.
Also, a tip for storing ground coffee: Buy only enough for one week, store the rest, and finish opened packs within a week. That will give you enough ground coffee before it can go stale after opening.
Instant Coffee
Instant coffee has a longer shelf life than other types of coffee. It lasts between a year and 10 years after opening the package or 10 to 20 years if left unopened.
The freeze-drying process used to create instant coffee removes most of the moisture. This makes it less susceptible to degradation over time. Keep it away from moisture to ensure it lives up to its promise of quick, hassle-free brews.
Fresh (Green) Coffee Beans
Fresh or green coffee beans have the longest shelf life of any coffee other than instant coffee. It lasts between six months and a year after harvest. Cold storage, as low as 50°F, can provide a long-term solution for them.
Green beans have a more stable natural oil than roasted coffee. And the stability of those compounds makes them better suited for long-term storage.
Factors Affecting Coffee Storage
When storing coffee, several factors can affect its freshness, flavor, and quality. Understanding these factors can help keep your coffee fresh and flavorful.
Temperature
Temperature fluctuations are one of the most critical factors in coffee storage.
Extreme temperatures can impact the flavor of your coffee.
High temperatures can cause coffee beans to lose their flavor and aroma.
Cold temperatures can cause moisture to form on the beans, leading to staleness and mold.
(68F – 77F or 20C – 25C) is best
Light
Direct sunlight causes coffee beans to lose flavor and aroma, resulting in poor-quality coffee.
Humidity
Excess moisture can cause coffee beans to become moldy and stale. Using desiccants offers an effective solution for this problem. That’s why it’s important to keep your coffee in opaque containers and in a dry place to prevent these issues.
Air Exposure
Air, or more precisely, oxygen, is coffee’s natural enemy in long-term storage. Oxygen absorbers are therefore a valuable tool in your coffee-storing toolkit. Constant exposure to air can cause coffee to oxidize, resulting in stale coffee.
How To Keep Coffee for Long-Term Storage
Keeping coffee for long-term storage includes different methods which have their merits and drawbacks. Here are some ways to keep your coffee fresh for long-term storage.
Freezing Coffee
Storing coffee beans in a freezer is a hotly debated topic because frost might compromise the coffee’s quality. However, it can be an effective way to preserve the freshness of coffee beans. If you buy coffee in bulk, consider freezing some to extend its shelf life. Ensure you limit exposure to external odors, as coffee is highly absorbent.
Pros and Cons of Freezing Coffee
Knowing the pros and cons of freezing coffee aids in making an informed decision. While it extends life, it can also alter taste if done incorrectly.
Pros
Freezing can slow down the oxidation process. This preserves the freshness of your coffee beans.
Since freezing can preserve the freshness of coffee, it also extends its shelf-life.
Cons
Freezing and thawing process can introduce moisture to the coffee beans. This can affect the taste and aroma of your coffee.
Coffee beans absorb freezer odors altering the coffee’s taste and flavor.
Make sure to allow the coffee to come to room temperature before brewing. This prevents condensation from forming and ruining the flavor.
Using Air-Tight Containers
Use airtight, opaque coffee storage containers. Glass or ceramic options are preferable over plastic. These will protect your coffee from light, air, and moisture, ensuring it remains fresh and flavorful.
These will also prevent oxidation, which can cause your coffee to lose its flavor and aroma. Also, when opening it, minimize the amount of time the container is open.
Vacuum Sealing
Vacuum-sealed containers work by minimizing air exposure, which helps keep your coffee fresh and flavorful for a longer period. This removes most of the air in the container, which can prolong the shelf life of your coffee. It pairs well with other methods like freezing or the use of oxygen absorbers.
Using Oxygen Absorbers
Using oxygen absorbers in tandem with other methods elevates your coffee storage game. By reducing the amount of oxygen in the container, you prevent oxidation from occurring, which can cause your coffee to lose its flavor and aroma. They are particularly useful when combined with vacuum-sealing.
Mylar Bags with Oxygen Absorbers
Mylar bags are airtight and opaque, providing excellent protection against light, air, and moisture. Combined with oxygen absorbers, they are arguably the most effective way to store coffee long-term.
The oxygen absorbers remove most of the oxygen from the bag, which helps prevent oxidation and maintain the freshness of your coffee. This method is ideal for those who buy in bulk and seek long-term options.
Nitrogen-flushed coffee is a newer storage method that involves replacing the air in a coffee bag with nitrogen gas. This process helps prevent oxidation and maintain the freshness of coffee.
These are a commercial but accessible solution for prolonged shelf life. They are especially suitable for whole coffee beans.
Nitrogen-flushed coffee can have a longer shelf life than other storage methods, making it a great choice for those who want to buy coffee in bulk.
FAQs About Storing Coffee Long Term
Can I store my coffee in the refrigerator?
Storing coffee in the refrigerator is not recommended. It can introduce moisture and odors that can negatively affect the flavor of your coffee. A cool, dry pantry or cupboard is a better storage option.
Is it better to store coffee in the original packaging or transfer it to a different container?
When opened, transfer your coffee to an airtight, opaque container. Higher-quality coffee bags may include a built-in seal and a one-way valve. If you don’t have a container, those can work.
Can I store different types of coffee together?
It’s best to store different types of coffee to avoid mixing flavors. Combining different coffees in one container can alter the taste of your coffee. Keep flavored coffee separate from unflavored coffee to prevent the transfer of flavors.
Key Takeaways On Storing Coffee
If you’re like me, there’s nothing better than a hot cup of coffee while sitting next to a fire on a crisp autumn morning.
Storing coffee properly is not just about ensuring longevity but preserving that rich, aromatic experience cup after cup. Mastering the art of coffee storage ensures a delightful coffee experience every time. Whether it’s the use of air-tight containers or grasping the significant role of oxygen, each strategy is indispensable.
Pro Tip: Pack some of your coffee in smaller containers or bags to be used for barter should SHTF.
So how do you store coffee long term? Share your thoughts in the comments below.