The best survival flashlights are more than just a source of light, they are your lifeline in challenging situations.
They’re essential in situations like being deep in the wilderness or faced with a sudden power outage, and then darkness starts to close in. It’s a situation that becomes even more terrifying when you realize you don’t have a flashlight to guide you.
In such moments, high-quality survival flashlights can make all the difference between safety and disaster.
Don’t leave yourself vulnerable to the unexpected. Equip yourself with the right survival flashlights for every scenario.
Whether you’re assembling a bug-out bag or upgrading your everyday carry, we’ve compiled a list of the top 25 survival flashlights for 2023 that cater to EDC and tactical use.
Don’t wait until it’s too late — secure your safety now and face the unknown confidently.
Understanding why you need a survival flashlight is the first step in making an informed purchase that goes beyond the basic need for illumination, it’s about ensuring your personal safety.
Illumination
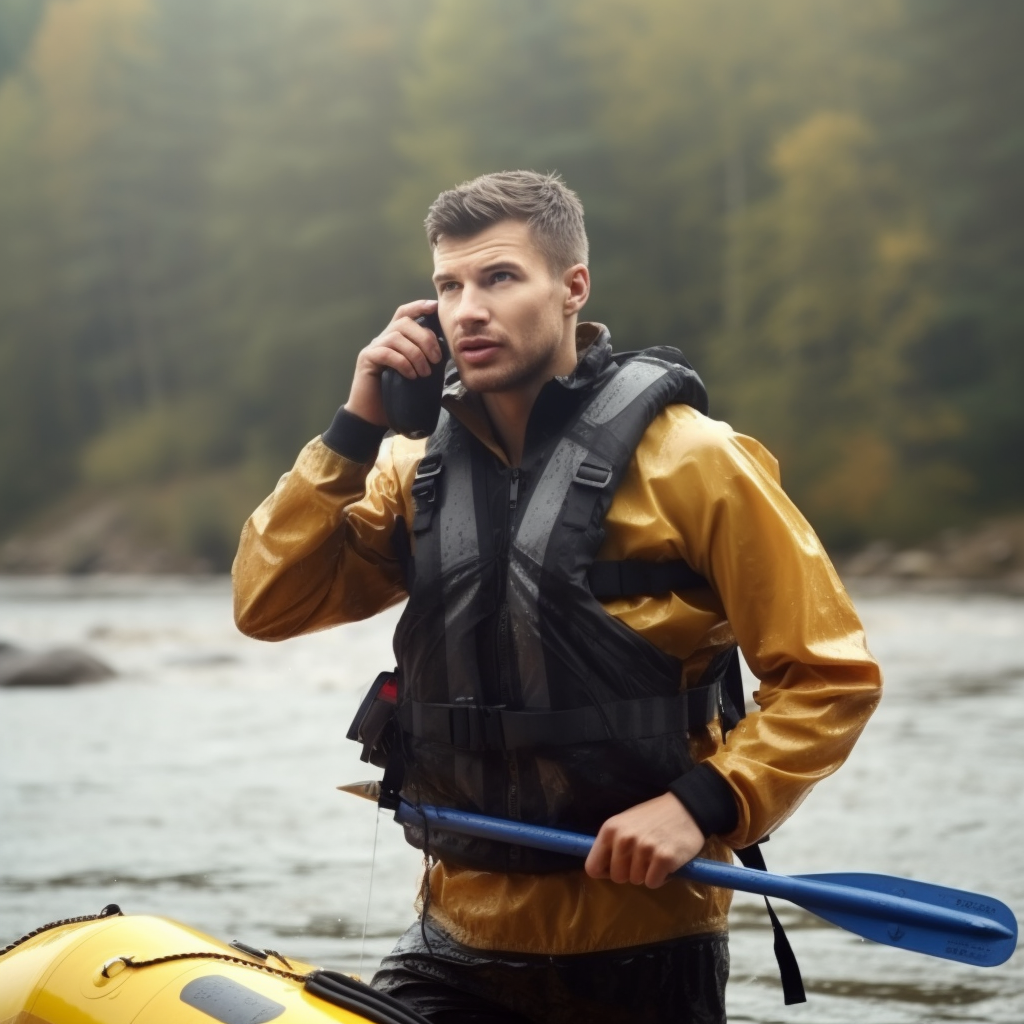
Your flashlight can not only light your path when darkness arises, but it can serve as a self-defense tool when needed. Look for models that have a strobe light feature for disorienting potential threats.
Flashlights are helpful when camping, hiking, or backpacking, and when it suddenly gets dark. They can help you see where you’re going, avoid any hazards, and even signal for help if needed.
Self-defense
High-lumen survival flashlights or models with a strobe function can temporarily blind or disorient potential attackers, giving you precious time to escape or defend yourself. Plus, some have a tactical bezel for striking an attacker if necessary.
Signaling and Communication
Signaling and communication are vital in rescue scenarios and your flashlight could become your savior. Features like SOS modes can be lifesaving in emergency situations. Ever heard of Morse code? With a flashlight, you can communicate and send messages or even signal for help when you’re lost.
For example, you can use the SOS signal (three short flashes, followed by three long flashes, and then three short flashes) to alert rescuers to your location.
Fire-Starting
Fire-starting capabilities can transform your flashlight from a light source to a survival tool. Look for units with a built-in fire starter for ultimate utility.
If you’re ever in a situation where you need to start a fire, some survival flashlights come with built-in fire starters. Talk about handy for keeping warm, cooking, or signaling.
Emergency Tool
An emergency tool feature can make your flashlight a multifunctional lifesaver. This can include a glass breaker, seatbelt cutter, or even a compass, making them incredibly useful in emergencies like car accidents or natural disasters.
Durability and Reliability
Durability and reliability go hand-in-hand when considering your flashlight purchase, be sure your choice is both water-resistant and shockproof.
Some of the best survival flashlights are designed to withstand harsh conditions, made from durable materials like aircraft-grade aluminum and featuring water-resistant or waterproof capabilities.
They’re designed to work when you need them most.
Versatility
A versatile flashlight allows your flashlight to serve multiple functions beyond just illumination. Consider models that offer different light modes and additional features like a laser pointer. With multiple modes like high, low, and strobe, you can adapt to different situations, save battery life, or signal for help.
Buyers Guide: What To Consider Before Buying Survival Flashlights
Our survival flashlight buyer’s guide is designed to walk you through the key considerations for your purchase. This ranges from size and weight to additional features like USB charging. When searching for the perfect EDC survival flashlights, keep these key factors in mind:
Size and Weight
Size and weight are crucial factors for portability. Smaller flashlights are easier to carry but may compromise on features. Look for a compact and lightweight flashlight that easily fits in your pocket, purse, or bag without being too bulky or heavy.
Durability
Durability should be at the top of your list when selecting survival flashlights. Opt for a flashlight made from sturdy materials like aircraft-grade aluminum or stainless steel, and ensure it has a water-resistant and shockproof design to withstand harsh conditions.
Brightness and Adjustability
The number of lumens (brightness) and adjustability are key features that contribute to a flashlight’s effectiveness. Check for options that allow you to switch between high, medium, and low settings. Consider the flashlight’s lumens and select one with adjustable brightness levels, so you can adapt the light to different situations and conserve battery life when needed.
Battery Life and Type
Battery life and type can significantly affect how long your flashlight remains useful. Options like solar charging can provide an extra layer of reliability. Check the flashlight’s battery type and life, such as rechargeable or disposable batteries.
Longer battery life is ideal for emergency situations, and rechargeable batteries can be more cost-effective in the long run.
Additional Features
Additional features can turn a basic flashlight into a multi-purpose tool. Keep an eye out for built-in radios, solar panels, or even emergency sirens. Look for extra features like a strobe or SOS mode for emergencies, a zoomable focus for adjusting the beam distance, and a built-in clip for easy attachment to your belt or bag.
Now that you know what to look for, lets check out some of the best survival flashlights.
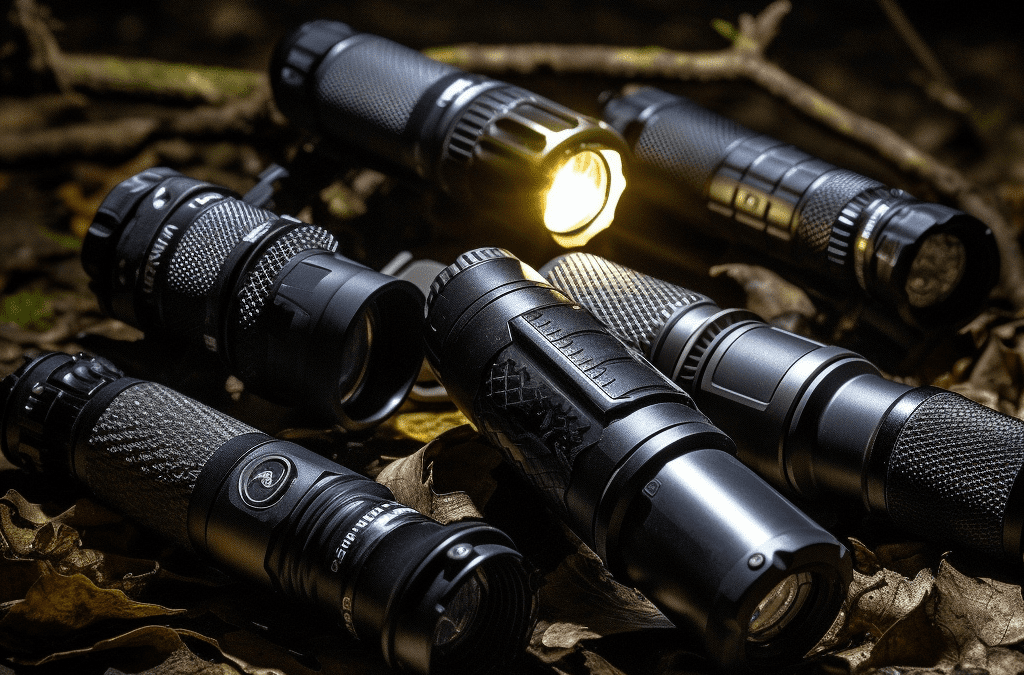
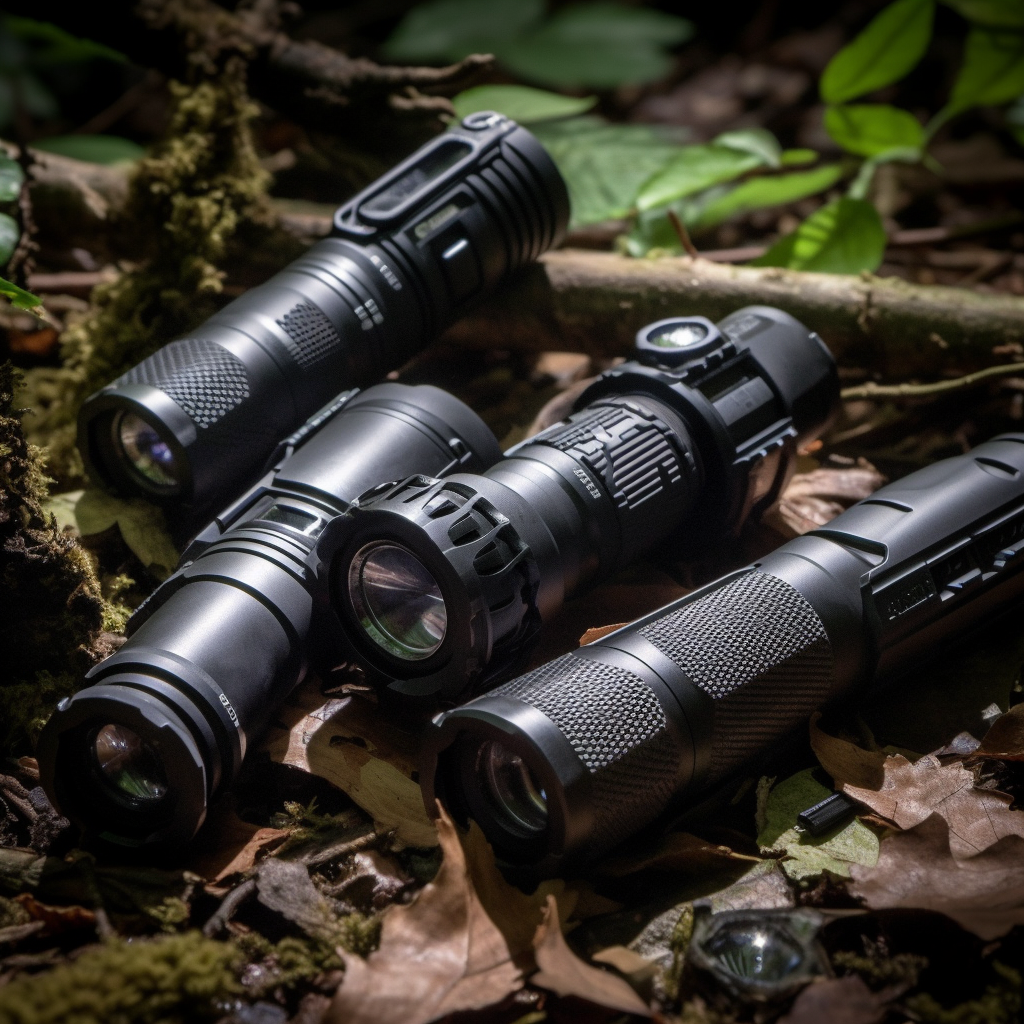
25 Best Survival Flashlights For 2023 EDC & TacticalUse
If you’re planning to be prepared, you’ll want to invest in survival flashlights that rank among the top 25 in both EDC and tactical use. Here are the best ones available on the market:
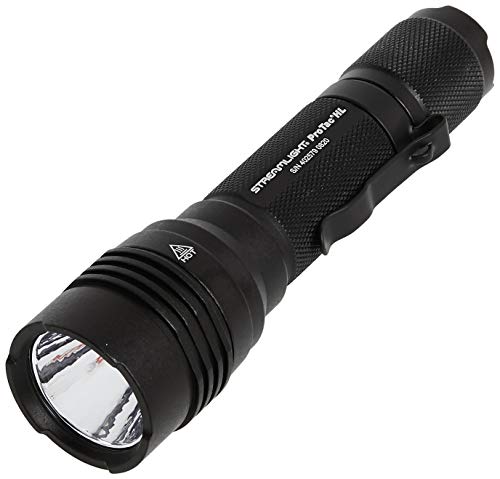
This Streamlight flashlight offers custom-engineered optics for a focused beam and optimized peripheral illumination, with a multi-function switch for various modes.
Its durable aluminum construction and comfortable grip make it perfect for users who need a powerful 1,100-lumen light that reaches up to 510 meters.
Keep up in the dark with a flashlight that offers a solid build, blinding brightness, and compact size.
The GearLight High-powered LED Flashlight features an ultra-wide beam, long battery life, adjustable zoom, multiple lighting modes along with water-resistant durability.
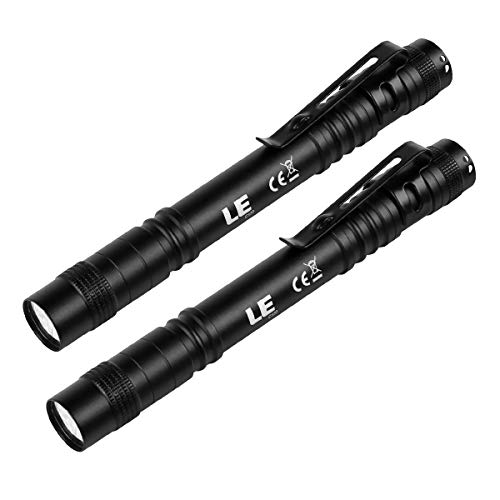
The LED pocket pen is the perfect pocket flashlight for indoor and outdoor activities. Easily slip it into your pocket or bag, and you won’t even notice it’s there.
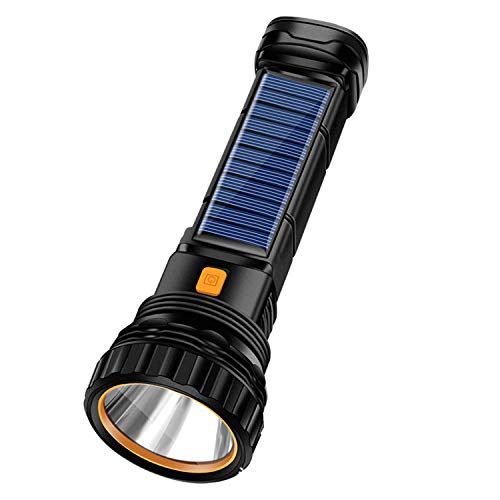
This multi-functional flashlight also acts as a power bank, providing emergency power for your smartphone. It’s perfect for home, outdoor activities, and emergencies.
Need a reliable light source for any situation? The Vont LED Tactical Flashlight boasts a non-slip grip, smart dual-mode illumination and lightweight indestructible construction.
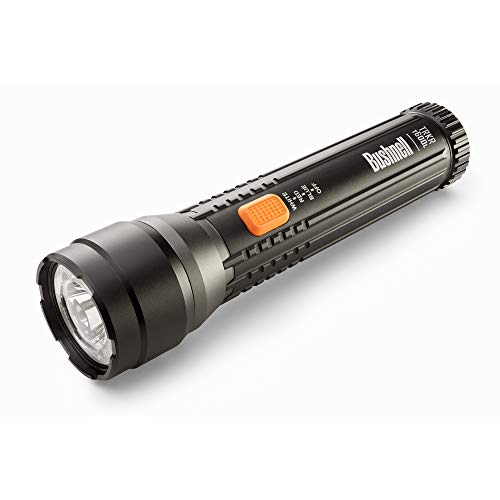
A flashlight from one of the world’s leading battery brands. The Energizer LED Spotlight is a durable, 600-lumen work light with a 425-meter beam, perfect for professionals and outdoor enthusiasts.
Plus, it’s impact-resistant, water-resistant and includes a hands-free option.
Illuminate your surroundings effortlessly with the GearLight S2000. Its rugged construction ensures it can handle any situation, making it a reliable companion wherever you go.
Ideal for outdoor adventures and emergencies, it’s both durable and portable.
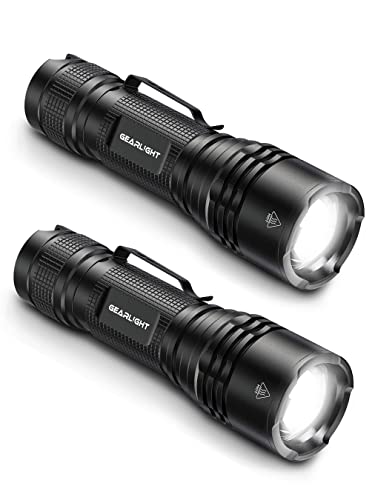
The GearLight TAC LED flashlight is a compact yet powerful light source, small enough for everyday carry and durable enough to withstand tough conditions.
This versatile flashlight set includes two TAC flashlights and essential accessories. Plus, it features two zoom modes. It’s perfect for camping, emergencies, and daily use.
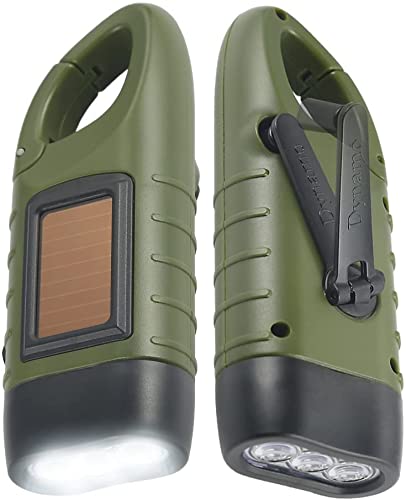
The Simpeak Hand Crank and Solar Flashlight offer versatile emergency lighting with its minute-long cranking for 10 minutes of light and solar panel for backup power.
Its rugged design and built-in carabiner make it perfect for outdoor activities and on-the-go emergencies.
Experience top-notch quality and durability with this weather-resistant flashlight. It features an anodized design and a powerful projecting beam perfect for camping, climbing, fishing, and hunting.
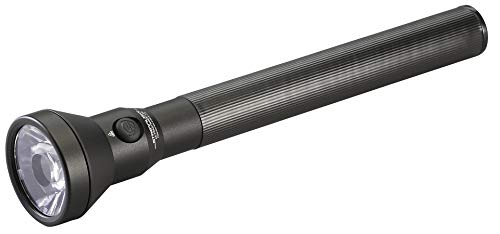
Designed for professionals and consumers, MagLite LED flashlights showcase exceptional craftsmanship, engineering, and advanced technology.
The BolDuck 180,000 Lumens Super Bright Flashlight comes equipped with an upgraded LED chip and features a zoomable design with six lighting modes, including spotlight and floodlight options.
This rechargeable flashlight is IPX7 waterproof and perfect for various activities such as camping, hiking, and emergencies while also serving as a power bank for your devices.
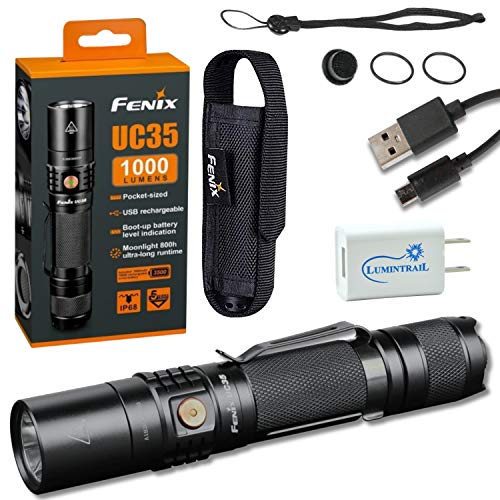
A compact and tactical flashlight with micro USB charging, the Fenix UC35 is capable of producing up to 1000 lumens and reaching 872 feet.
Its durable aluminum body and multiple output modes, including strobe, make it an excellent choice for military, policing, outdoor lighting, and emergencies.
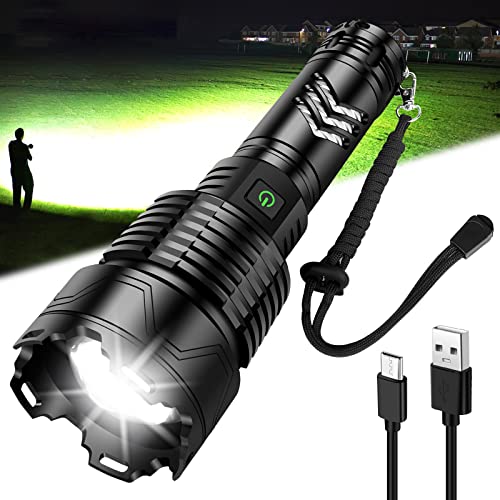
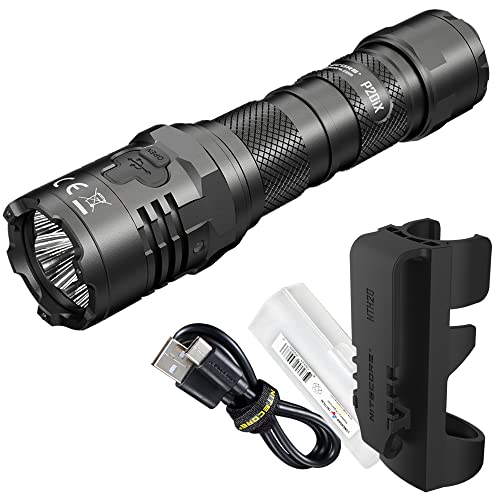
This high-lumen tactical flashlight boasts 4000 lumens, four brightness levels, and a glass-breaking bezel for emergencies.
With USB-C fast charging, strobe-ready functionality, and waterproof rating, this flashlight is perfect for high-intensity tactical operations and comes with a compatible NTH20 tactical holster.
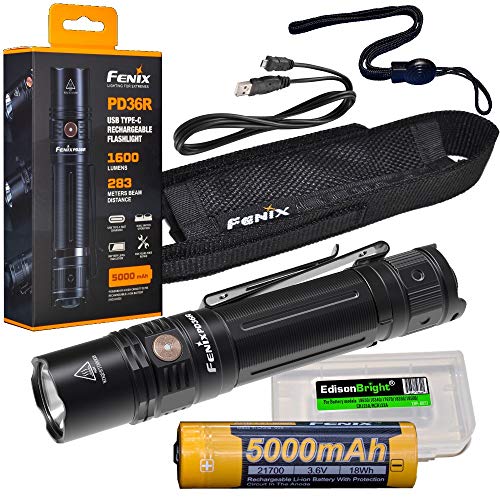
This Fenix flashlight is super bright at 3000 lumens and reaches up to 442 yards, perfect for pros and outdoor enthusiasts. With USB-C fast charging and a compact design, you can easily switch between four brightness modes and strobe.
It’s the ideal buddy for camping, hiking, and more.
This awesome flashlight features three lighting modes, offering up to 800 lumens and a 310-meter beam for max brightness.
It’s got a dual-switch tech, a rechargeable battery, and a sleek aircraft aluminum body. It’ll last you long and it’s versatile to use for all your adventures!
This helmet flashlight offers 115 lumens, a bright blue tail light LED, and an easy-to-use on/ off switch.
It conveniently rotates 360 degrees, clamps securely to your helmet, and is perfect for those who need reliable hands-free lighting in high-pressure situations.
The ultra-compact Aviator flashlight features a bright primary white and secondary colored LED in one sealed head, with a self-locking selector ring for easy switching between the two.
It comes in a durable, aerospace aluminum construction, so it’ll last long. It also features a dual-output tail cap click switch, making it a versatile and reliable choice for various lighting needs.
FAQs About Survival Flashlights
What kind of survival flashlights are the best?
Choosing the best survival flashlights really depends on your needs, but you can’t go wrong with one that’s durable, versatile, and bright with multiple modes.
How bright should survival flashlights be?
Survival flashlights should ideally be at least 200 lumens bright. This is because, in a survival situation, you’ll need enough light to navigate dark environments, avoid potential hazards, and even signal for help if necessary.
A brighter flashlight can also serve as a self-defense tool, temporarily disorienting potential threats.
What kind of flashlight is the most sustainable?
The most sustainable flashlights are those with rechargeable batteries, like the ones using solar power or USB charging.
These types of flashlights help reduce waste by eliminating the need for disposable batteries, making them a more environmentally friendly and cost-effective option in the long run.
Key Takeaways of the Best Survival Flashlights
As you face the uncertainties of the world around you, having reliable survival flashlights in your arsenal is crucial.
Imagine being stranded during a power outage or natural disaster, with only the light of your trusty survival flashlight guiding you to safety.
Or picture yourself in a car accident, using the built-in emergency tools to escape and save lives. These are the moments when a high-quality, versatile flashlight becomes invaluable.
Don’t wait until it’s too late to invest in a flashlight that offers durability, reliability, and versatility for your survival needs. Arm yourself with the confidence and security that comes with being prepared for any situation that comes your way.
Remember, the light you choose today could be the beacon of hope that illuminates the path to safety tomorrow.
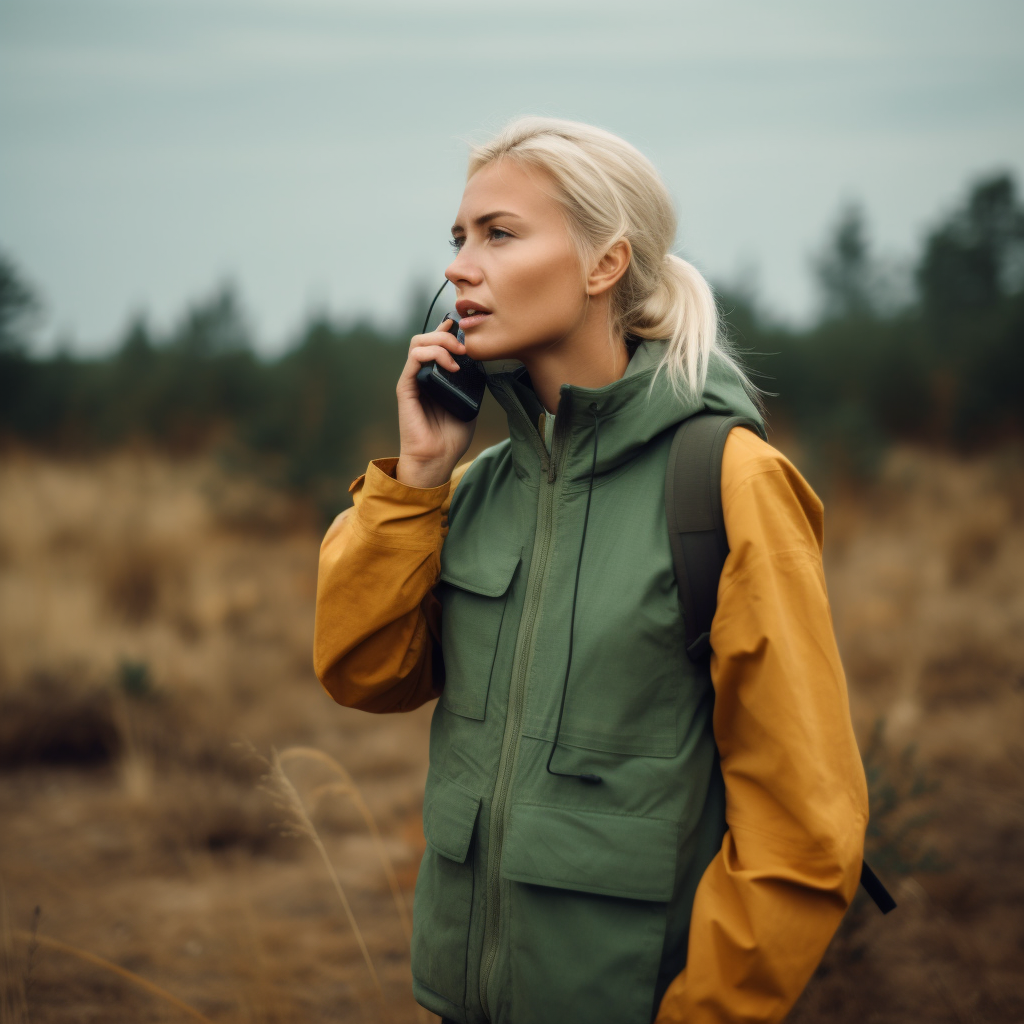
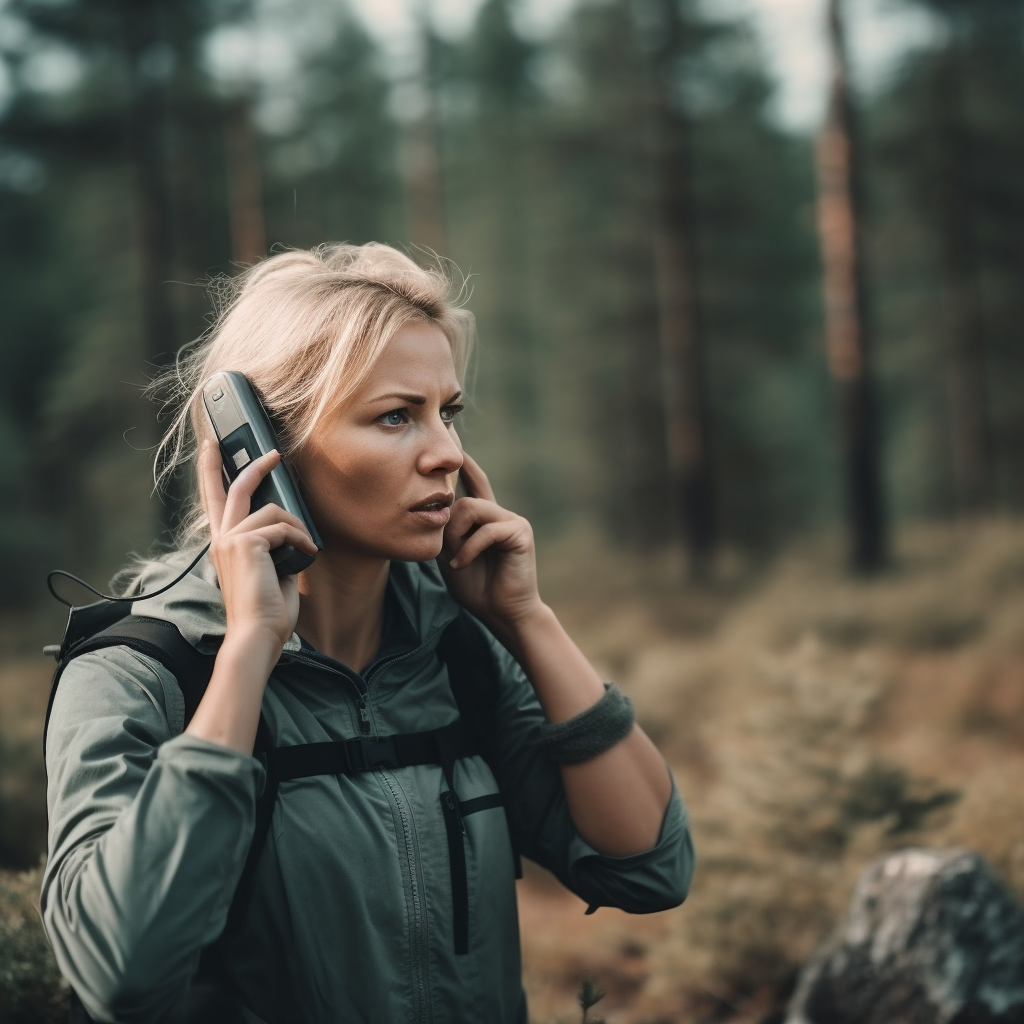
Picture yourself deep in the wilderness, miles away from civilization, and suddenly find yourself in a life-or-death situation. Your heart races as you realize your phone has no signal.
These situations make you wish you had a survival walkie-talkie on hand.
A reliable walkie-talkie is a non-negotiable addition to your survival kit. Professional guides and experienced adventurers know all too well the value of a good walkie-talkie.
They also provide access to vital weather updates and a lifeline to emergency services when you need them most.
In a world of uncertainty, having a reliable survival walkie-talkie by your side can make all the difference in staying connected and safe during emergencies.
But with so many options available, how do you choose which is right for you?
Fear not! We’ve done the research and compiled a list of the top 10 walkie-talkies that will keep you connected with your group when it matters most.
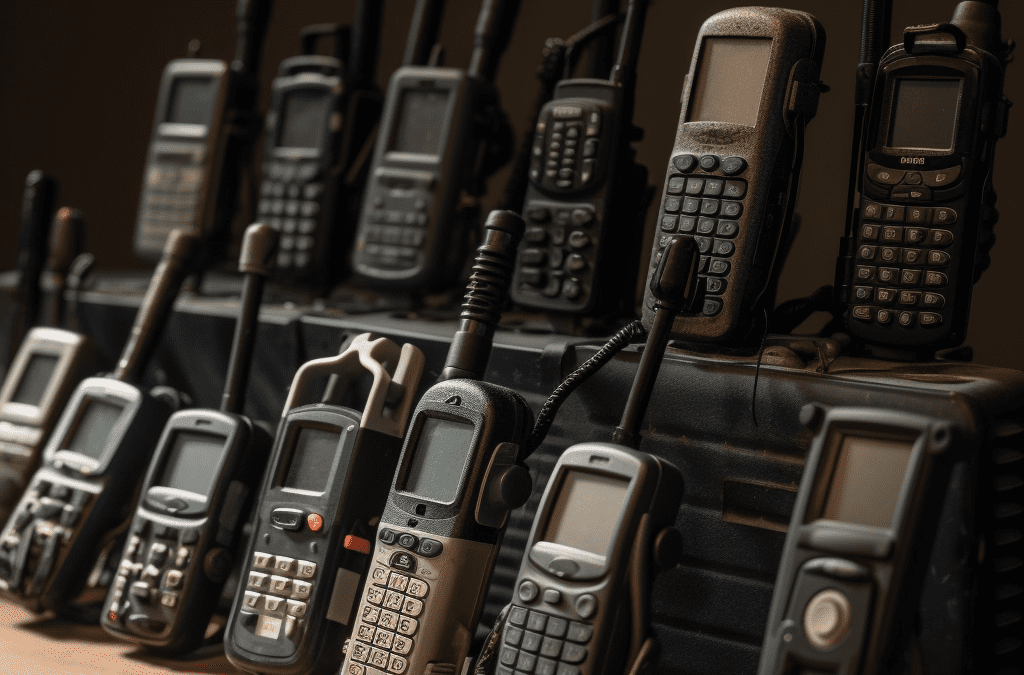
Our Top Picks For The Best Survival Walkie Talkies For Preppers
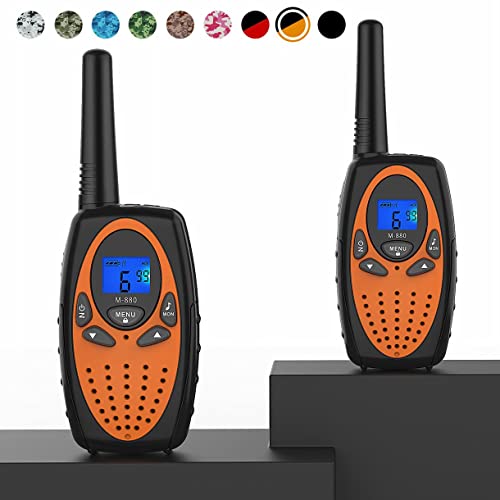
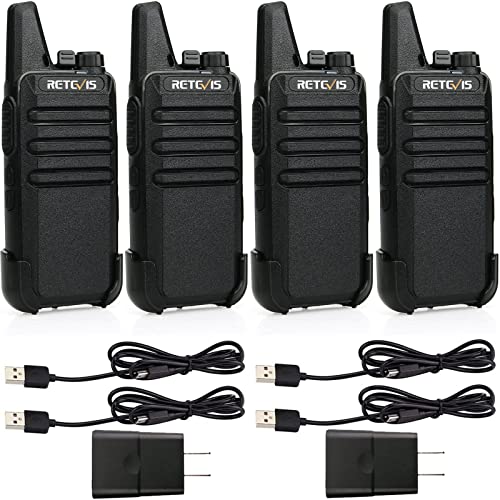
Topsung M880 walkie talkies are built to keep you connected when it matters most. Boasting 22 main channels and 121 privacy codes, these walkie talkies offer an impressive range of up to 1/4/16 miles so you’re never out of touch.
With a standby time of 3-4 days on just 3 AA batteries, these lightweight, palm-sized devices (2.9 oz) are packed with advanced features.
It has hands-free function (VOX), keypad lock, LCD screen with backlight, belt clip, earpiece jack, adjustable power, and volume, and durable, eco-friendly materials (ABS).
As icing on the cake, it also comes with the latest FCC certification and a 30-day replacement guarantee — a lot of bang for your buck.
When it comes to cheap yet quality handheld amateur radios, Baofeng is a household name. This Baofeng walkie talkie is designed for reliability and convenience.
Featuring a 1500mAh rechargeable battery, you can continuously use it for all day, with 2-4 days of regular operation and 5-7 days of standby time. You can also charge it easily with options like power banks, PC chargers, or car chargers.
With 16 pre-programmed channels, each offering 50 CTCSS and 105 DCS tunes for private communication, these walkie talkies are perfect for any situation, even in challenging terrains.
The lightweight, slim design is ready to use right out of the box, and the package includes all the accessories you’ll need. Although the quality might not rival high-end models, you’ll get more than what you paid for at just $30.
Rest assured, these walkie talkies have passed the FCC certification and come with a 30-day money-back guarantee, a 12-month warranty, and 24/7 email support.
If you’re looking for a pocket-sized walkie talkie with a lightweight build at an affordable price point, consider these on for size. It’s as thin as a cellphone, making it easy to carry, perfect for long adventures.
It has a unique belt clip design for quick removal and installation. The VOX hands-free function keeps your hands available for other tasks.
There’s also USB charging, fast charging, automatic power-saving, and low battery reminders.
Ideal for commercial events and outdoor activities, the RT22 is a practical addition to your emergency kit, taking up minimal space while leaving room for other essential items.
Their size takes up very little space in your emergency kits, leaving more room for other important items you might otherwise not be able to take with you.
This is an affordable, full-featured radio that provides excellent sound quality and range. It’s definitely not a toy, but it won’t break the bank either.
If you’re on a budget but still need a walkie talkie that delivers, this is the one for you. You’ll be surprised by its price and array of features in this little device.
The MOICO Long Range Walkie Talkie has an amazing 5-mile range in open fields and a decent 1.2-mile maximum range in urban areas. That should be enough to talk to your friends and family if you’re not looking to stray too far apart.
What sets this walkie talkie apart is its 22 FRS channels and 99 sets of CTCSS tones, providing a whopping 2,178 combinations to ensure your conversations remain private. That’s a lot of privacy for such an affordable device!
There’s also a one-to-one or one-to-more communication function that allows multiple walkie talkies to communicate on the same channel. It also comes with VOX-Hands Free Function, with three sensitivity levels for hands-free operation.
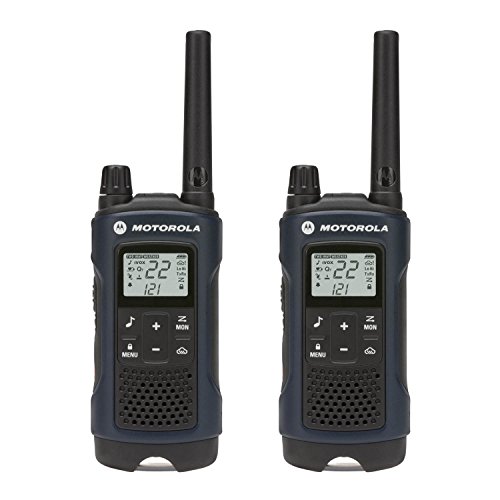
The T460 walkie talkie boasts an impressive 35-mile mountain-to-valley and an impressive 2-mile urban neighborhood range.
Real-life ranges will depend on how much obstruction or interference is around, but it’s nice to have that three-mile potential.
The real-time weather updates via the weather channel and weather alerts are great at preparing you for all weather scenarios. It also has 22 channels and 121 privacy codes, so finding an available channel should be a breeze.
The iVOX/VOX function serves as a speakerphone, allowing hands-free communication in any scenario. Powered by NiMH rechargeable batteries, you can enjoy around 8.5 hours of use or simply pop in 3 AA batteries for up to 21 hours on the move.
The built-in LED flashlight is a thoughtful addition, coming in handy when navigating in the dark.
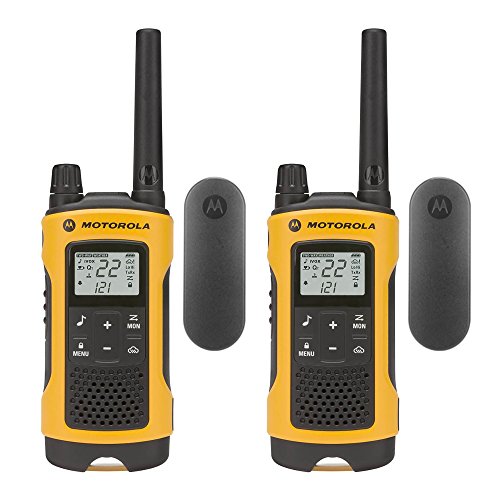
With 22 channels, 121 privacy codes, and 2,662 combinations, you’ll easily find an available channel for clear communication. This walkie talkie features a communication range of up to 35 miles. But that depends on terrain and conditions.
The weatherproof IP54 rating and built-in flashlight ensure peace of mind during evening adventures, emergencies, or power outages.
Stay updated as this radio provides 11 weather channels, including seven NOAA channels. Additional features include 20 call tones, a keypad lock, a talk confirmation tone, a low battery alert, and an eco-smart design for less power consumption.
It’s also compatible with other FRS/ GMRS (General Mobile Radio Service) radios and powered by dual power options.
If you’re looking for a radio that lets you access all 40 CB radio channels, stay informed about road conditions, and receive NOAA weather alerts with crystal-clear communication, this is the one for you.
You can get improved CB radio transmission and reception with the Soundtracker System, which filters through 90% of noise and optimizes signal transfer.
It also features a built-in NOAA Weather Radio Channel that helps you stay prepared with 24-hour updates on weather, emergencies, and hazards.
You can also monitor two pre-selected channels simultaneously with its Dual Watch feature. And with just one press, you can enjoy full coverage, accessing up to 40 CB radio channels.
The easy-to-use, illuminated multifunctional display ensures visibility in any lighting condition, while the handheld design makes it perfect for on-the-go adventures.
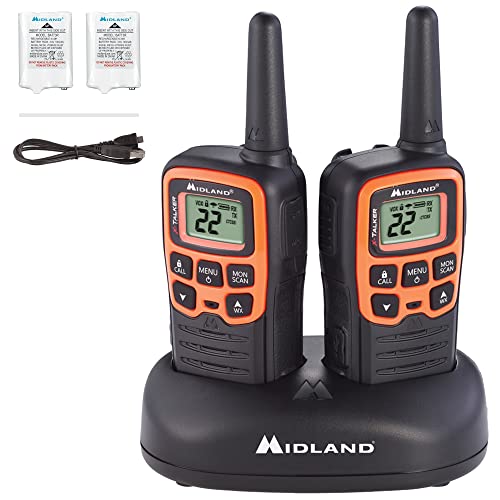
This walkie talkie is your lifeline, providing license-free communication up to 28 miles away. With 22 FRS channels, 38 privacy codes, and crystal-clear sound quality, you’ll know your messages are heard and understood, no matter the situation.
The 38 CTCSS privacy codes offer up to 836 channel options, blocking unwanted eavesdroppers and ensuring your private conversations remain just that – private.
It also ensures long-range communication with minimal obstructions, so you can stay connected and feel secure.
The package comes with belt clips, rechargeable battery packs, a desktop charger, and a micro USB charging cable – everything you need for easy transport and charging on the go or during daily use.
And with compatibility across all Midland FRS walkie-talkies and accessories, this walkie talkie is a versatile choice for any communication scenario.
I only wish that it could last longer. It only has a 10-hour battery life which is unsuitable for emergencies.
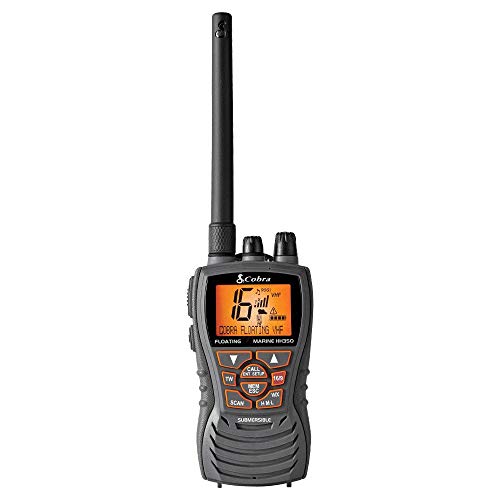
If you’re ever out on a marine adventure and your trusty radio happens to slip out of your hands and into the depths below, don’t worry—this one’s made to float and is here to save the day!
With its vibrant orange core, it’s easy to spot and retrieve, averting potential disaster. And with an impressive 6 watts of power, you’ll experience extended range communications, ensuring you can stay connected even in the most remote locations.
It has full access to NOAA weather channels, emergency alarms, and a JIS7/IPX7-rated submersible design. The noise-canceling microphone cuts through background noise, providing crystal-clear conversations.
Plus, this radio has you covered, whether navigating the waters of the USA, Canada, or international seas, providing maximum coverage to keep you connected and secure.
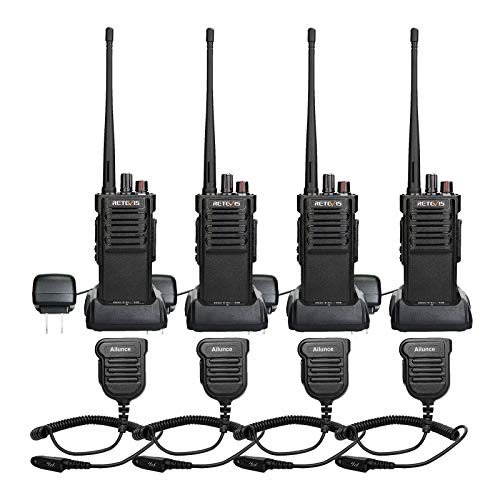
In a bustling hotel, retail store, or restaurant, where efficient communication is key to success, this radio emerges as the ultimate tool to keep your team connected and coordinated. It’s ideal for use in these demanding on-site applications.
It offers an impressive 25-floor range, with 22 preset channels with privacy codes for minimal interference.
Built tough, the DXFRS800 is shock-resistant and can withstand a 2-meter drop. Its anti-slip design guarantees secure handling, while the LCD keeps you informed of the radio’s status so you’re always in control.
With 18 hours of run-time, these radios are ready to keep up. The hands-free VOX operation allows your team to stay productive, while vibration alerts and auto squelch ensure that you won’t miss any crucial messages amidst the hustle and bustle.
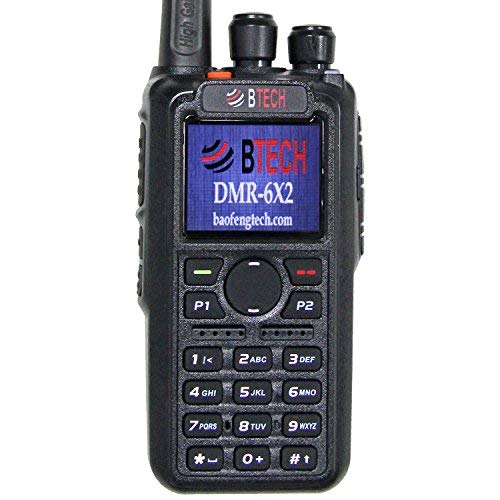
With storage for an astounding 4,000 channels, 10,000 talk groups, and 200,000 contacts, you’ll never feel lost or disconnected.
The DMR-6X2’s built-in GPS, audio recorder, and backward compatibility with BTECH and Nagoya SMA-Female antennas and previous BTECH accessories make it a versatile and reliable tool for any task.
With this walkie talkie, you can stay ahead with upgradeable firmware and radio that supports various channel configurations. The ‘Digital Monitor’ feature even allows you to keep an eye on all available DMR traffic on your current channel.
Additional highlights like simple text messaging, imperial GPS display, and easy talk group access further enhance your communication capabilities. Plus, the radio’s support for various analog modes makes it adaptable to a wide range of situations.
And with a battery life of up to 35 hours on a single charge, you can trust this walkie talkie to be there for you through the most demanding circumstances.
This high-power, long-range walkie talkie is built precisely for working in a demanding environment like construction sites or large-scale events.
With an impressive battery life of over 24 hours, you can count on this walkie talkie to last throughout your adventure. Its VOX-ready, emergency alarms and 50 non-standard CTCSS and 232 DCS codes ensure your team stays connected and protected.
Rain or shine, the IP67 waterproof speaker mic delivers clear and loud audio, while the rugged and durable body can withstand shocks, vibrations, and multiple 2-meter drops.
The IP67 waterproof speaker mic ensures clear and loud audio even in harsh weather conditions, while the rugged and durable body can withstand shocks, vibrations, and multiple two-meter drops.
These radios are specifically designed for large commercial environments and may not directly connect to other radio brands. However, if needed, you can contact the company for firmware assistance to ensure seamless integration.
I Already Have A Smartphone…
When phone signals fail, such as natural disasters, terror attacks, or nuclear fallout, your phone is as good as a paperweight. This is where survival walkie-talkies become indispensable.
Smartphones may be convenient, but their reliability can falter in extreme situations. As a survivalist, it’s important to have a backup communication method like a walkie-talkie.
Their radio signal-based operation doesn’t depend on mobile networks. This should give you uninterrupted communication in the most challenging circumstances.
With a frequency range reaching up to 12 km or more and the ability to connect to over 22 channels, survival walkie-talkies are perfect for emergencies.
Don’t leave your safety to chance — invest in a reliable walkie-talkie for your survival tool kit.
What Is A Walkie Talkie?
A walkie-talkie, also known as a two-way radio, is a handheld communication device that allows you to talk to others over radio frequencies without relying on cell networks.
It’s a push-to-talk device, meaning you can’t speak and listen simultaneously. Walkie-talkies have been around for decades, we used to use them all the time as toys when we were kids.
But they’ve become popular among outdoor enthusiasts, event organizers, and emergency responders due to their simplicity and reliability.
Benefits Of Having A Walkie Talkie
Reliable communication: In areas with limited or no cell service, walkie-talkies provide a dependable way to stay connected with your group. This can be crucial during camping trips, hiking adventures, and indispensable in survival scenarios.
Cost-effective: There are no monthly fees or contracts associated with walkie-talkies. Once you purchase the device, you can use it without incurring additional costs.
Easy to use: With their push-to-talk feature and straightforward controls, walkie-talkies are user-friendly and accessible to people of all ages.
Enhanced safety: In emergencies, walkie-talkies can help you maintain communication with your group or connect with emergency channels.
What To Look For In Buying A Good Two Way Radio
Range
In a true SHTF scenario, communication is vital. Look for a walkie-talkie with an impressive range, ideally one that can reach up to 20 miles or more.
Battery Type
One of the most crucial aspects of any walkie-talkie is its battery life. After all, a dead walkie-talkie is about as useful as a two tin cans attached to opposite ends of a string.
You may not always have access to batteries or power sources. So you’ll want a device with long-lasting battery life or one that uses rechargeable or replaceable batteries.
You can also opt for solar-powered walkie talkies. These can harness the power of the sun to recharge their batteries.
Remember that choosing a walkie talkie with a reliable battery ensures you stay connected, even during extended emergencies or off-grid adventures.
Durability and Weather Resistance
A rugged, water-resistant design is a must for any survival walkie-talkie. You need a device that can take a beating and keep on ticking, regardless of the conditions.
Channels and Privacy Codes
More channels and privacy codes mean less interference and clearer communication. In survival situations, you NEED to minimize confusion and maintain secure lines of contact. Secure channels are even more important if you’re up against enemies.
Emergency Features
It’d be good to look for a survival walkie talkie with additional features like weather alerts, SOS signals, or built-in flashlights to keep you informed and prepared during emergencies.
Hands-Free Operation
Look for a walkie-talkie with hands-free options like a headset or voice-activated transmission. This allows you to communicate while keeping your hands free to focus on other tasks.
How To Use A Walkie Talkie
1. Power up: Charge or insert fresh batteries and turn on your walkie-talkie.
2. Choose a channel: Select a communication channel for you and your partner(s).
3. Adjust volume: Set a comfortable listening level using the volume control.
4. Talk: Hold the “talk” button, speak clearly into the walkie-talkie, and release the button when done.
5. Listen: Keep the device near your ear to hear responses, and ensure your partner(s) are on the same channel.
6. Use etiquette: Say “over” when you finish speaking and avoid interrupting others.
7. Check the battery: Monitor battery life and recharge or replace as needed.
Walkie Talkie Lingos
To ensure clear and concise communication, users often use specific lingo or phrases. Here’s a list of common walkie talkie lingos and their meanings:
1. Affirmative: Used to confirm or agree with a statement or request. It means “yes.”
2. Breaker/Break: A term used to interrupt or request to join an ongoing conversation, usually followed by the channel number or user’s identifier.
3. Copy: Acknowledgment that a message has been received and understood.
4. Goahead: Permission to proceed with a message or action.
5. Negative: Used to disagree or indicate “no” in response to a question or request.
6. Over: Indicates the end of a transmission and that the sender is awaiting a response.
7. Out: Signals the end of a conversation without expecting a response, meaning the channel is now free for others to use.
8. Roger: Another way to confirm that a message has been received and understood, similar to “copy.”
9. Standby: A request to wait for further instructions or information.
10. Wilco: Short for “will comply,” indicating that the sender will follow the instructions provided.
11. 10-codes: A set of standardized codes used to represent common phrases, such as “10-4” for “message received” or “10-20” for “location.” Note that the use of 10-codes varies between different agencies and organizations.
12. Repeat: A request to resend the last message, often used when the transmission was unclear.
13. Sayagain: Similar to “repeat,” it is a request to have the last message repeated.
14. Clear: Indicates that the user has finished their transmission and is leaving the channel open for other users.
FAQ About The Best Survival Walkie Talkies
Are walkie talkies good for SHTF?
Walkie-talkies are great for SHTF situations, as they enable short-range communication without depending on cell networks. They’re especially useful in emergencies when other communication methods might be down.
What radios do preppers use?
Preppers typically use HAM radios, CB radios, or GMRS/FRS radios, as these provide longer range communication and access to emergency channels. These radios can help you stay informed and connected with others during crisis situations.
Would an EMP affect walkie-talkies?
An EMP could potentially affect walkie-talkies, as it can damage electronic devices. However, if you store your walkie-talkies in a Faraday cage or other protective enclosures, they might remain functional after an EMP event.
Wrap Up of The Best Survival Walkie Talkies For Preppers
Don’t wait until it’s too late to realize the importance of reliable communication in critical situations. Equip yourself with a tool that keeps you connected and informed when it matters most.
Whether you’re an avid hiker, a dedicated prepper, or just someone who wants to be ready for life’s unexpected twists and turns, having the right walkie talkie can be a game-changer.
Explore your options, find the perfect two-way radio, and confidently face whatever challenges life throws your way, knowing you’re prepared for the unexpected.
DISCLAIMER: The content of this article is for informational and educational purposes only. It is intended to promote understanding and knowledge of various survival methods and strategies, not to encourage violence or illegal activities. The DIY homemade survival weapons discussed are meant for use in true survival situations where traditional forms of protection are not available.
Remember that misuse of these homemade survival weapons could result in harm, injury, or legal troubles. Always check your local laws regarding the creation and possession of homemade weapons. These tools should only be used responsibly, and in a manner consistent with self-defense and survival scenarios.
Never attempt to use these weapons against another person in a non-life-threatening situation. We strongly advocate for peaceful conflict resolution and respect for all human life. Safety and ethics should always be your top priority when dealing with survival situations. Always use your best judgment and act within your local laws and regulations.
We are not responsible for any harm or damage caused by the creation or use of these DIY weapons. It is your responsibility to ensure safety and legality in your actions.
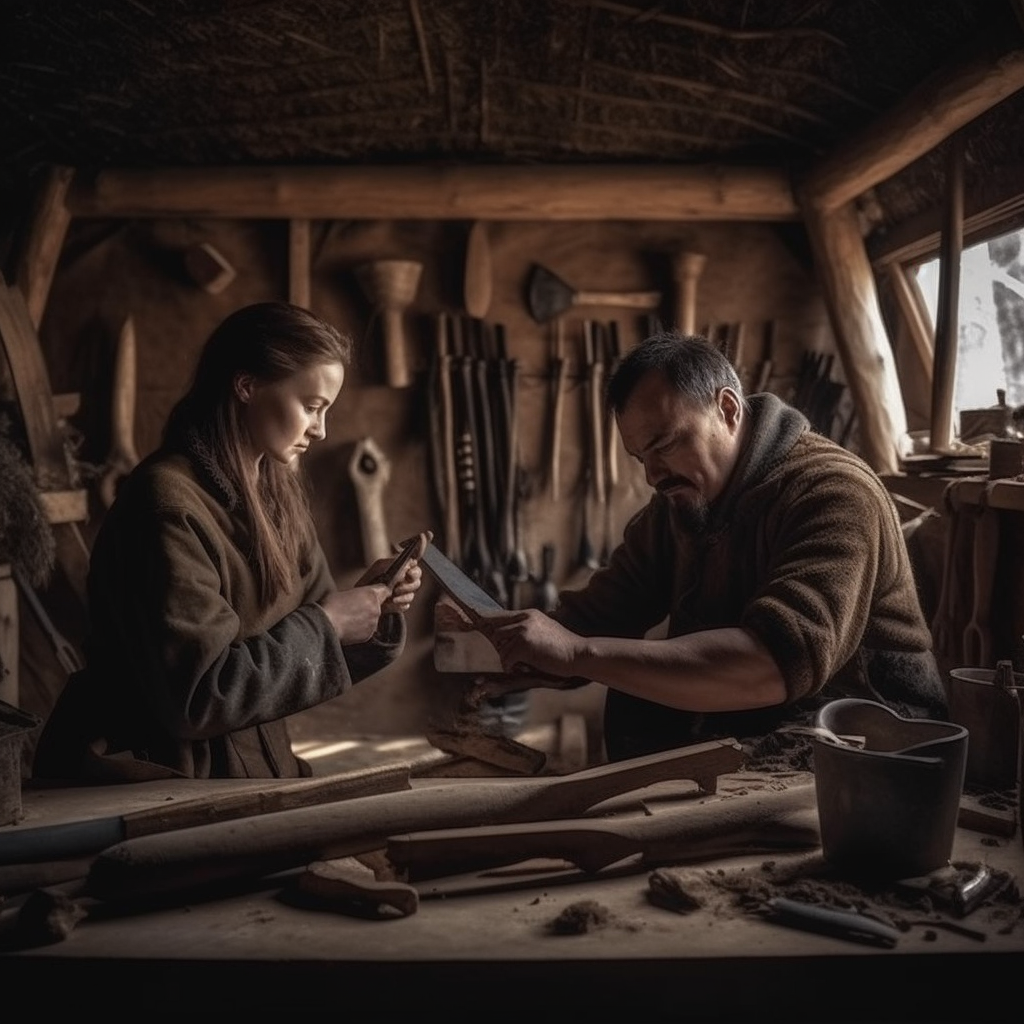
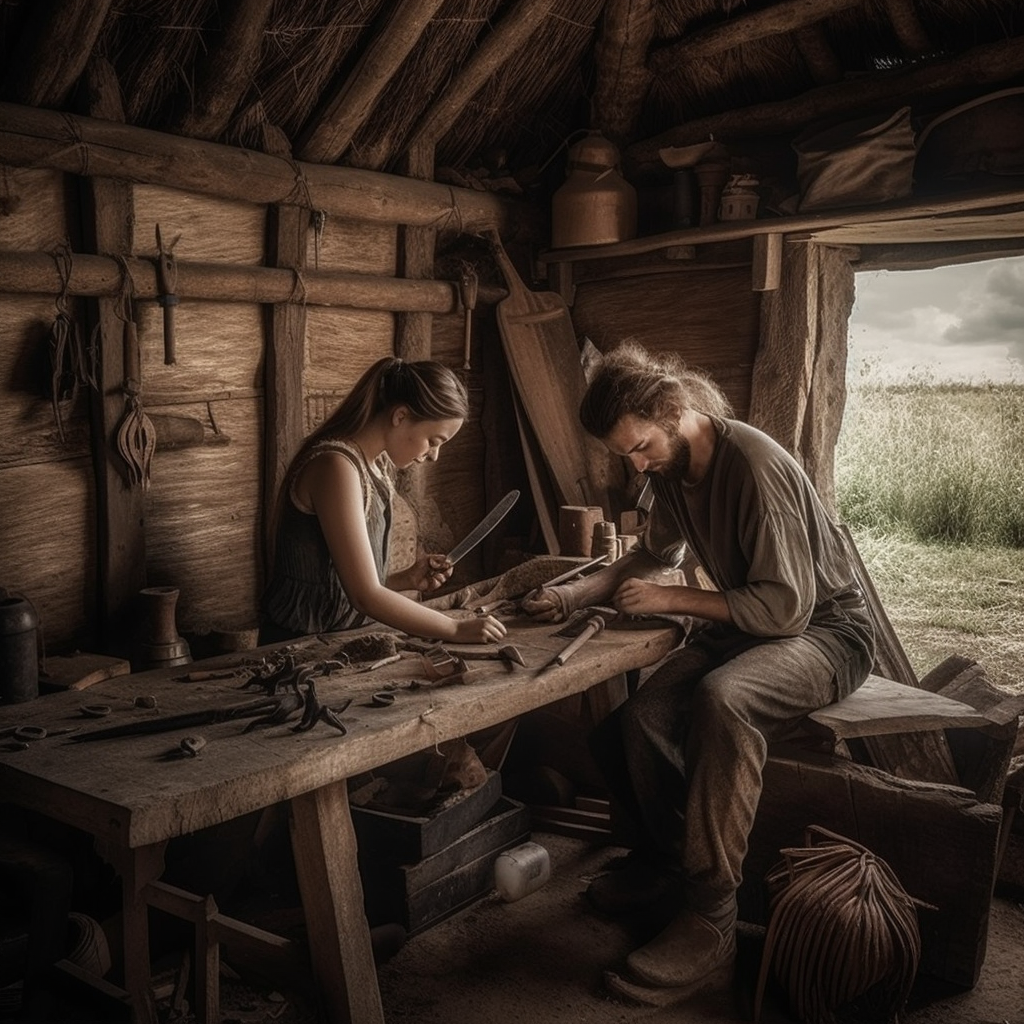
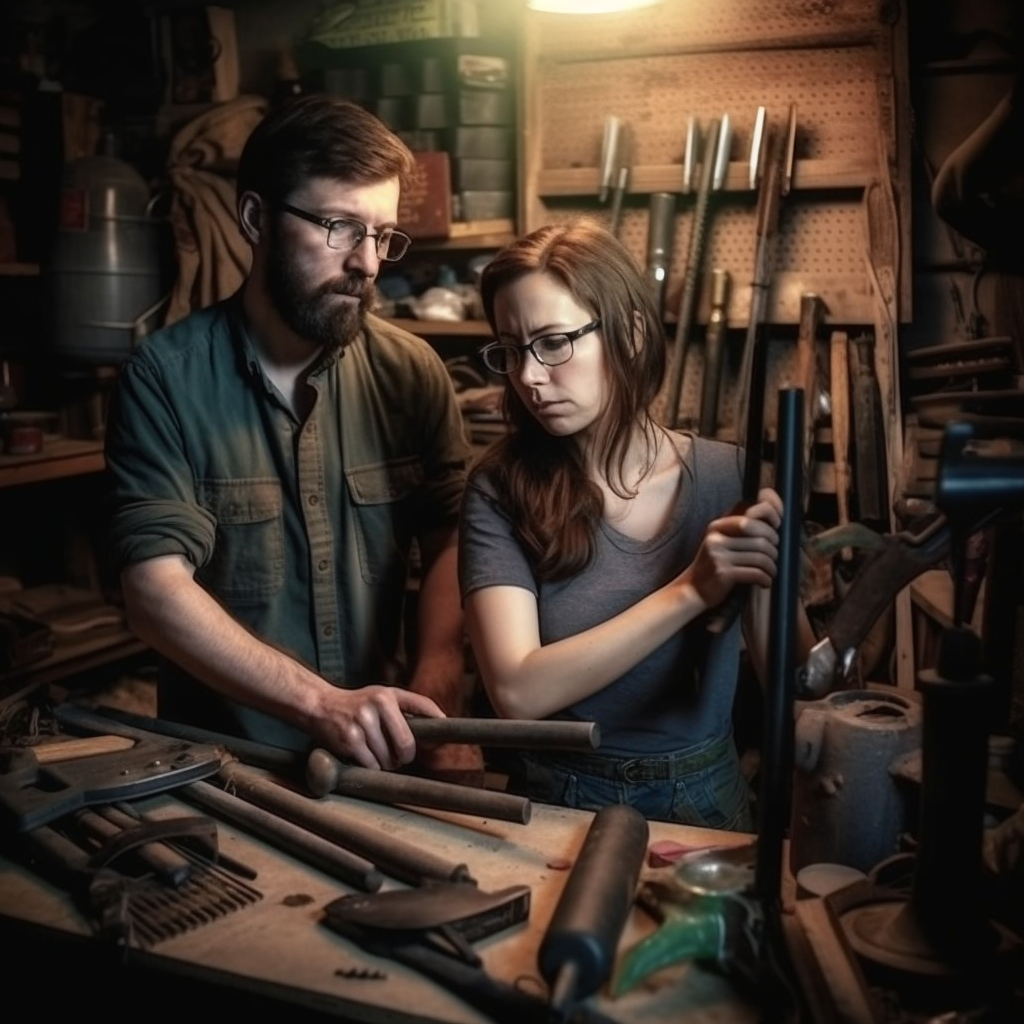
DIY survival weapons are not just a cornerstone of survivalism; they’re a testament to human ingenuity. This guide doesn’t just arm you with tools, but with knowledge—your most vital survival gear.
What if the world has gone off the rails, and pandemonium is the new norm? In these dire times, having the right tools at your disposal can determine whether you and your family survive or succumb to the chaos.
That’s where our collection of 36 DIY homemade survival weapons come into play — giving you the edge you need to navigate the apocalypse.
The best part? These homemade survival weapons are not only effective, but they can also be crafted using everyday items you probably have lying around your home or garage.
Because when society crumbles and the chips are down, the only person you can truly rely on to safeguard you and your loved ones is a well-prepared survivor—like yourself.
So, let’s dive into this roundup and get ready to face the end of days, armed with an arsenal of DIY homemade survival weapons.
Never let your guard down; in a survival situation, awareness is your first line of defense. I always try to have something on me for personal defense. But you never know when things will go south. A quiet city or neighborhood can easily be enveloped in riots.
The government could decide to lock us down again. Heck, people get robbed inside their homes all the time. You never know where and when you might get caught out.
The key takeaway here is anything can become a household weapon. A fire extinguisher, a baseball bat, and a wood handle was broken the right way — these things can help you fend off an attacker when you don’t have your primary on you.
Creativity in weapon-making expands your survival toolkit and options. As I’ve said earlier, regular household items can easily be weapons in the right hands. But having that ability to think creatively is indispensable to survival.
It’s easy to put a knife at the end of a pole and call it a spear. But I would much rather bet my life on the guy who can make that same spear with a piece of wood and scrap metal from the dumpster.
Try to train your mind to look beyond the obvious. I’m not out here saying use a homemade shotgun instead of your primary firearm. But be the guy that can break all your guns, run out of ammo, and still have something to shoot with.
Another thing to keep in mind is, in a true SHTF scenario, any weapon you can make, you can use to barter with other survivors. That might come in handy in case you run out of certain supplies.
Mastering your DIY weapons ensures they’re more than just showpieces—they become extensions of your survival instinct. So if possible, train with your chosen weapon. This will give you confidence in making and using them in any situation.
Some of the weapons below can be aimed or thrown. You need to hone in these skills similar to shooting your gun to improve your accuracy. The best way to do this is through repetitive practice.
Discover 36 versatile DIY survival weapons you can craft from household items. You should be able to make almost every weapon on this list with junk or items lying around your house. Any material you need to buy should be extremely affordable.
But if you want to be extra thrifty, you can probably find some of the materials outside or while dumpster diving.
Disclaimer: Some of the items on this list can be dangerous and might even be illegal in some states. You should check your state laws before making or using them.
1. DIY Pipe Shotgun
A DIY Pipe Shotgun has a metal piping that serves as your main component, solidifying its usability. You probably know this as a slam fire shotgun, but this DIY pipe shotgun is your go-to buddy for close-range protection. It’s powerful, easy to assemble, and perfect for anyone needing quick, reliable defense.
Check out this video to give you an idea of how your shotgun will work and how to assemble it at the end.
H/T @PlastikGatz
2. Spiked Nail Bat
Clubs are spiked nail bats that are primitive but potent. Nails provide the teeth, and the bat serves as the body in this simple yet ferocious tool.
Sure a regular hammer or aluminum bat can do the job. But there’s just something intimidatingly scary about a spiked bat. It’s a great go-to weapon for a zombie apocalypse.
There are many versions of a spiked nail bat. The style, design, and accessories will depend on what kind of damage you’re looking to do.
H/T @loadedforbear9290
3. Flamethrower
A DIY flamethrower offers range and power, transforming gasoline and a metal tube into a fire-spewing mechanism. Flamethrowers are great for starting fires or burning out enemies off trenches. It’s a nice weapon that can get you out of a pinch.
I will show you two ways you can make a flamethrower at home.
All you need is a lighter and a can of aerosol. You can check it out below:
H/T @ModernRogue
But there’s a really easy way to make a “legit” flamethrower with some serious power and range.
H/T @TheKingofRandom
4. PVC Bow and Arrow
The PVC bow and arrow exemplify resourcefulness using a PVC pipe and string to make this classic long-range weapon.
Way before guns were invented, bows were the primary ranged weapon of choice. The fact that it’s still around today shows how effective a hunting weapon is.
In a survival scenario, I suggest creating a real wooden bow or even a half-decent plywood bow.
H/T @BackyardBowyer
5. Rebar Tomohawk
The Rebar Tomahawk combines aerodynamics and heft. It uses rebar and wood for throwing or hand-to-hand combat.
Tomohawks are one of the most versatile, time-tested survival tools you can have. Use it for chopping wood, building out your shelter and trench, hurling and hunting, or close-quarter combat.
If you can’t find rebar, you can use any thick piece of metal, like a pipe wrench.
You would probably use it to make other weapons as well.
Make this Rebax Tomohawk at home:
H/T @HTSTAAL
6. Spike Pit Booby Trap
The Spike pit booby trap is defense in landscape form. Wood spikes and camouflage make it an environmental snare. These booby traps were the nightmares of GIs during the Vietnam War. Known as punji traps in Vietnam, up to 11% of fatalities during the war were because of these nasty buggers.
Spike Pit Booby traps are cheap and easy to construct. Perfect for perimeter defense and trapping unfortunate animals.
Materials
Sticks, nails, glass (sharp pointy objects, for defense, the rustier, the better)
Leaves surrounding vegetation for camouflage.
Bamboo or plywood (for cover)
How to Make a DIY Spike Pit Booby Trap
Making Spike pit booby traps is as straightforward as it sounds.
Find strategic locations where intruders might pass, like a trail or false entryway.
2. Grab a sturdy stick or shovel and dig a hole with steep sides, at least 2 to 3 feet deep.
3. Search for solid and straight sticks and sharpen the ends with a knife. If you have long metal nails or broken glass bottles, they also work.
4. Arrange the sharpened sticks at the bottom of the pit, pointing upwards.
5. Gently cover the hole with very thin plywood or bamboo.
6. Camouflage the cover with branches, leaves, and other natural materials to blend it with the surroundings.
IMPORTANT: Mark the trap location on a map or with a discreet sign to avoid accidents.
Need more ideas? Check out some of these Vietnam War Punji Traps.
H/T @AdySetyawan
7. DIY Pepper Spray
DIY Pepper Spray adds a non-lethal, blinding option to your arsenal. You only need capsicum and a spray bottle. Pepper spray works as a great backup in situations where you can’t get access to more intimidating weapons when SHTF.
A potent spray in the face is enough to stop an animal or intruder in its tracks.
Materials
Spray Bottle (pressurized spray bottles work best)
Pepper (ghost pepper), pure capsaicin liquid, or chili powder (use this as your last option)
Oil
Alcohol
Cheesecloth or coffee filter
This guy is crazy, but he explains how to make your own pepper spray pretty well.
H/T @CanadianPrepper
8. Plywood Bow
Another version of a bow, the Plywood Bow adds stability. Its rigidity complements the bowstring’s tension. If you live in a dense city with very few trees around, a plywood bow might be more practical for you to make.
You can find plywood just about everywhere, and with a little ingenuity, you can fashion a decent bow out of one.
Materials:
Paracord
Plywood
Wood glue
Zip ties (optional)
Look at this brief video to learn how to make one at home. The trick is to layer your plywood to create enough draw weight without snapping your bow.
H/T @1stBurnmoorscouts
9. Survival Slingshot
The survival slingshot is a study of mechanical advantage. Elastic bands and a y-shaped frame make this weapon both simple and effective. Slingshots are perfect for hunting birds and small animals but also work well for protection and self-defense.
Materials:
Y-shaped branch (find one that fits well in your hand)
Optional: steel balls (these give your more consistent damage)
Optional: slingshot bands (if you want something that lasts a long time)
Make this at home and teach your kids how to have fun and hone in on some simple survival skills.
H/T @BlackScoutSurvival
10. Bullwhip
A bullwhip is made of leather and handle combined into a weapon that extends your reach. This ancient weapon isn’t just for show. It can help you fend off attackers, hunt small game, or even manage livestock.
This project will take some time to make and to get used to. Here’s a video to take you step by step on how to make your bullwhip at home.
H/T @caliberwhips9595
11. Throwing Stars / Throwing Spikes
From stealth to surprise, throwing stars or throwing spikes are lightweight yet lethal. Metal or wood serves as the base material. Regarding self-defense or hunting, throwing spikes/ stars pack a powerful punch in a small package. These easily concealed weapons are perfect for those looking to add extra security to their arsenal.
Materials:
16 gauge steel sheet
Metal file
Metal sander
Hack saw
The guys at TKOR have a really easy tutorial for you to try.
H/T @TheKingofRandom
12. DIY Caltrops
DIY Caltrops are metal pieces twisted into a tetrahedron shape that disrupt movement across an area. If you’re looking for a no-nonsense approach to deter pursuers, caltrops are a great DIY tool.
These small, spiked wonders are designed to puncture tires or injure the feet of anyone trying to follow you.
Add these to your survival pack ASAP:
H/T @5tonswguns219
13. Homemade Taser
The homemade taser requires batteries and wiring to transform it into stunning power and adds electrical force to your toolkit.
No one enjoys getting shocked, and this DIY weapon puts the power of electricity at your fingertips.
This homemade taser can stop an attacker in their tracks, perfect for personal protection.
The best part? You can find some of these components right at your home.
H/T @MaxImagination
14. DIY Shiv/ Knife
A DIY shiv or knife is simply made of metal or plastic, sharpened to a point, and becomes a close-quarters essential. This handy DIY shiv/ knife can be made from just about any item around your home. Great for hunting or as a backup tool for protection or DIY crafts.
Materials:
Hacksaw
Wooden stir stick
Duct tape
Aluminum can
Pliers
Scissors
With some creativity and ingenuity, you can turn scrap metal, glass, or plastic into a versatile cutting tool perfect for various uses.
Heavy and imposing, the war hammer combines a metal head and a wooden handle that offers brute force and a devastating impact. The war hammer is a powerful melee weapon that delivers bone-crushing blows and pierces through armor like a hot knife through butter. It’s a very versatile weapon to have in your arsenal.
Make this insane weapon yourself:
H/T @WeaponCollector
16. Pocket Dart Gun
Made of small tubes and darts, pocket dart guns add surreptitious striking power, offering a covert, ranged option. This little gadget can pack a serious punch in a compact and discreet design, making it the perfect companion for on-the-go protection or outdoor adventures.
Here’s a video showing you how to make one:
H/T @Nighthawkinlight
17. Laser-Assisted Blowgun
The Laser-assisted blowgun is both high-tech and primal. A laser sight improves the accuracy of this ancient weapon. Equipped with a laser sight for pinpoint accuracy, this stealthy and silent weapon takes your hunting game to the next level.
Perfect for pursuing small game or quietly eliminating targets from afar, you’ll enjoy the thrill of staying under the radar.
Make one by following the video guide below:
H/T @TheKingofRandom
18. Sheet Metal Self-Loading Pistol
The Sheet metal self-loading pistol is a feat of DIY engineering. Sheet metal and a firing pin assemble into a semi-automatic choice. While it may not boast the polish of its commercial counterparts, this DIY firearm means business when it matters most.
In capable hands, this rugged, self-loading pistol proves that sometimes, homemade can be just as effective.
H/T @clintonwestwood5498
19. DIY Naginata
The DIY Naginata offers the benefits of both spear and sword. A long shaft and blade bring versatility to your weapons cache. This ancient Japanese weapon masterfully combines a spear’s reach and a sword’s cutting power.
Perfect for self-defense, hunting, or crowd control, the Naginata offers flexibility and efficiency in one mighty package.
All you need is a machete or shiv.
H/T @NoBSSurvival
20. Medieval Sling
Medieval sling is a tribute to ancient warcraft that’s made of a simple loop and pouch that allow for rock-hurling precision. It is the ultimate blend of simplicity and effectiveness. Launch small rocks or any other makeshift ammo with this weapon!
It’s easy to make and requires only a few materials, making it the practical go-to for your survival arsenal.
You only need a cord and tape to make one:
H/T @tods_workshop
21. Bola
The Bola is as elegant as it is effective. Weighted ropes intertwine to immobilize your target. If you want a non-lethal solution for self-defense, hunting, or crowd control, here’s the bola — an ancient weapon with a modern twist!
Originating centuries ago, the Bola has been used to skillfully immobilize prey or foes by tangling their legs or wings.
Materials:
Rocks or stones of the same size
Paracord
Here’s a tutorial on how to make one:
H/T @BlackScoutSurvival
22. DIY Spear
The DIY spear is a hunting staple made of a wooden shaft and pointed tip, offering both range and penetration. The spear is a versatile weapon perfect for hunting and self-defense. Don’t let its straightforward design fool you. This handy tool is all about making life easier, one task at a time.
All you need is a knife, a piece of wood, and duct tape or paracord to assemble them.
Here’s a good video showing you how to make a survival spear:
Kubaton is a small, held rod that concentrates force into pressure points. They are easily concealed self-defense weapons. But these strike pressure points and deliver powerful blows. You can make this using various materials.
Below is a simple way to make one using a wood pallet:
H/T @dekeros-recreationalwoodwo6456
24. Homemade Stun Grenade/ DIY Flashbang
The homemade stun grenade offers shock and awe by using flash powder and casing to produce a stunning explosion. A homemade stun grenade or flashbang is a non-lethal explosive device that creates a bright flash and loud bang to disorient and temporarily incapacitate adversaries.
It’s ideal for self-defense, crowd control, or creating diversions.
Normally, I would suggest buying these and just keeping them well stored. But if you insist on making one or find yourself needing one ASAP, here’s a video to help you.
H/T @willitflash
25. Homemade Molotov
Homemade molotovs are made of a simple glass bottle and flammable liquid that bring fire to the frontline. This improvised incendiary weapon can create a burning barrier or cause significant damage to structures or vehicles. While dangerous, it can be an effective tool in desperate situations.
DIY rocket launcher adds explosive range by combining tubing and propellant. Consider this if time is on your hands and you’re looking for serious firepower. This improvised rocket launcher can launch projectiles with considerable force and range.
While not as refined as military-grade launchers, it can still provide a significant advantage in serious situations.
Make it at home!
H/T @patrickdickinson6492
27. PVC Pipe Gun
PVC pipe gun is another example of plumbing turned projectile. PVC and a basic firing mechanism create this simple firearm. The PVC pipe gun is technically an airgun but in the right hands, these weapons are accurate, can be as lethal as a 22, and are extremely quiet.
Use this gun for hunting, target practice, or as backup protection:
H/T @SiriHomemadeA2Z
28. Paper Bricks
Paper bricks serve as improvised ammunition that’s made of compacted paper, offering a unique, disposable projectile. Paper bricks are versatile and eco-friendly weapons for self-defense or for constructing makeshift barriers.
Compacting wet, shredded paper into a solid block can create a surprisingly strong and durable material.
Here’s a quick guide to making one using easily accessible items. Remember, this is for educational purposes only and to be used in emergencies. Follow your local laws and regulations.
Shred old newspapers or other paper products.
2. Soak the shredded paper in water until it becomes a pulp.
3. Press the pulp into a brick mold, and let it dry in the sun to create solid paper bricks.
29. DIY Duct tape Blowgun Dart
You can’t have a blowgun without the proper ammo. You can make these darts from tools you probably have in your survival kit.
These darts can be lethal to animals and potential attackers with the right coating.
H/T @BackyardBowyer
30. Shepherd Sling
The shepherd sling is made of a length of rope and pouch merged into an ancient missile launcher. During biblical times, this is the weapon David used to take down Goliath. This sling is a simple yet effective projectile weapon that can launch small rocks or improvised ammunition with considerable force.
All you need is some paracord.
H/T @TheWeaversofEternity
31. Spiked Fist Load
The spiked fist load turns your hand into a weapon with metal spikes and a gripping handle that makes your fist a mace. Fist loads, like brass knuckles, are tools held to improve the damage when punching. Common fist loads are lighters, a roll of quarters, or your usual metal brass knuckles.
However, you can make scary spiked fist loads at home to do serious damage.
H/T @GediminasDamasius
32. Loaded Umbrella
The loaded umbrella surprises with its dual function, concealing a weighted or bladed tip. This one’s not an umbrella with a hidden gun. Instead, it’s got weights. At first, it seems completely unaltered, properly when wielded as a club, it packs a devastating punch.
How to Make a DIY Loaded Umbrella
Obtain a sturdy full-sized umbrella with a solid handle and carefully disassemble the umbrella tip.
2. After that, lash the heavy objects around the pole’s center. If you have any extras, put them at the end and work your way in.
3. Depending on your umbrella’s design, you may need to remove the arms from the central slider piece to close it. Use the umbrella’s rap or leash to tie the arms over the shaft.
33. Glass Knapping Arrows and Blades
Glass knapping arrows bring an artisanal edge by using flint or glass shards to serve as the arrowheads in this delicate but deadly weapon. Create wickedly sharp arrows and blades, ensuring you’re always one step ahead in the wild! These trusty tools will be your go-to companions for hunting, protection, and thriving when the going gets tough.
Here’s a quick video that shows you how to do it:
H/T @TheKingofRandom
34. Slapjack/ Sap
The slapjack or sap is a concealable impact weapon that combines leather and metal, creating a blunt-force tool. Craft your own DIY slapjack or sap for a discreet and effective self-defense weapon to keep you safe in the great outdoors.
Using just a flexible material and some added weight, you’ll be well-prepared to handle unexpected challenges in the wild.
Here’s a quick and easy way how to make one:
H/T @primalpunch
35. Balloon Slingshots
Balloon slingshots offer light-hearted lethality using rubber balloons and a Y-frame. This balloon slingshot is a fun and versatile DIY weapon perfect for hurling projectiles or causing distractions in the wild.
With just a balloon and a sturdy frame, you’ll have a potent slingshot that’s easy on resources but big on impact!
H/T @PajenDIY
36. Rambo Spear Trap
The rambo spear trap is a Hollywood-inspired trap that makes use of a spring-loaded mechanism. This handy trap is great for camp security and food catching. When activated by an unwary animal or intruder, the spears impale or injure the victim.
Check out this video to learn how to make one:
H/T @cavemancody
Key Takeaways Making Your DIY Homemade Survival Weapons!
Learning to create DIY homemade survival weapons is a fun and engaging activity, but it also helps you build confidence and resourcefulness when facing unexpected challenges. Materials at hand and a creative mindset become life-saving tools.
Remember, these weapons are meant for true survival situations or educational purposes, so always prioritize safety and ethics. As you explore new skills and techniques, you’ll find yourself better prepared for whatever life throws at you.
Self-defense canes and walking sticks aren’t just for aiding in mobility; they serve as an unassuming yet potent tool for personal protection. Whether you’re walking through a dimly lit parking lot or hiking, these multifunctional canes offer a dual purpose.
A cane can be a subtle but efficient means of self-defense. You never know when you might find yourself in a dangerous situation. That’s why it’s crucial to safeguard yourself with a reliable weapon.
But with so many options on the market, it can be overwhelming to choose the right one. That’s why we’ve put together a list of the 7 best self-defense canes and walking sticks for discreet protection.
Read on to see the 7 best self-defense canes and walking sticks in 2023 and find the ideal one to keep you safe.
Our Top 3 PicksFor The Best Self-Defense Canes And Walking Sticks
Self-defense canes and walking sticks are versatile tools designed not only for mobility but also for personal safety. They are beneficial for more than just those who need support while walking — they’re also a subtle yet handy defense tool anyone can use.
Self defense canes and walking sticks can be made from sturdy materials such as metal, wood, or high-grade plastic. Metal components often hidden in these canes provide that extra layer of security.
Advantages of Self-Defense Canes And Walking Sticks
The advantages of self-defense canes and walking sticks go beyond aiding in walking; they also offer a concealed means of self protection. From discreet design to dual functionality, the benefits are manifold.
A tactical cane is legal in most countries, so you can carry it wherever you go.
It is a non-lethal weapon, which means you can use it to fend off an attacker without causing any serious injuries.
It is a discreet weapon, and most people won’t even know you are carrying one.
A self-defense cane is a multi-functional tool that can be used as a walking aid and weapon.
Top 7 Self-Defense Canes and Walking Sticks
Discover the top 7 self-defense canes and walking sticks that excel in durability, usability, and discreet protection. Each item in our list brings its unique set of features to the table.
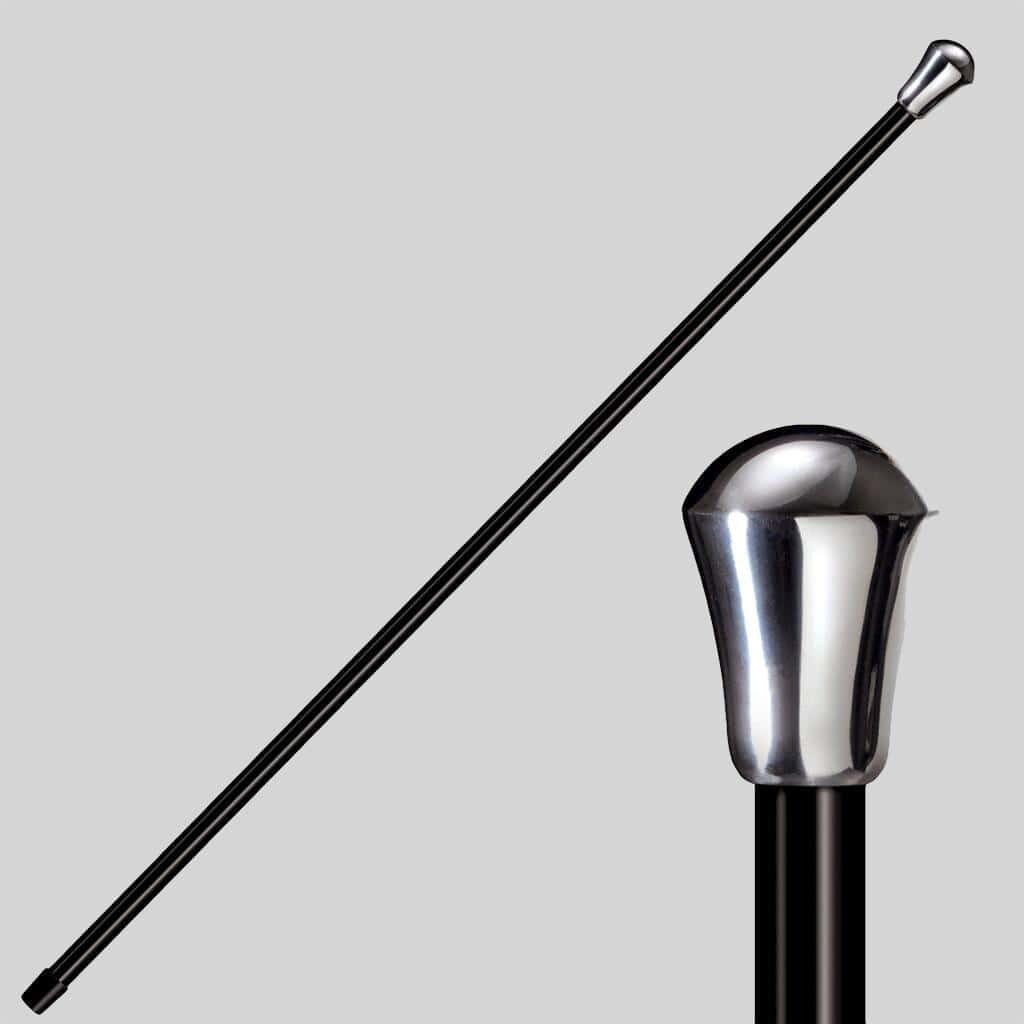
The Cold Steel City Stick is a practical and stylish self-defense cane that perfectly balances stability and portability. Made with eleven layers of sturdy yet lightweight fiberglass, it weighs just 15.7oz and measures 37-5/8 inches long.
Its mirror-polished 6160 Aluminum head comes in two styles: the classic scent stopper head and the innovative pistol grip style, which fits comfortably in one’s hand like a 17th-century pistol butt. The head provides a secure grip which you can use for striking, if necessary.
With removable heads, you can personalize your City Sticks through engraving or modification, tailoring it to your tastes. Besides the eye-catching appearance and robust construction, the City Sticks emphasize safety and comfort with a thick, rubber, non-slip ferrule at the base, ensuring secure footing. However, it may only withstand heavy use for a few months.
Also, its lack of a hooked handle makes it difficult to grab onto an attacker’s limb and throw them off balance. So while it may not be suitable for grappling, this tactical cane is excellent for long-range attacks and cross-guards, making it an excellent choice for self-defense in urban environments.
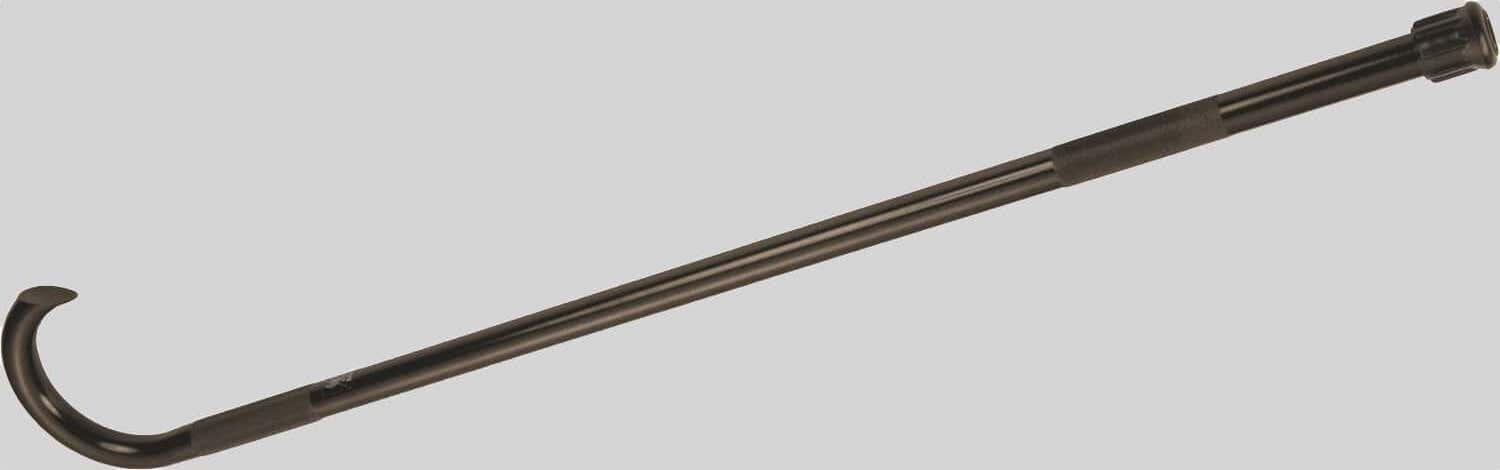
The Ka-Bar TDI Self-Defense Cane is a well-designed tool with black powder-coated and thick aluminum construction that gives it a solid and durable feel. This metal cane measures 39 inches and has a 1-inch diameter, which you can cut shorter to customize it to your preferred length.
This self-defense stick features a distinctive curved pointy handle, making it a formidable and versatile tool for protection.
And apart from being a reliable self-defense tool, the Ka-Bar TDI Self-Defense Cane is also useful for other everyday tasks. Its sturdy design makes it a great aid for walking, hiking, and even fending off animals.
Its heavy and curved handle gives you a lot of leverage, making it a helpful tool for breaking down doors or smashing windows in emergencies.
This combat cane is invaluable for those who prioritize resourcefulness and readiness. Its versatility and solid construction make it a great addition to any outdoor enthusiast’s gear collection.
The ZAP self-defense cane combines a walking stick and a taser. Its adjustable from 32 to 36 inches to suit your preferences. The taser is concealed inside the cane, and to use it, simply press the button to deliver a powerful shock to your assailant. It also has a bright LED flashlight on top.
This cane is an excellent means of self-defense for seniors since it can stand in for traditional martial arts cane against humans. It’s powerful — and its sound would be enough to put someone off coming up to you. However, it’s more effective to use on aggressive animals like stray dogs.
The cane’s construction from tough aluminum makes it sturdy enough to take a hit. And, the rubber or silicone-like material used for the handle is soft and pleasant to hold.
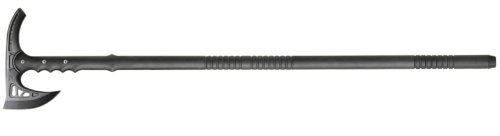
The M48 Tactical Survival Axe is an outstanding product for those requiring a versatile and reliable tool for hunting or outdoor adventures. Constructed with 2Cr13 steel and lightweight fiberglass, this combat cane boasts impressive strength and durability.
With a weight of 2.9 pounds, it may not be the lightest option, but its versatility and heat-resistant properties make up for this. It won’t burn or warp, making it an ideal tool for managing burning logs. Also, you can use it for clearing brush, chopping wood, or fending off predators.
Its curved back spike, sharp tip, and hammerhead make it ideal for self-defense scenarios. However, this survival cane focuses more on its tactical use, so it may not be suitable for those looking for a walking aid.
Still, the M48 Tactical Survival Axe is an excellent investment for anyone seeking a rugged and versatile tool for outdoor activities or self-defense.
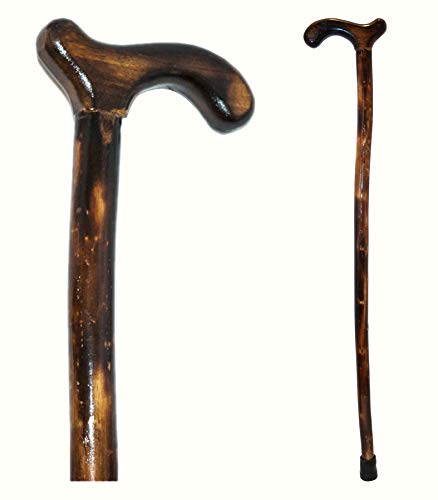
If you’re looking for a reliable and stylish walking companion, the Brazos Handcrafted Wood Walking Cane is worth considering. It features a unique crook handle and spiral twist design made from solid oak.
This cane is not only attractive but also sturdy and reliable, with no moving parts to become unstable. Plus, it will last for years.
The smooth handle is comfortable to hold, while the rubber tip provides good traction on most surfaces. And at 37 inches tall, this cane is the perfect height for most people.
It’s also lightweight and available in different styles and lengths of 24- and 40-inches, so you can pick a size that’s right for you. However, it’s important to note that this cane is made of wood, so exposure to water can damage it.
Still, the walking canes from Brazos are a great choice for those looking for a unique and sturdy walking cane that’s lightweight and easy to use.
This walking stick perfectly blends style, functionality, and durability. Made from 100% natural wood, the RMS is a handcrafted cane that’s weatherproof and robust enough for outdoor use.
At 36 inches tall and 1.5 inches in diameter, weighing less than a pound, it is an ideal choice for those with heights between 5’4″ and 6 feet.
The offset cane’s anti-slip rubber tip is a practical feature, providing reliable traction on various surfaces. The hook’s opening is large enough to accept limbs – basically all you need from a cane for self-defense purposes, provided you learn some basic cane combat methods.
Beyond its aesthetic appeal and lightweight design, this walking cane is highly versatile. It is suitable for a range of needs, including added support and balance, and self-defense.
The Bubba Stik is not only about its striking appearance. It also boasts impressive functionality. This 39 inches tall and 1-inch diameter walking stick is made from solid American Red Oak. The anti-slip black rubber tip ensures users can walk safely on various surfaces.
While it’s too heavy to be used in close combat self-defense, it’s sturdy enough to use as a club or cross-guard. This cane is an excellent pick whether you need something to move about or a self-defense stick in case of an attack.
Types of Self-Defense CanesAnd Walking Sticks
Various types of self-defense canes and walking sticks exist to meet differing personal and security needs. From tactical canes to electrical variants, each offers its distinct advantage.
Tactical Canes
Tactical canes come with additional features like serrated edges or hidden compartments, often used by security professionals. The design focuses on multi-functionality.
Tactical canes are often made of materials like aluminum or carbon fiber. They’re also lightweight with a strong build that allows them to withstand impacts.
Tactical canes feature a knurled grip for a stable grip and accurate cane swinging. Some tactical canes include flashlights for low-light situations.
Stun Canes/ Electrical Canes
Stun canes or electrical canes pack a high-voltage surprise for any would-be assailant. It has a built-in stun gun that can deliver an electric shock to the attacker, incapacitating them. They are an ideal choice for those looking for a passive yet effective defense mechanism.
These are an excellent option for people who may not be physically capable of swinging a heavy cane. However, they require a source of power, which means that you will need to recharge the battery periodically.
Gun Canes
A gun cane is a controversial type of self-defense cane that has a firearm built into the handle. They are similar to concealed carry weapons, but the firearm is disguised as a cane.
Gun canes are illegal in some states and countries, so it’s important to check local laws before purchasing one. These also require significant training and practice to use effectively, and they are not suitable for everyone.
Sword Canes and Hammer Canes
Sword canes are a unique type of self-defense cane that has a concealed blade built into the shaft. You need to train well to use them properly.
On the other hand, hammer canes have a heavy, blunt head designed to deliver significant force upon impact. The hammerhead can be used to strike an attacker and cause significant damage. However, hammer canes require significant physical strength to wield for some.
What To Look for When Buying the Best Self-Defense Canes And Walking Sticks
Before you purchase self-defense canes and walking sticks, there are several factors like material and weight need to be considered. These are critical to both your mobility and safety. Let’s take a look at other factors you need to consider before buying a self-defense cane:
Material
The material of the cane significantly influences its durability and weight. Choices range from wood to carbon fiber, each with its unique set of advantages. Choose a cane made from sturdy materials such as metal, wood, or high-grade plastic to ensure that it can withstand the impact of an attack.
Wooden Canes
Wooden canes are traditional, easy to customize but can be on the heavier side. They blend well in everyday settings. canes are a classic choice that is durable, affordable, and easy to find. Although oak and hickory woods are both strong and durable, they’re heavy.
On the other hand, ash is lighter but less durable than an oak or hickory fighting cane.
Aluminum Canes
Aluminum canes are lightweight, durable, and less expensive than other materials. They often feature adjustable lengths and grips.
They come in various colors, shapes, and sizes and are often made of aircraft-grade aluminum, which is strong and lightweight.
Carbon Fiber Canes
Carbon fiber canes offer the best of both worlds: lightness and strength. These high-tech options are suitable for those seeking top-of-the-line features.
These type of canes are made by weaving carbon fiber strands together to create a strong and lightweight material. They can be expensive but are often considered one of the most effective self-defense canes available.
Composite Canes
Composite canes are made from a blend of materials, offering a balanced range of features. They are often the choice for those who can’t decide between wood and metal.
These are made by combining different materials, such as fiberglass, carbon fiber, and aluminum, to create a strong and durable cane. Composite canes are lightweight and strong but also more expensive than some other materials.
Weight
The weight of the cane is crucial for ease of use and effective self-defense. Lighter canes are easier to wield but might lack the stopping power of heavier options. The cane should be light enough to carry around but heavy enough to deliver a powerful strike.
Grip
The grip of your self-defense cane impacts your control and comfort. Materials like rubber or textured metal offer an optimal grip. Choose a comfortable and non-slip cane to ensure that you have a firm grip on the cane when using it as a weapon.
Length
The length of the cane must be suited to your height and reach. A properly sized cane ensures comfort and effectiveness in self-defense scenarios. The length of the cane should be long enough to deliver a powerful strike, but not too long that it becomes difficult to carry around.
To determine the proper length for a self-defense cane, stand up straight with your arms relaxed at your sides. Measure the distance from the ground to your wrist. This measurement will give you an approximate length for a comfortable and effective self-defense cane.
Also, some canes are adjustable, allowing you to fine-tune the length for your needs.
Additional Features
Additional features like hidden compartments or built-in flashlights add utility to your self-defense cane. These features often make the difference in a critical situation.
Some self-defense canes and walking sticks come with extra features, such as concealed blades, stun guns, or flashlights. Consider whether these features are important to you and if they align with your needs and local laws.
Basic Self-Defense Cane Techniques
Mastering basic self-defense cane techniques can turn your walking aid into a formidable personal protection tool. Learn to strike, block, and more with precision. These are some basic self-defense cane techniques that you can use in various situations.
1. The Strike
The strike is a basic yet effective self-defense move that targets vulnerable areas. Aim for the face, throat, or knees for maximum impact. The most basic self-defense cane technique is simply using the cane to strike an attacker.
Hold the cane in your dominant hand, with the handle facing forward. Aim for the attacker’s head or other vulnerable areas, like the knees or shins.
H/T to @CaneMasters-MartialArts for this video: An Unstoppable Movement for Cane Self-Defense
2. The Hook
The hook technique utilizes the cane’s curved end to ensnare an assailant. It’s an excellent maneuver for maintaining distance. Hold the cane in your dominant hand, with the handle facing forward.
Swing the cane up and around in a hooking motion, aiming for the attacker’s neck, face, or arm.
3. The Block
Blocking with your cane can neutralize an incoming attack. Positioning is key for this defensive action. If an attacker is coming at you with a weapon, like a knife or a club, you can use the cane to block their strikes.
Hold the cane in both hands horizontally in front of you, and use it to deflect the weapon.
4. The Sweep
The sweep technique aims to destabilize your attacker by targeting their legs. Timing and positioning are critical for this move. A sweep can be an effective technique if an attacker is charging at you.
Hold the cane in both hands, with the handle facing forward. Swing the cane in a wide arc, aiming to knock the attacker’s feet out from under them.
5. The Jab
The jab is a quick, pointed attack aimed at deterring your attacker. Accuracy is vital in this technique, as you’ll be targeting specific points.
Using the jab technique can increase the distance between you and your attacker. While holding your cane by the handle, step back and jab the end of the cane into your attacker and immediately recover by pulling back.
H/T to @FightFast for this video: Walking Cane Strikes To Stop Your Attacker.
How To Use Self-Defense Canes And Walking Sticks Effectively
Learning how to wield your self-defense cane effectively to maximize its protective capabilities. Proper technique and awareness can make all the difference.
Get Professional Training: Seek out professional instruction in self-defense and cane techniques to ensure you know how to use your cane effectively in an emergency.
Practice Regularly: Like any self-defense tool, practice is essential. Regularly practice your self-defense techniques with your cane to build muscle memory and maintain your skills.
Be Aware of Your Surroundings: Stay alert and be aware of your surroundings at all times. A self-defense cane is only effective if you can identify potential threats and react accordingly.
FAQs About the Best Self-Defense CanesAnd Walking Sticks
Are self-defense canes and walking sticks legal?
Self-defense canes are generally legal to own and carry in most places. However, it’s important to note that using self-defense canes and walking sticks are only allowed in situations where you reasonably believe that you or someone else is in immediate danger. Using a combat cane in a non-threatening situation could result in legal consequences.
Do I need training to use a self-defense cane?
Some types of self-defense canes and walking sticks require training and practice to use effectively, while others are more straightforward. It’s important to choose a cane that suits your level of experience and comfort.
Can I use a regular walking cane for self-defense?
While a regular walking cane may provide some level of protection, a self-defense cane is specifically designed to be more effective and durable in a self-defense situation.
Key Takeaways of the Best Self-Defense Canes and Walking Sticks
From choosing the right material to mastering basic techniques, these key points can be your guide to personal safety.
Self-defense canes and walking sticks are an effective and discreet way to look after your safety. With its modest design and various special features, you can always be prepared to protect yourself without drawing attention.
Remember, your safety is crucial, and having a reliable self-defense cane in hand could truly make all the difference in an emergency. So take a look at the options available and pick the best self-defense canes and walking sticks that match your personal style and needs.
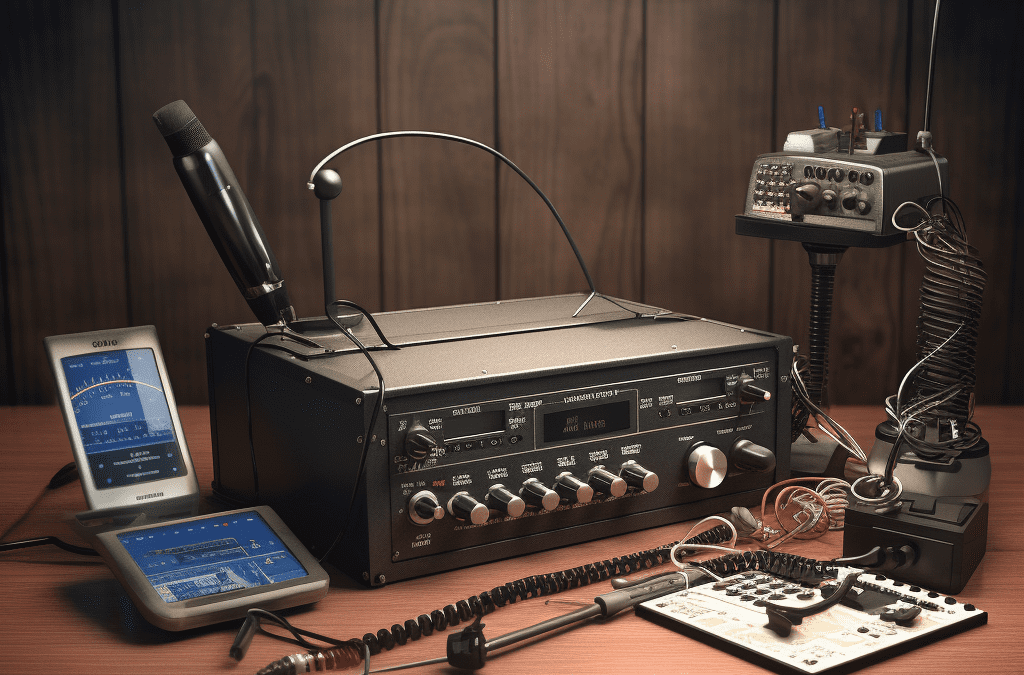
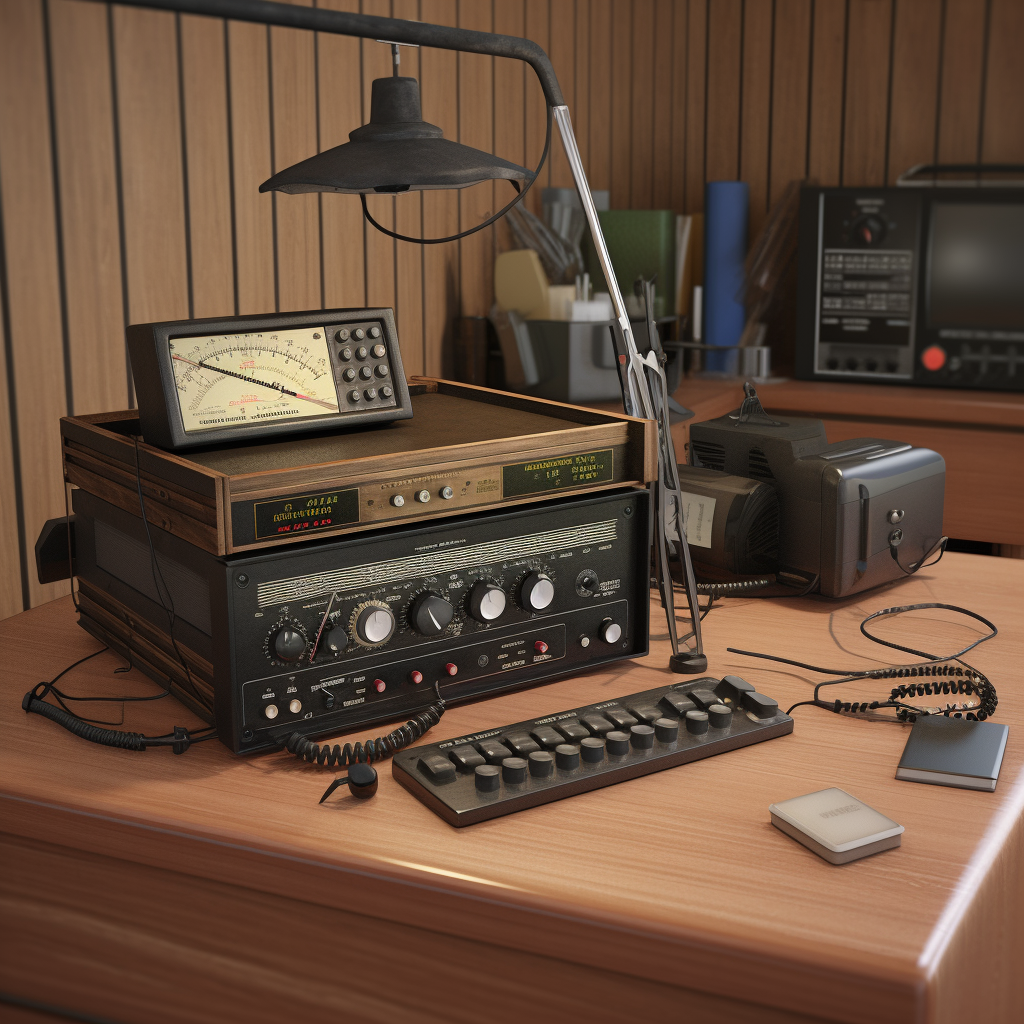
Learning how to set up a ham radio system is your gateway to secure, long-distance communication that doesn’t rely on conventional networks.
With a ham radio, you can communicate with other ham radio operators all across the globe. You can also build your radio channel and take part in emergency communications.
To set up a ham radio, choose a suitable transceiver, antenna, and power supply. Then, create a comfortable workspace with proper cable management, storage, and lighting. You should also familiarize yourself with local regulations and learn ham radio etiquette before operating your station.
If you are looking to set up your own radio station or backyard radio shack, you’re in luck, we’ve provided a comprehensive guide on how to do just that.
In this guide, we’ll take you through the basics of ham radio, from the equipment you’ll need to get started to the regulations you’ll need to follow.
A ham radio serves as a versatile device that is known for its flexibility, allowing you to tap into frequencies for personal communication, experimentation, and even emergency services.
People use ham radios for emergency communications, long-distance chats, and local and international contests.
The Significance of Ham Radio Communication
Ham radio’s form of communication bypasses conventional networks, making it an invaluable resource during natural disasters.
There are several reasons ham radios remain popular:
Emergency communication. Ham radio operators help emergency agencies communicate during natural disasters and power shortages.
Community-building. There is a diverse and welcoming ham radio community. They offer opportunities to exchange ideas, and collaborate on projects locally and globally.
Skilldevelopment. You need to learn about radio technology, electronics, and communication protocols to use a ham radio. This will help you develop important technical and problem-solving skills.
Internationalconnections. Ham radio allows operators to connect with people worldwide. It fosters a sense of global unity among enthusiasts from various cultures and backgrounds.
Frequencyexploration. Ham radio operators may experiment with speech, Morse code, and digital data over several frequencies.
Competitionsandawards. The ham radio community frequently hosts contests and award programs. It helps encourage skill development and personal goal achievement for community members.
Off-the-grid communication. Ham radio allows communication in distant locations, such as camping or trekking.
Public service. Ham radio operators often volunteer their skills and equipment for public events. It benefits the community and allows operators a chance at real-world practice.
Types of Ham Radios
Whether you choose handheld, mobile, or base station models, understanding your needs is key to finding the radio that suits you.
Here are the three main types of ham radios:
Handheld Radios – Small, portable radios called Handie- talkies or HT’s (aka walkie-talkies) for outdoor activities and short-range communication.
Mobile Radios – Vehicle-installed radios with increased range and power need external antenna and power.
Base Station Radios – Fixed-location radios offer the most range and power. These require extra equipment like antennas and power supplies.
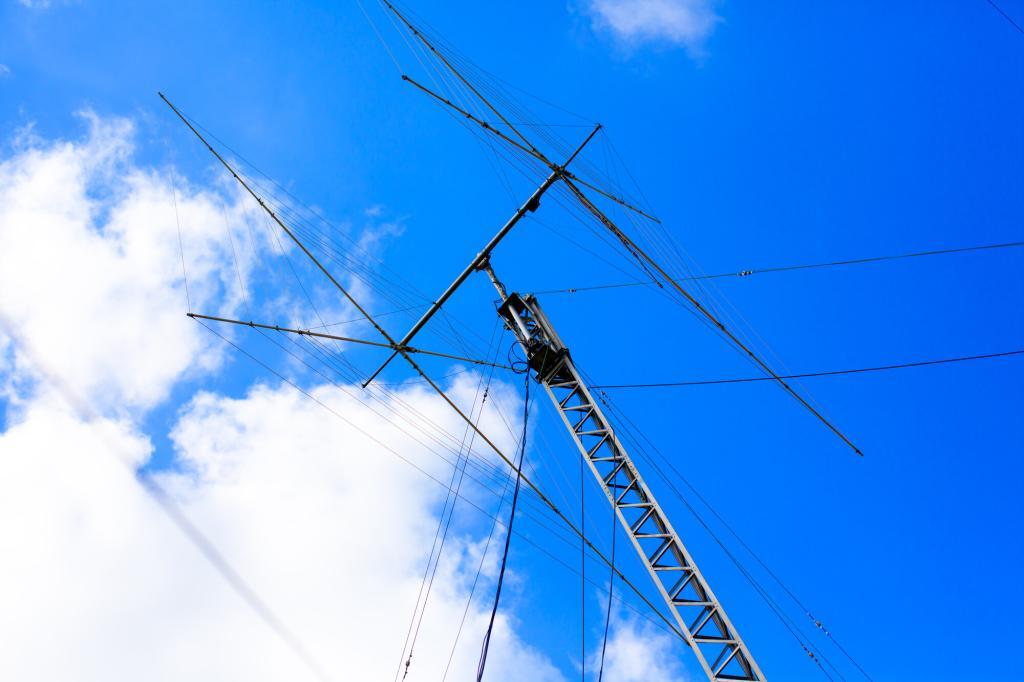
Choosing the Right Ham Radio Equipment
Learn how to build a ham radio station by selecting the right components, such as transceivers, antennas, and power supplies for your needs. These greatly influence your communication range and clarity. Here are some factors to consider when selecting your equipment:
Transceiver
The transceiver is the heart of any ham radio station setup. From transmitting to receiving signals, its features dictate your system’s capabilities. There are many types of transceivers on the market. They vary from basic portable devices to complex versions with digital signal processing.
Antennas
Your antenna plays a crucial role in signal transmission. Whether directional or omnidirectional, your antenna type affects the quality and reach of your communication. It’s used to transmit and receive radio signals and affects your signal’s strength and range.
There are several antenna options. Choose from wire antennas, vertical antennas, and directional antennas.
Each type of antenna has its strengths and weaknesses. It depends on the signal you want to transmit and receive. The radio antenna you choose will depend on your radio type and communication needs.
Installing your antenna properly is critical for maximum performance. Here are some tips to ensure that your antenna is installed correctly:
The greater the antenna’s height, the farther its signal will travel.
Adjust your antenna to face the broadcasting facilities you want to contact.
Good grounding is essential for both safety and minimizing interference.
Power Supply
An adequate power supply ensures your ham radio functions without hiccups. Be it battery or direct AC, the choice is dictated by your setup location.
Mobile and base station radios need a power supply connected to an electrical outlet or vehicle battery while handheld radios typically use rechargeable batteries.
A reliable power supply ensures a consistent source of energy for your transceiver. Consider your chosen transceiver’s power requirements and select a power supply accordingly.
SWR Meter
An SWR (Standing Wave Ratio) meter measures the efficacy of your antenna setup. This measurement is critical to properly tune the antenna to the frequency used. It helps you fine-tune your system for maximum signal strength.
Coaxial Cable
Coaxial cables connect your transceiver and antenna. Cable quality influences signal clarity, so it is essential to choose high-quality, low-loss coaxial cable to ensure there is minimal signal loss.
Grounding Equipment
Grounding equipment protects your setup by minimizing electrical hazards and interference, protecting your ham radio from lightning strikes and other electrical surges. It is important to have a good grounding system in place to ensure your equipment is well protected.
Microphone and Speaker
Your microphone and speaker define audio quality and are necessary for voice communication. Many transceivers come with a microphone, however, poor audio can lead to miscommunications. So it’s best to invest in a higher-quality one for better audio performance. A speaker or headphones will also boost your listening experience.
Accessories and Tools
Additional tools make your setup versatile. You’ll also need tools like a soldering iron, tuners, amplifiers, wire strippers, and wrenches for assembly and maintenance.
Setting Up Your Ham Radio Station
Setting up your ham radio station is a step-by-step process that needs proper assembly to ensure operational efficiency. Once you have your equipment, you can start setting up your ham radio.
Choose a Location
The location you choose affects your ham radio’s performance. Altitude and obstructions should be considered. Choose one with minimal electrical interference and enough space for you and your equipment.
Assembling Your Equipment
Start by gathering all the necessary equipment and tools, and set up a dedicated workspace for your radio station. Get a clean, organized area with enough room to lay out your components and tools.
Connect the power supply to the transceiver and plug it into an electrical outlet. Attach the microphone and speaker or headphones to the appropriate jacks on the transceiver.
Connecting the Antenna
Connecting the antenna correctly is vital for signal strength and the type of antenna you use matters. Install your antenna according to the manufacturer’s guidelines. Make sure it’s positioned for optimal reception and transmission. Then, connect the antenna to your transceiver using the coaxial cable.
For best results, mount your antenna as high as possible, either on a rooftop or a tall mast. Ensure it’s properly grounded to protect your equipment from lightning and electrical surges.
Power Up and Configure Your Transceiver
Once your ham radio is powered up, you should configure your transceiver settings. Calibration is essential for optimal performance, so make sure to follow the transceiver’s manual to configure settings such as frequency, mode, and bandwidth.
For handheld radios, charge the battery according to the manufacturer’s instructions.
For mobile and base station radios, connect the power supply to an electrical outlet or your vehicle’s battery. Make sure you have the correct voltage and amperage for your radio.
Be sure to use a surge protector to safeguard your equipment from voltage fluctuations and power surges.
How To Build a Portable Ham Radio Setup
Building a portable ham radio setup can be an empowering experience, offering you the ability to communicate over long distances without relying on traditional networks.
To guide you through this process, we’ll delve into the essential components such as antennas and power sources, ensuring you have all the knowledge you need to create a functional system.
Choose a transceiver. Pick a compact handheld transceiver (HT) with desired frequency bands and features like dual-band, GPS, or weather alerts.
Select an antenna. Invest in a portable antenna for your frequency range and ensure compatibility with your transceiver or use an adapter.
Pick a power source. Use compatible rechargeable batteries, external battery packs, or solar panels for portable power.
Gather accessories. Include a backup microphone, headphones, programming cable, SWR meter, and contact log.
Protect your gear. Use a durable carrying case or backpack with compartments to organize your equipment and keep it safe.
Prepare for outdoor use. Choose weather-resistant or waterproof equipment for outdoor operation.
By following these steps, you’ll create a portable ham radio setup for on-the-go communication.
H/T to @edwhitney1862 for this video: Build A “GO ANYWHERE” Box For Your Ham Radio
How To Set Up a Ham Radio Repeater
Setting up a ham radio repeater enhances your communication range using a transceiver and antenna. This guide will walk you through the straightforward process to get your repeater station up and running:
Research and planning. Familiarize yourself with local regulations, frequency allocations, and licensing requirements. Determine the coverage area you want to achieve and select an appropriate location for your repeater.
Choose the right equipment. You’ll need a receiver, transmitter, duplexer, and power supply. Ensure that the receiver and transmitter can operate on the desired frequency bands and are compatible with each other.
Select an antenna. Choose an antenna that suits the frequency range of your repeater and offers optimal coverage. Consider factors like gain, polarization, and radiation pattern.
Install the equipment. Mount your repeater equipment in a weatherproof enclosure, such as a cabinet or rack. Ensure proper ventilation to prevent overheating. Securely mount the antenna at the highest possible point to maximize coverage.
Configure the repeater. Program the repeater with the appropriate input and output frequencies. You can use CTCSS (Continuous Tone-Coded Squelch System) tones or DCS (Digital Coded Squelch) codes, and time-out settings. This ensures that only authorized users can access your repeater.
Test the system. Perform thorough tests to verify the performance of your repeater. Check the coverage, signal strength, and audio quality. Adjust the settings or equipment as needed to optimize performance.
Maintain your repeater. Regularly monitor your repeater’s performance. Also, schedule routine maintenance to ensure its continued reliability.
Following these steps, you can successfully set up a ham radio repeater. You can also enhance the range and effectiveness of your amateur radio communication.
Testing and Troubleshooting
Testing and troubleshooting are vital for a reliable setup. Once everything is connected, turn on your radio and check for any issues. Regular checks can prevent potential issues, so always test the transmit and receive functions, and use an SWR meter to ensure your antenna is properly tuned.
If you encounter any problems, consult the user manual or seek help from experienced ham radio operators.
How To Operate a Ham Radio
To get started with setting up your ham radio, the first thing you’ll need is a licensed frequency and a compatible transceiver. Once you have your equipment and license, it’s time to start.
There are many ways to use your radio, from chatting with other operators to participating in contests and events. One popular activity is called “DXing.” It involves trying to make contact with operators in as many different countries as possible.
Essential Tips for Novice Ham Radio Users
Setting up a ham radio can be a daunting task for novice users, but understanding the essentials can make the process significantly easier. From selecting the right equipment to understanding radio frequencies, these tips will guide you through the initial stages of your ham radio journey.
Start with a basic setup. If you are new to ham radios, start with a simple setup. All you need is a handheld transceiver and a basic antenna to get started.
Join a local club. Joining a local ham radio club is an excellent way to learn more about the hobby and meet other enthusiasts. You can also get advice on equipment and techniques from more experienced hams.
Learn about the different modes. Ham radios offer many different modes of communication, including voice, digital, and Morse code. Learning about the different modes will help you find one that best suits your interests and needs.
Take a licensing course. To legally operate a ham radio station, you must obtain a license. There are many online courses available that can help you prepare for the licensing exam.
Ham Radio Setup Cost
A good ham radio setup might cost between $800 and $1,200. However, budgeting correctly can save you from unnecessary costs.
Typically, you’ll only need $100 for a basic ham radio setup. This will buy you a simple, low-power radio for short distances and pay for your ham radio license exam and study books. At this point, it’s perfect to buy used equipment.
Getting Licensed and Ham Radio Certification
Operating a ham radio requires a license in most countries. However, regulations vary by jurisdiction. The Federal Communications Commission (FCC) regulates amateur radio licensing in the United States.
H/T to @SurvivalDispatch for this video: Getting Into Ham Radio For Beginners.
Categories of Ham Radio Licenses
There are three classes of ham radio licenses in the United States. Each offers a unique set of operating privileges:
Technician – Entry-level license granting access to VHF and UHF frequencies.
General – Intermediate level, providing access to additional HF frequencies.
Amateur Extra – Advanced level, allowing access to all amateur radio frequencies.
Preparing for Your Certification Test
Preparing for your test involves studying regulations and technical aspects. Mock exams can be highly beneficial.
To obtain your license, you must pass a written exam. Many resources are available to help you prepare, including online courses, textbooks, and study guides.
You can also join a local ham radio club for guidance and support from experienced operators.
Taking the Ham Radio Examination
Taking the exam certifies your ham radio knowledge. The format of the exam and its content may vary. But once you feel ready, find a nearby exam location and schedule your test.
Exams are administered by Volunteer Examiner Coordinators (VECs) and usually cost a small fee. After passing the exam, you’ll receive your call sign and can legally operate your ham radio.
Joining the Ham Radio Community
Local Clubs and Organizations
Local clubs provide social and technical support. Ham radio clubs are a great way to meet fellow enthusiasts, learn new skills, and stay updated on the latest technology and regulations.
Membership often includes various benefits. Many clubs offer classes, workshops, and events, as well as opportunities to participate in emergency communication drills.
On-Air Etiquette and Best Practices
Proper on-air behavior is crucial in ham radio communication. Best practices include radio courtesy and specific jargons. Respect other operators’ conversations, and adhere to the established frequency band plans.
Additionally, be mindful of your transmit power and avoid causing interference to other users.
Ham Radio Regulations
Before you can start transmitting on your ham radio, you must understand the regulations governing amateur radio use. Compliance with ham radio laws is non-negotiable.
In the United States, these regulations are overseen by the Federal Communications Commission (FCC). The FCC requires all amateur radio operators to obtain a license before transmitting on the airwaves. To obtain a license, you’ll need to pass a written exam that tests your knowledge of radio regulations and operating procedures.
FAQs about Setting Up a Ham Radio
Do I need a license to listen to ham radio?
No, you don’t need a license to listen to ham radio transmissions. However, you do need a license to transmit on amateur radio frequencies.
How much does it cost to set up a ham radio station?
The cost of setting up a ham radio station can vary greatly depending on the type of radio, antenna, and accessories you choose. A basic handheld radio can cost around $30, while a high-end base station setup can cost several thousand dollars.
Can I use a ham radio during an emergency if I don’t have a license?
In life-threatening circumstances, you may operate a ham radio without a license. Nevertheless, it is strongly advised that you get a license and learn how to use the equipment and procedures before an emergency occurs.
What is the range of a typical ham radio?
The range of a ham radio depends on various factors, including the type of radio, antenna, frequency, and atmospheric conditions.
Handheld radios typically range a few miles.
Base station setups can reach hundreds or thousands of miles under optimal conditions.
How do I find other ham radio operators in my area?
You can find other ham radio operators in your area by joining local clubs. You may also participate in on-air nets or attend ham radio events like field days and conventions.
You can also use online resources, such as forums and social media groups, to connect with fellow enthusiasts.
What frequencies can I use with my ham radio?
The frequencies you can use depend on your country’s license class and the band allocations. Each license class grants access to different frequency bands and operating modes. Consult your country’s amateur radio regulations for more information.
Key Takeaways Of How To Set Up a Ham Radio System
Knowing how to setup a ham radio station can be a rewarding experience. It offers numerous benefits, from emergency communication to social connections.
By choosing the right equipment, assembling your station, getting licensed, and joining the ham radio community, you’ll be well on your way to enjoying this fascinating hobby.