Prepping 101: Mastering Essential Survival Skills for Modern Challenges
Equip yourself with vital knowledge in emergency management, resource allocation, and sustainable living to confidently face unexpected events.
Our comprehensive guide delves into the core aspects of prepping, including strategic planning, stockpiling essentials, and developing self-sufficiency to safeguard your and your loved ones’ future.
Explore key areas such as emergency kits, food preservation, water purification, and energy independence. Learn to navigate natural disasters, financial crises, and global uncertainties with our expert tips.
Prepping 101 isn’t just about survival; it’s about thriving in any circumstance with foresight and preparedness.
Key Takeaways
Prepping is a practical approach to ensuring your safety in emergencies. It involves taking steps to be financially prepared and stocking up on essential supplies.
Building a bug out bag and developing survival skills are crucial for unexpected situations.
It’s important to note that prepping is not just for extremists or conspiracy theorists. It’s a sensible way to be prepared for any situation.
Don’t wait for disaster to strike. Start prepping today to secure a safe future for yourself and your loved ones.
Photo of a tornado in the background of a neighborhood.
There are numerous reasons why you should start prepping without delay. In today’s world, where the frequency of natural disasters is increasing, the ongoing pandemic is a constant concern, and unexpected emergencies can occur at any time, it’s crucial to be prepared.
Prepping isn’t limited to beginners; it’s a practice that benefits anyone who prioritizes their safety and aims to acquire essential survival skills. Watching preppers TV series provides you with valuable knowledge and insights on how to effectively prepare for various scenarios.
By stockpiling necessary supplies and developing self-reliance and problem-solving skills, prepping equips you with the tools needed to navigate through unpredictable situations.
Don’t wait for disaster to strike; take action today and ensure your readiness for whatever challenges may come your way.
Start your prepping journey now and gain the peace of mind that comes with being prepared for the unknown.
Financial Preparedness Tips
Financial preparedness is crucial for your financial well-being and security. One key aspect of being financially prepared is to save an emergency starter fund of at least $1,000. This fund acts as a safety net to protect you from unexpected expenses or income loss.
It’s recommended to aim for long-term financial security by saving three to six months’ worth of expenses. Creating a budget is essential in disaster preparedness as it helps you keep track of your spending and prioritize saving.
Following the advice of financial expert Dave Ramsey, who suggests the ‘baby steps’ approach to building an emergency fund, can be beneficial. By adopting sound financial habits, such as budgeting and consistently saving, you can achieve financial preparedness and gain peace of mind.
Building a strong financial safety net for emergencies is an important step towards ensuring your financial stability.
Adopting Sound Financial Habits
Adopt sound financial habits in your prepping journey to ensure stability and resilience.
By incorporating these habits, such as budgeting, bulk buying, and cost consideration, you can effectively prepare for emergencies while managing your everyday expenses.
Create a detailed budget that includes your income, expenses, and savings goals. Track your spending and make adjustments as needed to stay on track with your financial objectives.
Take advantage of sales and discounts by buying essential prepping items in bulk. This not only saves you money in the long run but also ensures you have an ample supply of necessary items.
When prepping, consider the cost of the items you purchase. Look for affordable options that meet your needs and prioritize essential items over non-essential ones.
By adopting these sound financial habits, you can navigate your prepping journey with responsibility and effectiveness.
Start today and take control of your financial future, ensuring you’re well-prepared for any situation that may arise.
Photo of our food pantry stocked with #10 cans.
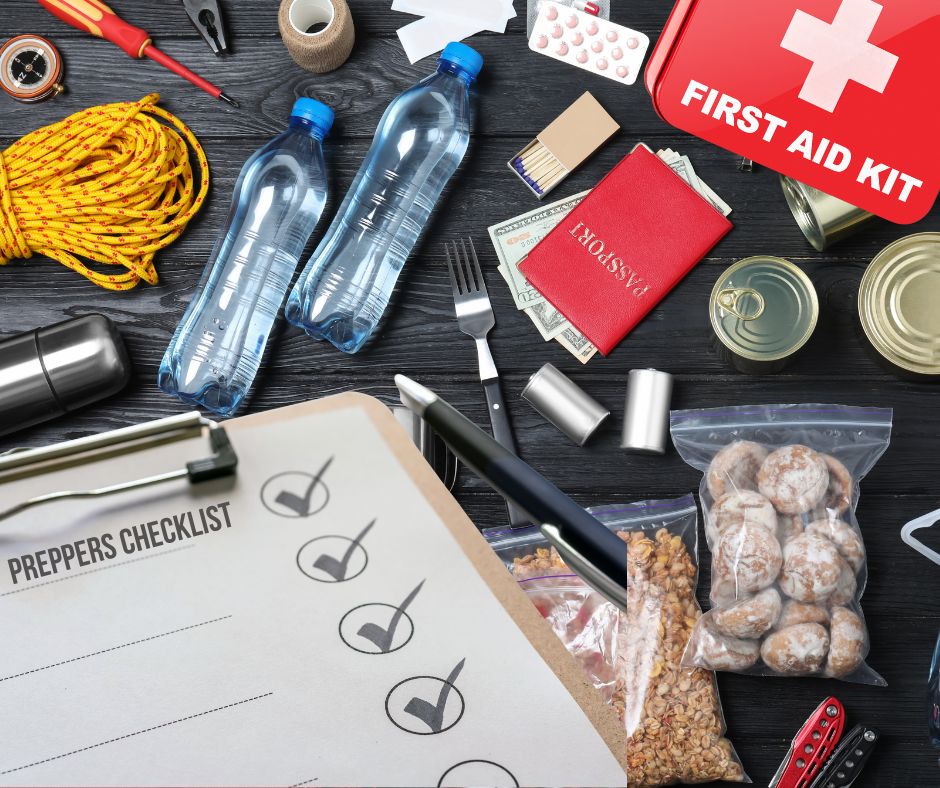
Essential Supplies for Prepping
To be well-prepared for emergencies, it’s essential to have a stockpile of necessary supplies. Investing in essential prepping supplies will ensure your safety and survival in times of crisis.
Here are three main categories of supplies that you should prioritize:
1. Food, Water And Shelter:
Food water and shelter are at the top of the list because they are a must to survive.
To be well-prepared for emergencies, stocking up on non-perishable food items and having a proper shelter is crucial. Fill your survival kit with long-lasting supplies such as canned goods, dried fruits, rice, grains, dehydrated foods, and protein bars.
Don’t forget to ensure a reliable and ample water supply as well. Consider investing in water purification tablets or a filtration system to guarantee access to clean and safe water.
Shelter is paramount in any survival situation, as it serves as a fundamental element of the survival hierarchy, right alongside the essentials of food and water.
A well-constructed shelter provides protection from the elements, be it extreme temperatures, precipitation, or wind.
Shelter also plays a crucial role in preserving your mental and emotional well-being, providing a safe haven, sense of security and stability in an otherwise chaotic environment.
Moreover, a properly designed shelter can help you maintain a low profile and avoid detection in case you need to evade potential threats.
Whether it’s a temporary tarp lean-to, a makeshift debris hut, or a well-stocked bug-out location, understanding the principles of shelter-building and having the necessary tools and materials can be a lifesaving skill in times of crisis.
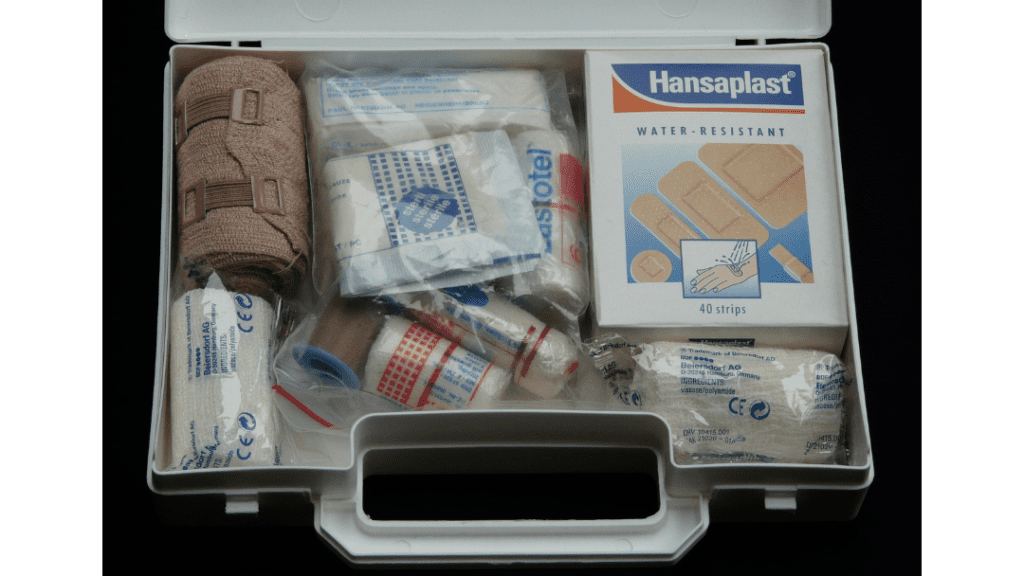
2. Medical and Hygiene Supplies:
Access to medical services can be limited during emergencies, making it vital to have a comprehensive first aid kit on hand. Include essentials like adhesive bandages, sterile gauze, antiseptic wipes, and common medications.
Pay attention to hygiene as well, stocking up on items like soap, toothpaste, and toilet paper. Maintaining cleanliness is crucial for preventing the spread of diseases.
Photo of a first aid kit supplies. Bandages, gauze and band aids.
3. Tools and Equipment:
Equipping yourself with essential tools and equipment is fundamental in emergency situations. A reliable flashlight is a must-have for illumination, especially in the dark. Waterproof matches will come in handy for fire-starting purposes, and extra batteries will ensure your devices remain powered.
A multi-tool is a versatile accessory that serves multiple functions. Additionally, having a portable radio or communication device will keep you connected and informed when critical information is necessary.
By focusing on these three main categories of supplies, you will significantly enhance your preparedness and increase your chances of successfully navigating through any crisis.
Remember to regularly check and replenish your supplies, ensuring that they are always up-to-date and readily available when needed.
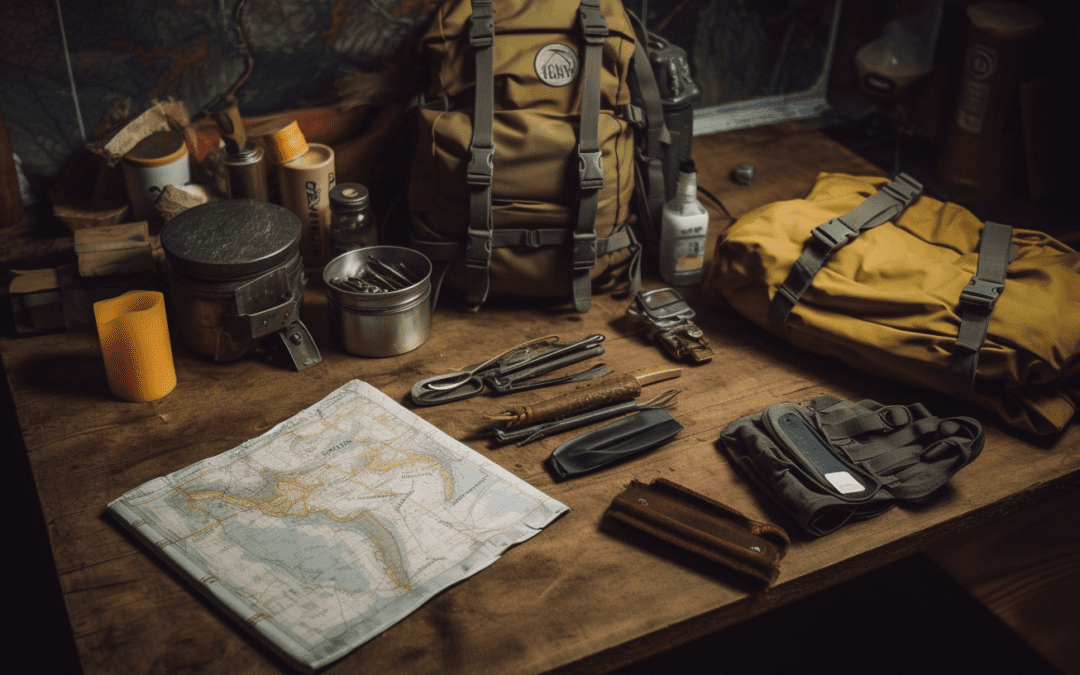
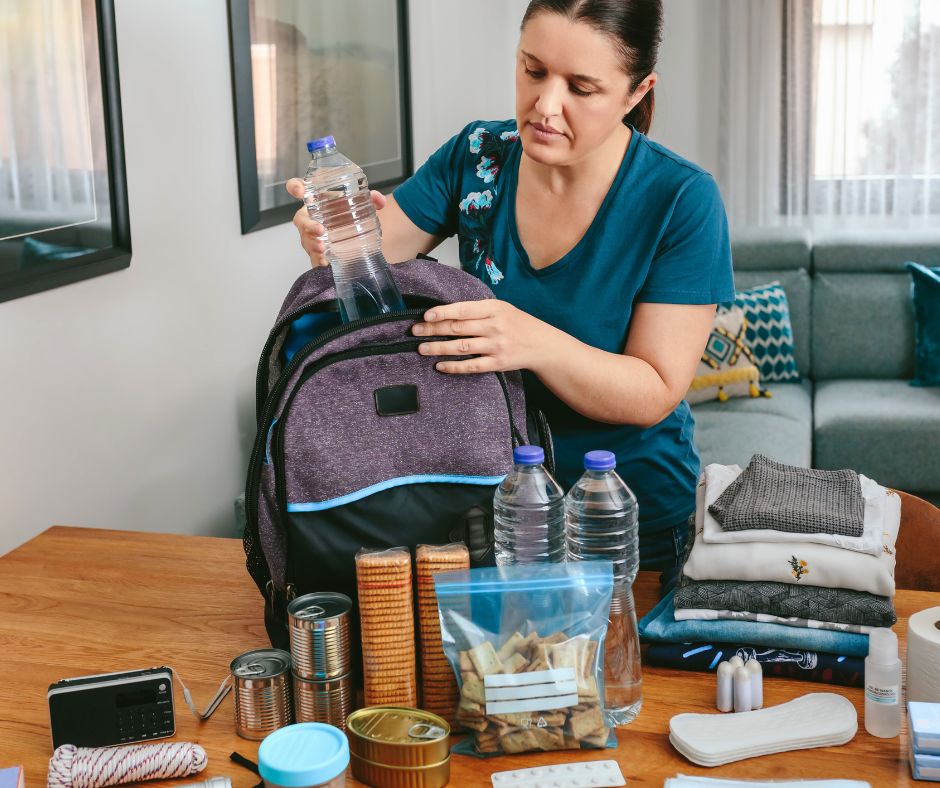
Importance of a Bug Out Bag
A bug out bag is an essential item for quick and efficient evacuation during emergencies. It ensures self-sufficiency and survival for at least 72 hours, providing you with the necessary supplies for food, water, shelter, and first aid.
A bug out bag allows for mobility and adaptability in unpredictable situations, making it a crucial component of your emergency preparedness.
By having a bug out bag ready, you can confidently face any emergency and have the necessary resources to overcome challenges. It provides you with the means to survive during a crisis, giving you peace of mind knowing that you’re well-prepared.
Having a bug out bag ensures that you’re ready to leave your home at a moment’s notice, enabling quick evacuation when needed. It’s a portable bag filled with essential supplies that are carefully selected to sustain you during an emergency situation.
Whether it’s a natural disaster, power outage, or any other unforeseen event, having a bug out bag ensures that you have the tools and resources to navigate through the crisis.
Man wearing a backpack sitting on a rock with his dog looking out at a lake.
Must-Have Survival Skills
Mastering survival skills is imperative for effectively navigating through emergencies and guaranteeing your safety and well-being. As a skilled prepper, it is vital to possess a diverse range of abilities to handle any unforeseen circumstance that may arise.
To this end, there are three essential survival skills that you must cultivate:
Disaster Preparedness: Developing the ability to assess potential dangers and create comprehensive emergency plans is indispensable.
Acquiring knowledge in first aid and CPR will enable you to provide immediate medical assistance when required. In addition, understanding how to identify and procure safe food and water sources during a crisis is critical for survival.
To find a CPR class near you, go to the American Red Cross for training services.
Self-Defense: Becoming proficient in self-defense techniques will allow you to safeguard yourself and your loved ones in times of peril. It is essential to familiarize yourself with different types of self-defense weapons and learn their effective utilization.
Cultivating situational awareness will enable you to anticipate and evade potential threats proactively.
Communication: Acquiring proficiency in using various communication devices, such as ham radios and walkie-talkies, is crucial for staying connected during emergencies.
Developing effective communication strategies will enable you to transmit vital information to others efficiently. Enhancing your ability to actively listen and convey messages clearly and succinctly is also paramount.
By honing these fundamental survival skills, you will be well-prepared to navigate any emergency situation that comes your way.
Whether it involves assessing dangers, defending yourself, or communicating effectively, these skills will empower you to remain safe and take control during challenging times.
Building a Support Network
Building a support network and collaborating with individuals that have different skillsets and expertise will ensure a well-rounded group. When disaster strikes, joining forces with others allows you to combine resources, skills, and knowledge to effectively navigate through unpredictable situations.
By working together, you can increase your chances of survival and thrive in the face of adversity. Seek out people who have knowledge in areas such as first aid, navigation, food preservation, and self-defense.
One of the key benefits of collaboration during emergencies is the shared pool of resources. When you collaborate with others, you can combine your prepping supplies, ensuring that everyone has access to essential items like food, water, and medical supplies.
This shared resource pool not only increases your chances of survival but also minimizes the strain on any one individual or group.
Another advantage of collaboration is the diverse range of skills that each person brings to the table.
During emergencies, tapping into a diverse set of skills such as first aid, navigation, communication, and problem-solving can be invaluable.
By collaborating with others, you can leverage this collective knowledge and expertise to tackle challenges more effectively.
Furthermore, collaboration provides essential emotional support during difficult times. Emergencies can be overwhelming, and having a support network is crucial for your mental and emotional well-being. Be sure to establish reliable communication channels, such as a group chat or designated meeting spot, this will facilitate effective coordination and information sharing.
It is important to foster a sense of trust and cooperation within the group, so that everyone feels comfortable asking for and offering help when needed.
Remember, building a support network is not just about preparing for emergencies, but also about forming meaningful connections with others who share a common goal of readiness and resilience.
Bugging Out Vs. Sheltering in Place
When faced with an emergency situation, it’s crucial to carefully consider whether to bug out or shelter in place. Your circumstances and level of preparedness play a significant role in this decision-making process.
Factors to consider when contemplating a bug out scenario include mobility, the availability of survival gear, and having a designated safe location to retreat to.
It’s important to assess your ability to quickly and efficiently move to a safer area if necessary.
On the other hand, sheltering in place can be a viable option if you have a well-stocked and secure location.
Prioritize your comfort by ensuring you have ample survival supplies, including non-perishable food, water, and medical necessities. Take steps to secure your home, such as reinforcing doors and windows, and consider acquiring basic self-defense skills to protect yourself and your loved ones.
Ultimately, your decision should be based on your available resources, capabilities, and the potential risks you may face during an emergency.
It’s essential to make a realistic assessment of your situation, taking into account factors such as the severity of the crisis, the duration of the event, and the availability of support systems.
Remember, there is no one-size-fits-all answer to this question. It’s important to evaluate your circumstances and preparedness level carefully.
By doing so, you can make an informed decision that maximizes your chances of survival and minimizes risks during a crisis.
Prepping in Small Spaces
Prepping in small spaces? No problem! With the right strategies, you can effectively prepare for emergencies even in compact living spaces like apartments or dorm rooms.
Take advantage of under-the-bed storage, deep cabinets, bookshelves, and bins in the garage to maximize your space. To save even more space and extend the shelf life of your supplies, consider vacuum packing items like clothing and bedding.
And don’t forget the versatility of tin foil, which can be used to wrap and protect delicate items.
When it comes to water storage, opt for gallon bottles or 5-gallon water containers as they are easy to store and manage.
Remember to prioritize your needs and get creative with your storage solutions in small spaces.
By utilizing the available space efficiently and thinking outside the box, you can effectively prep for emergencies, no matter the size of your living space.
H/T to @TheUrbanSentinelChannel for this video on small prepping spaces.
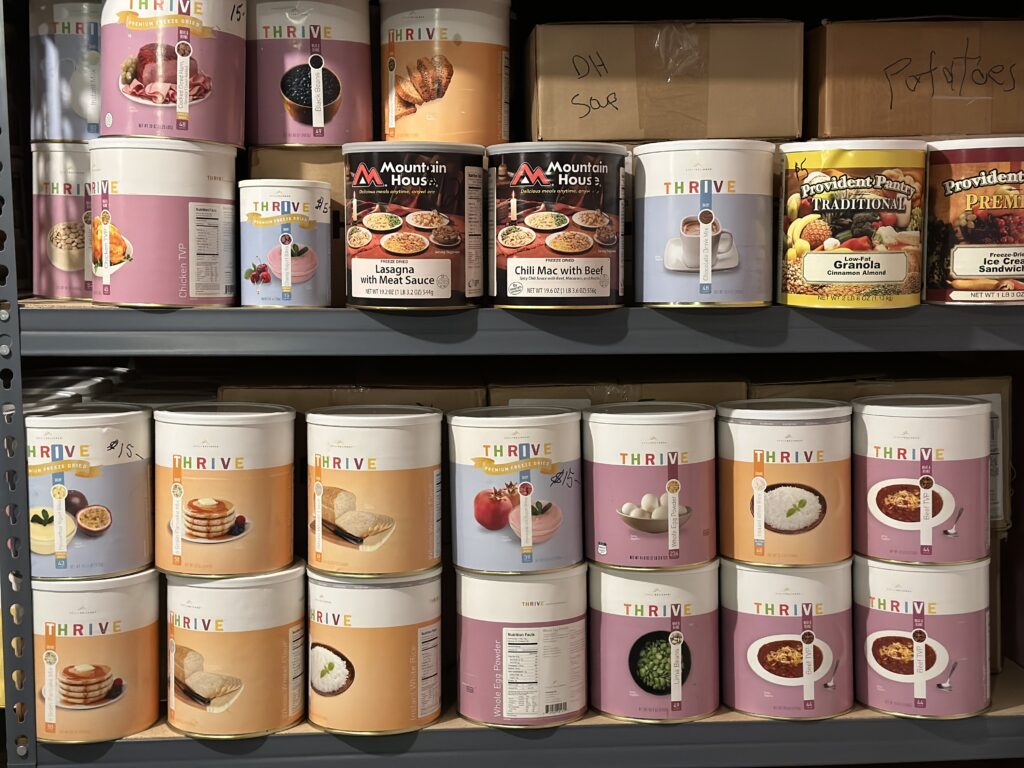
Food Storage Basics
To maximize your food storage efforts, consider these essential strategies:
Vacuum sealing: Extend the shelf life of your food by removing air through vacuum sealing. Use a vacuum sealer to keep dried fruits and nuts fresh.
Root cellaring: Store root vegetables like carrots, potatoes, and beets in a root cellar. This cool and stable environment helps extend their freshness.
Curing and smoking: Preserve and enhance the flavors of meats by curing and smoking them. Invest in a smoker to enjoy homemade bacon, jerky, and sausages.
Fermentation: Increase the shelf life of vegetables and enjoy tangy flavors through fermentation. Make sauerkraut or pickles to have a source of probiotics and nutrients.
Bulk storage: Save money by buying in bulk and store essentials like rice, pasta, and beans. Keep them fresh and pest-free in airtight containers.
Preserving herbs: Dry herbs such as basil, rosemary, and thyme to have flavors all year round. Hang them in a cool, dry place or use a dehydrator for long-lasting herbs.
Preserving dairy: Extend the shelf life of dairy products and have control over ingredients by making your own cheese or yogurt. Enjoy homemade dairy products with added freshness.
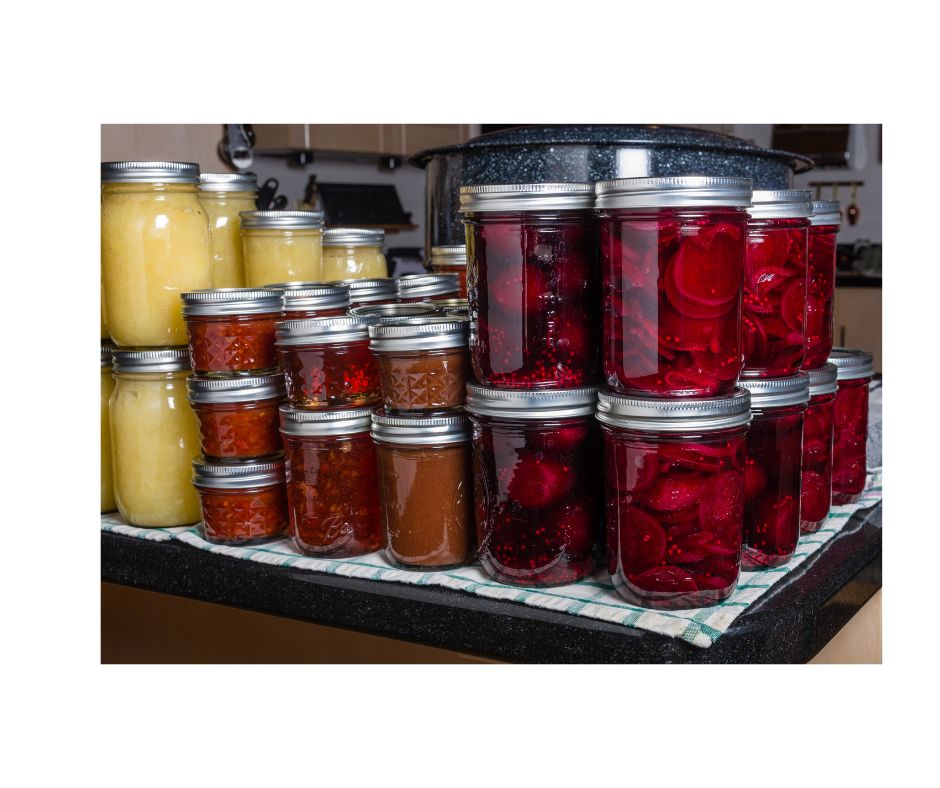
Canning: If you have a garden or access to affordable fruits and vegetables, canning is a great skill to learn. By canning your fresh food you are extending the shelf life and you can enjoy out of season fruits and veggies throughout the year.
Freeze Drying: If you own a freeze dryer, you know it is a great way to prep and store food. It prolongs your foods shelf life as well as making it light weight and easily tucked in a bug out bag. A great skill and option to have to get your emergency food storage prepared.
By incorporating these strategies into your food storage plan, you can ensure a diverse range of nutritious options, even in limited space.
Regularly rotate your supplies to maintain freshness and minimize waste for an effective food storage system.
Water Filtration and Storage Methods
To ensure a reliable supply of clean drinking water in emergency situations, it’s important to have effective water filtration and storage methods.
One option for water filtration is using water purification drops, which effectively treat large quantities of water. These drops are specially designed to eliminate harmful bacteria, protozoa, and viruses, making the water safe for consumption.
This system includes water treatment chemicals, a hand pump, and a water storage drum with a capacity of 55 gallons. With a shelf life of up to 4 years, it offers a long-term solution for water purification and storage.
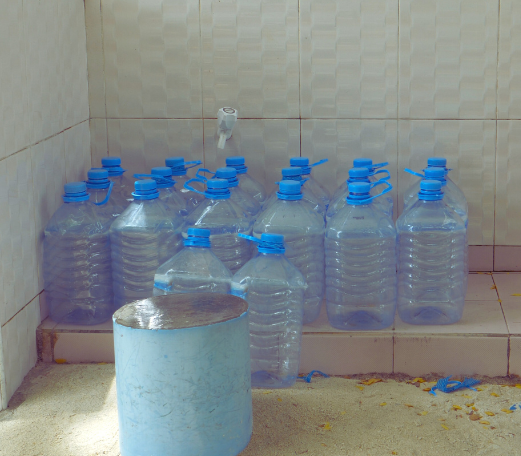
When it comes to storing water, it is crucial to have suitable containers that are specifically designed for food storage. Gallon bottles or 5-gallon water containers made of food-grade plastic are ideal options.
They are easy to handle and convenient to store. It is recommended to label the containers with the date of storage so that you can easily track and rotate your water supply to maintain its freshness.
Water jugs for emergency storage.
For emergency situations, it is advisable to have at least one gallon of water per person per day for a minimum of three days.
However, for longer-term emergencies, it is recommended to have a two-week supply of water stored. This ensures that you have an adequate supply to meet your hydration and sanitation needs.
It is also important to consider the quality of the water you are storing. If you are collecting water from natural sources such as rivers or lakes, it is necessary to filter and disinfect it before storage.
Portable water filters, like the LifeStraw Personal Water Filter, are effective in removing bacteria and parasites from water, ensuring its safety for consumption.
In addition to filtration and storage, it is crucial to plan for potential emergencies by identifying alternative water sources. Rainwater harvesting systems equipped with filters and storage tanks can provide a sustainable supply of water.
Additionally, understanding the location of nearby water sources and having the necessary tools for collecting and treating water from these sources is essential.
Preparing for emergencies includes being knowledgeable about waterborne contaminants specific to your area.
It’s important to be aware of potential pollutants and to select appropriate filtration methods to address them. Regularly maintaining and inspecting your filtration and storage systems will help ensure their effectiveness when needed.
By following these water filtration and storage methods, you can be well-prepared to meet your water needs during emergencies.
Remember to regularly rotate and replenish your water supply, stay informed about potential water sources in your area, and invest in reliable filtration systems to safeguard the health and well-being of you and your loved ones.
Check out this video from @homesteadonomics on a step by step rainwater harvesting set up.
Learning Core Survival Skills
Learn the essential survival skills necessary to be prepared for any emergency situation. Mastering core survival skills is crucial for preppers who want to effectively navigate unexpected circumstances.
Here are three lists of skills to focus on and develop:
Wilderness Medical Emergency Skills:
Gain proficiency in basic first aid techniques, including cardiopulmonary resuscitation (CPR) and wound treatment.
Learn how to identify and treat common medical emergencies that may occur in wilderness settings, such as dehydration, hypothermia, and snake bites.
Acquire the knowledge needed to improvise medical supplies and create makeshift splints or bandages.
H/T to @GrayBeardedGreenBeret for this video on wilderness medical.
2. Shelter and Fire Skills:
Learn how to construct shelters using natural materials like branches and leaves, understanding the principles of insulation and weather protection.
Master different fire-making techniques, such as using flint and steel, fire-starters, or friction methods.
Familiarize yourself with various fire structures, including teepee fires or log cabin fires, and their specific purposes.
H/T to @BUSHCRAFTTOOLS for this video on survival tips.
3. Navigation and Orientation Skills:
Develop proficiency in using a compass and reading maps accurately, allowing you to navigate effectively in different terrains.
Learn basic celestial navigation techniques, such as using the North Star as a point of reference for determining direction.
Acquire skills in orienteering, including understanding map symbols, route planning, and using landmarks to guide your way.
By focusing on these core survival skills, you will enhance your ability to handle emergencies and successfully navigate challenging situations.
Remember to practice and refine these skills regularly to maintain proficiency.
H/T to @TheMapReadingCompany for this video.
Frequently Asked Questions
How Can I Incorporate Prepping Into My Daily Life?
To incorporate prepping into your daily life, start by assessing your needs and creating a plan. Set aside money for emergencies, stock up on essential supplies, learn survival skills, and build a support network.
What Are Some Cost-Effective Ways to Prepare for Emergencies?
To prepare for emergencies on a budget, focus on essential supplies like food, water, and lighting. Look for cost-effective options, buy in bulk, and prioritize long-term storage. It’s all about being resourceful and efficient.
How Do I Customize a Bug Out Bag to Suit My Specific Needs?
To customize your bug out bag, assess your specific needs. Consider factors like climate, terrain, and duration of survival. Pack essential items like food, water, shelter, tools, and first aid supplies accordingly.
What Are Some Essential Survival Skills That Every Prepper Should Learn?
Learn essential survival skills for prepping: knot tying, CPR, and wound treatment. These skills are crucial for your safety and the well-being of your loved ones in emergency situations.
Start mastering them today.
How Can I Build a Support Network for Emergencies While Still Maintaining Self-Reliance?
To build a support network for emergencies while maintaining self-reliance, start by making a list of dependable people.
Be willing to reciprocate help and create a community of support for navigating unpredictable situations. Collaboration is essential for survival.
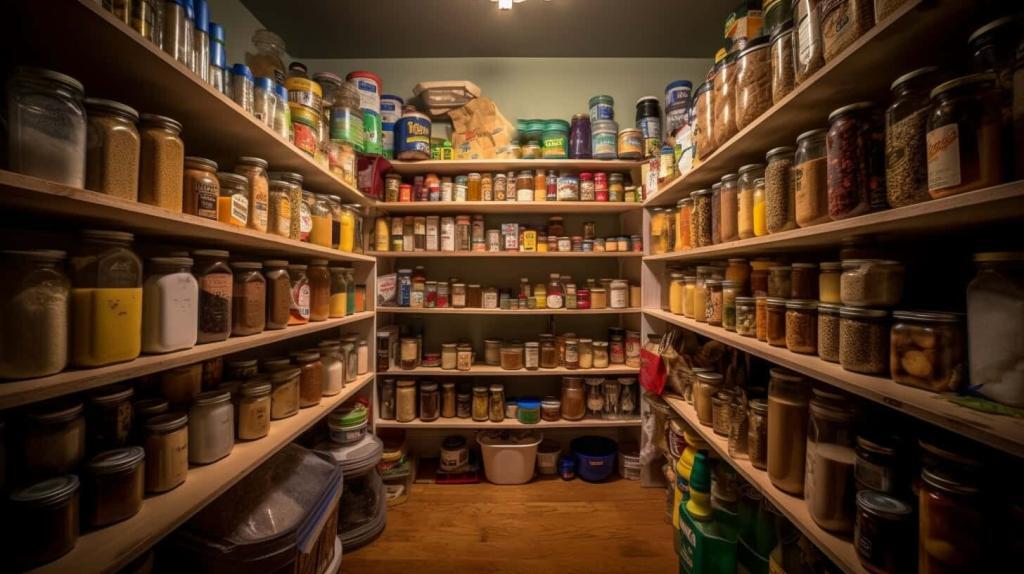
Photo of a stocked pantry.
Conclusion
In conclusion, prepping isn’t just for extremists or conspiracy theorists. It’s a practical approach to ensuring the safety and well-being of yourself and your loved ones in the face of emergencies.
By taking steps to be financially prepared, stocking up on essential supplies, building a bug out bag, and developing survival skills, you can take control of your future and be ready for the unexpected.
Don’t wait for disaster to strike – start prepping today.
Can you get pine nuts from any pine tree? No, not all pine trees produce pine nuts that are edible. This is where the Pinyon Pine (Pinus edulis), a famous tree for these desired nuts stands out. Learn about various pine species, where they live, and the nuts or seeds they produce.
Pine nuts are a great source of protein and fat, as well as vitamins, minerals, and antioxidants. Read on to learn where to find, how to identify, and how to harvest this wild food for your survival.
Pine Nut Sources
You cannot get these tasty nuts from any pine tree. However, the Pinyon Pine (Pinus edulis), is a famous tree for these special nuts.
While there are around 120 species of pine trees, only a few produce nuts that are large enough and have a pleasant taste suitable for human consumption. The most common pine trees that produce edible pine nuts include:
Pine Tree Species
Location
Pine Nuts
Pinus pinea (Stone Pine)
Mediterranean region
European pine nut – commonly used in Italian and Mediterranean cuisine.
Pinus koraiensis (Korean Pine)
Eastern Asia
Korean or Chinese pine nut – larger and have a higher fat content; popular in Asian dishes
Pinus edulis (Pinyon Pine) Pinus monophylla and Pinus cembroides (Single-leaf Pinyon and Mexican Pinyon)
Southwestern United States and Mexico
American pine nuts – smaller but known for their rich, buttery flavor
Pinus sibirica (Siberian Pine)
Siberia
Large pine nuts used in Russian cuisine
Chart of common pine tree to forage.
You should learn how to accurately identify the pine tree species before attempting to harvest or consume its nuts, as some pine tree parts can be toxic.
Also, harvesting these is labor-intensive, and always be careful not to harm the trees when foraging them.
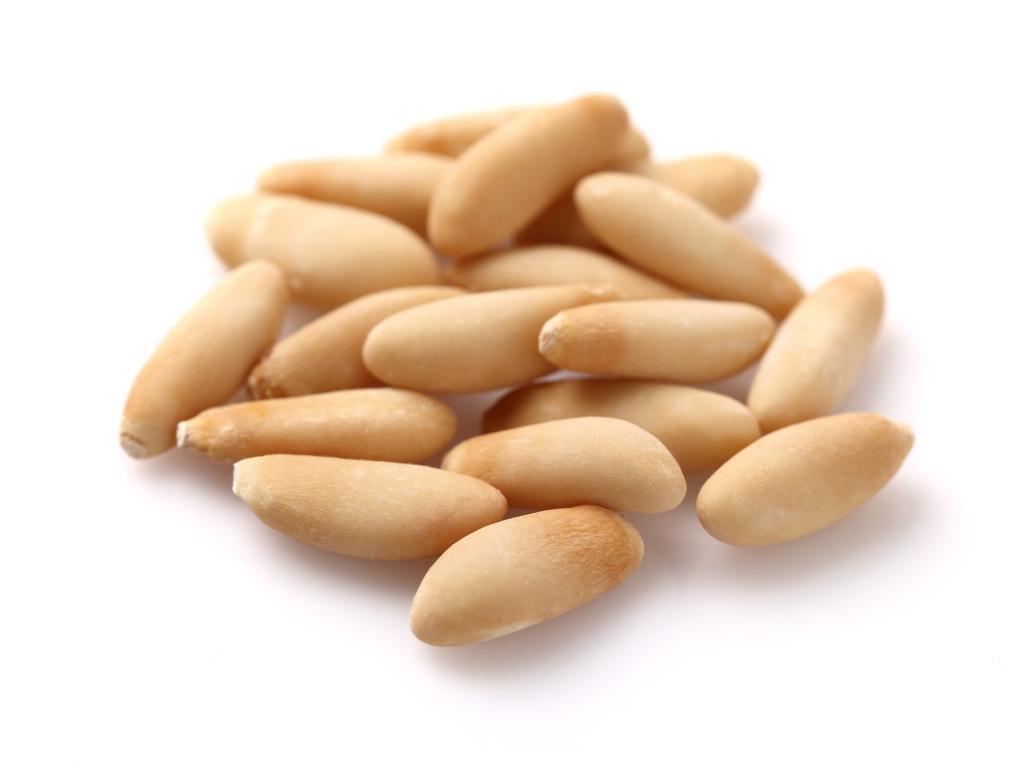
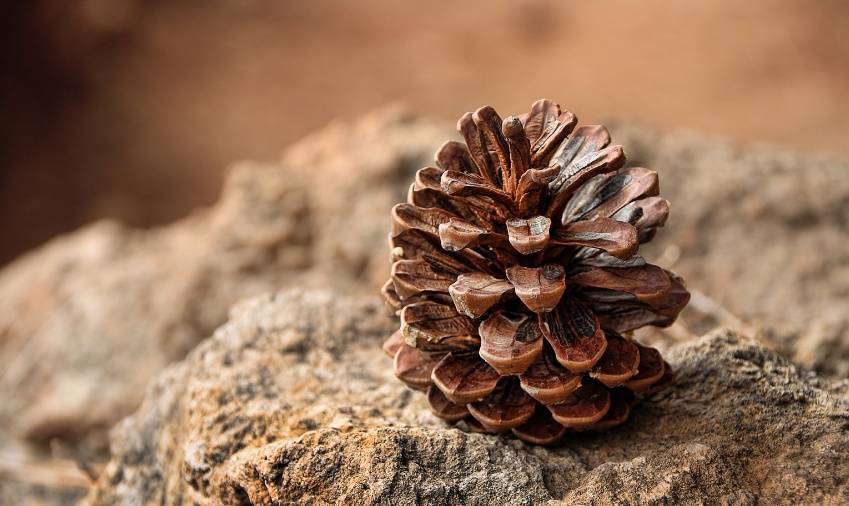
What Do Pine Nuts Look Like?
Pine nuts are small, elongated seeds that come from pine cones. Pine nuts are known for their unique taste, described as “buttery rich” with hints of pine and sweetness.
They have a light brown color and are enclosed in a hard outer shell. You can remove the edible kernel from the shell, which is creamy white to light beige and has a soft, slightly gritty feel.
Are Pine Nuts Edible?
Not all pine nuts are edible. And according to the UN Food and Agriculture, only 29 pine nuts come from edible species. There are a few additional species believed to be edible, but further research is needed to be sure.
The most common edible pine nut tree is the pinyon pine tree, native to the southwestern US. It produces the tasty and nutritious nut that many people enjoy.
Some other common species include the sugar pine, western white pine, and red pine.
Knowing how to properly identify different species before harvesting and consuming their nuts is essential to ensure a safe and enjoyable foraging experience.
How Do I Find Pine Nuts?
Learn the crucial differences and the species like Pinus cembra that provide edible nuts.
To find pine nuts, follow these steps:
1. Identify the right species of pine tree
Familiarize yourself with the appearance and characteristics of pine trees to distinguish between species like Pinus edulis and Pinus monophylla in your region. Different species produce nuts that are edible for humans. Pinus koraiensis, for example, is known for its flavorful seeds.
You can read foraging books and field guides to help you identify safe and edible pine trees.
2. Look for mature trees
Mature trees often showcase a more extensive root system and a well-developed canopy, indicative of their ability to yield a more significant number of pine nuts.
These trees can take up to 25 years or longer to reach it’s optimum production of pine nuts. Meaning your harvest would be more plentiful depending on the maturity of the tree.
3. Examine the pine cones
Look for mature, closed pine cones on the tree or the ground beneath it. The cones from Pinus pinea are particularly known for containing an abundance of seeds. Ensure to gather those that are unopened for a successful harvest of pine nuts.
4. Check the ground
Fallen pine cones can be an indicator that the nuts are available. Examine the area for piles of cones under the tree, as this can be a sign that the tree is actively producing nuts, ready to be harvested and enjoyed.
5. Choose the right season
Pine nut harvesting typically occurs in late summer and early fall when the pine cones mature. Plan your foraging trips during this time to increase your chances of finding some of these tasty morsels.
How to Harvest Pine Nuts
Proper techniques and timing are important for a successful pine nut harvest. Here’s a step-by-step guide to help you out.
Locate a pine tree with edible nuts.
Collect mature pine cones from the tree or the ground below.
Place the pine cones in a burlap sack or a similar breathable container.
Allow the pine cones to dry in a warm, sunny spot for a week or two. So the cones will open easily and release the nuts.
Shake the bag to separate the pine nuts from the cones.
Remove the hard outer shells of the nuts using a nutcracker or a similar tool.
Generally, late August to October is the best time to harvest. Harvesting usually happens during the late summer and early fall months. This is when the pine cones have matured and are ready to release the seeds. Timing your harvest ensures the collection of fresh and edible pine nuts.
One way on how to find these nuts is by keeping an eye on the ground around the tree for fallen cones, as this can be a sign that it’s time to harvest. The exact timing may vary depending on the specific pine tree species and region.
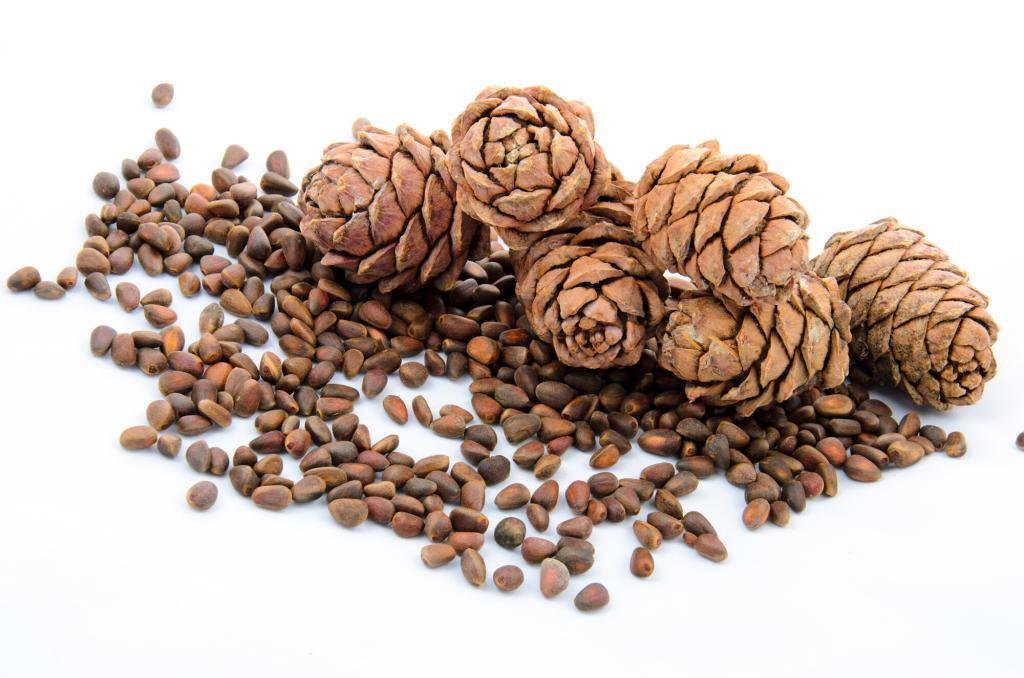
How Many Pine Nuts Are In A Pine Cone?
A single pine cone can house numerous seeds, making the hunt worthwhile. On average, one pine cone can contain anywhere from 20 to 100 pine nuts.
Tree health, environmental conditions, and maturity can impact the number of nuts a pine cone produces. Not all pine cones will have the same number of nuts, even on the same tree.
Pine Tree Toxicity
Certain species of pine trees are poisonous and you want to avoid ingesting their seeds or needles. Examples include the Araucaria heterophylla (Norfolk Island pine) with poisonous, highly concentrated seeds. These ar known to cause gastrointestinal issues and dermatitis.
Another example is the Yew tree (Taxus species), which is sometimes misidentified as a pine tree. It is very toxic, and all parts of the plant are dangerous, except the flesh of the berry around the seed. A very small dose of this poison can be deadly and she be avoided at all costs.
FAQ About Foraging Pine Nuts
How do I know what kind of pine tree I have?
Examine the needles, bark, and pine cones to identify the type of pine tree you have. Pinyon pines, for example, have short needles in bundles of two. They produce small to medium-sized, rounded cones.
Consulting a field guide or an expert in local flora can also help identify tree species.
H/T to @sacramentoriverecotours739 for this video: Harvesting Pine Nuts.
Is it safe to eat pine nuts raw?
Yes, it is safe to eat pine nuts raw as long as you know which ones are safe to consume. You can eat them raw, toasted, or cooked in various dishes. These raw nuts have a slightly sweet, nutty flavor and a soft, buttery texture.
Pine nuts can be used in various recipes. They can be used enjoyed as a delicious snack, blended up as pesto, or sprinkled on your favorite salad.
Are pine nuts nutritious?
Yes, pine nuts are nutritious. They contain omega-3s which are essential fatty acids to maintain a proper diet and boost your brain health.
In addition to the healthy fats, pine nuts contain protein and fiber which can assist in weight management by keeping you fuller for longer periods of time.
How do pine nuts grow?
Certain types of pine trees produce nuts inside their cones. After being pollinated by the wind, they mature into seeds within the female cones.
As the cones age, the nuts get embedded in the cone scales. When the cones are ready, they open up, letting the seeds or aka nuts fall out. After that, you may harvest the seeds.
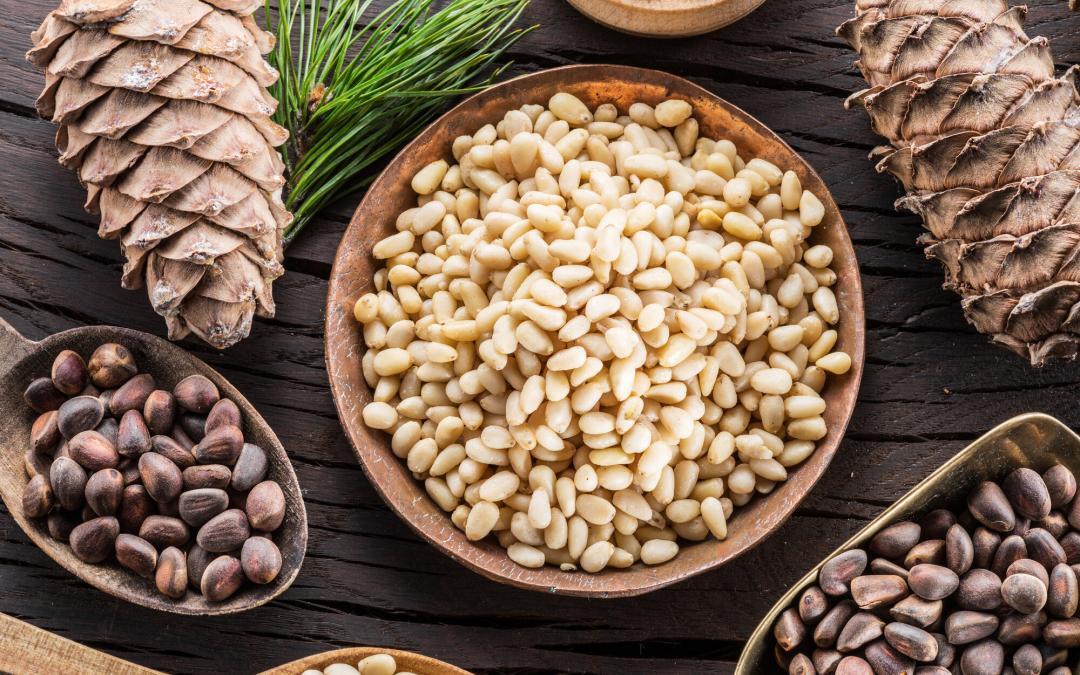
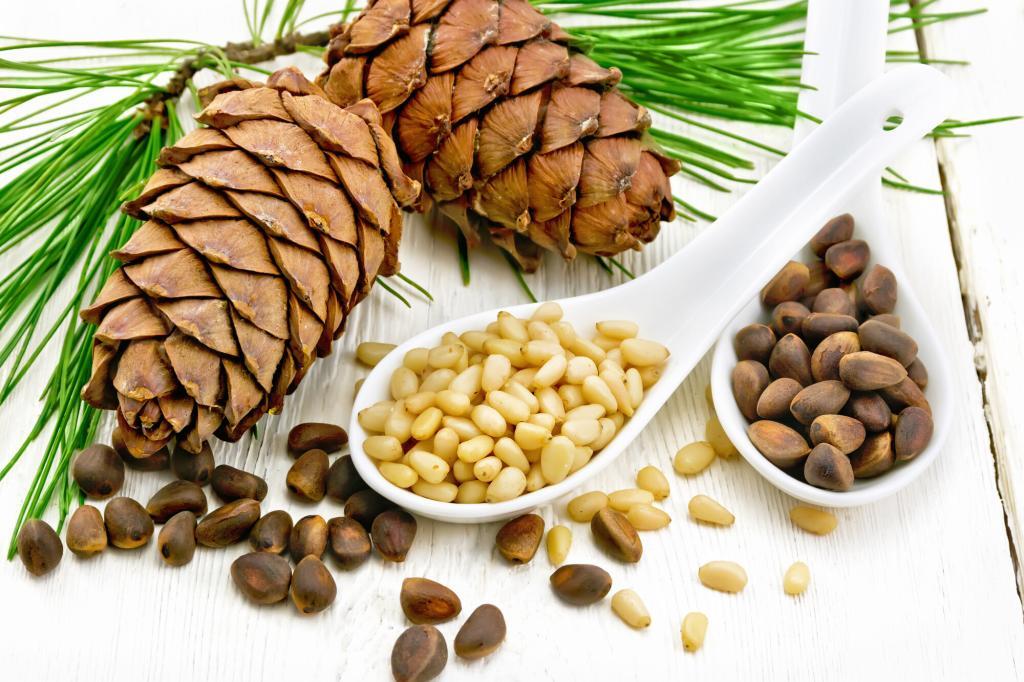
Photo of a pine cone next to a spoon of pine nuts.
Wrap Up: Can You Get Pine Nuts From Any Pine Tree?
While not all pine trees produce edible nuts, the pinyon pine tree and a few other species yield tasty and nutritious nuts.
Foraging for nuts can be a fun and rewarding activity – especially in the wild. Now that you know which trees produce edible nuts, you can practice harvesting them safely.
Pro Tip: Before foraging for these nuts, be sure to know how to identify the correct pine tree species that are edible. You don’t want to get into a situation of consuming anything poisonous.
Pine nuts can be a bit pricey at store according to my wife. Foraging these tasty nuts can not only save you some money, but possibly save you from starvation.
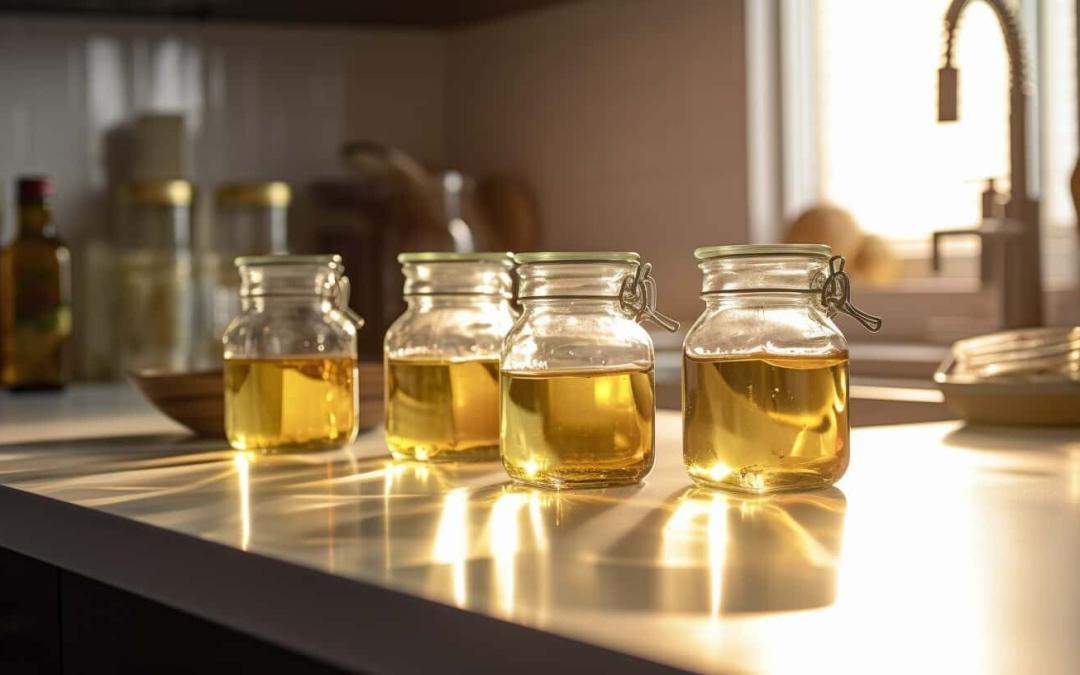
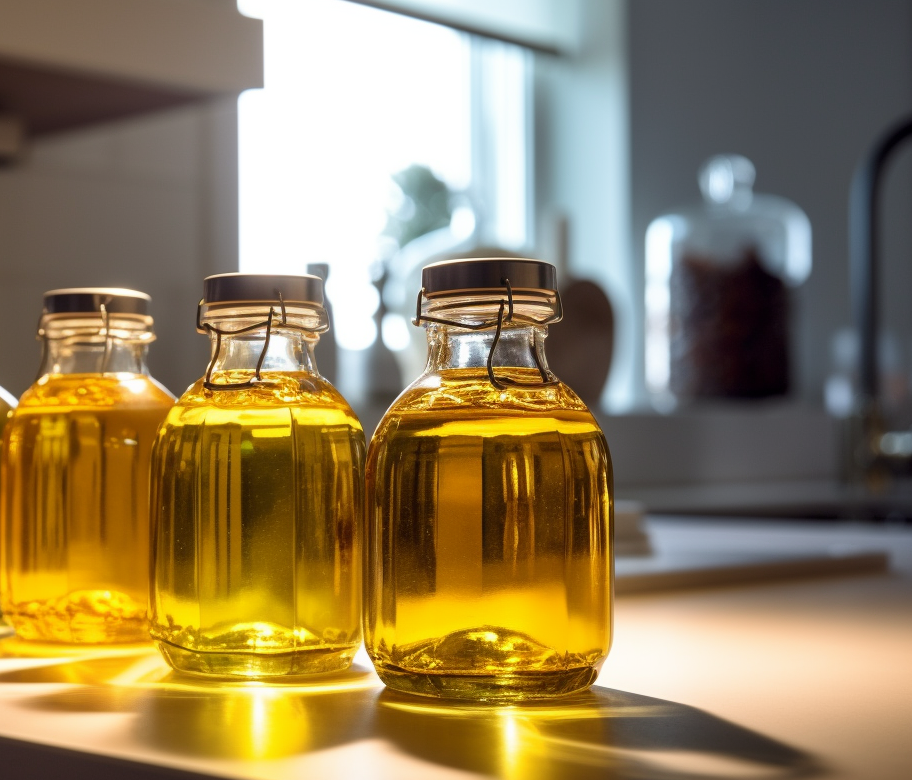
Learning how to make cooking oil from scratch involves selecting a base ingredient and using the cold-press or hot-press method to extract the oil.
For cold-pressing, you can grind the ingredients into a paste and use a machine or crush them and squeeze out the oil. For hot pressing, heat the base ingredient and extract the oil using a mechanical press.
Creating cooking oil at home is not just a culinary experiment, but a journey into understanding the essence of our daily meals. It’s all about using clean ingredients, understanding the basic steps, and trying out different oils to see what works best.
In this article, we’ll guide you through making your cooking oils using different ingredients found in the wild or stockpiled in your survival kit.
Making your own oil gives you control over the ingredients and the skills to add to your survival tool belt. This means better flavor and no unexpected additives. Plus, during a disaster, store-bought oils may not be available so your only option is to make one yourself.
Cooking oils are basically fats that you use for frying, baking, and other culinary purposes. You can get them from plant-based sources like vegetables, nuts, and seeds.
Oil can be used beyond its primary use for cooking. For instance, you can use it as a lubricant for squeaky hinges or tools that need a bit of smoothing.
If you’re exposed to harsh weather, oil can help protect your skin from drying out. Some oils, especially ones like tea tree, have antiseptic properties, making them useful for minor wounds.
Oil can also be a fuel source. It can power up lamps or even be used to create a temporary torch. And if communication is vital, oil can leave a mark or signal for help.
So next time you glance at that bottle, remember it’s more than just a cooking ingredient.
Common Types of Cooking Oils
From the robust flavors of olive oil to the high-heat capabilities of avocado oil, each type serves a unique culinary and nutritional purpose. Here are the common types of cooking oils:
Vegetable Oils
Derived primarily from plants, vegetable oils are versatile and commonly used in cooking. They provide an essential base for many dishes and are known for their light flavors.
They can come from different plant-based sources, including soybeans, corn, palm, olive, canola, and sunflowers.
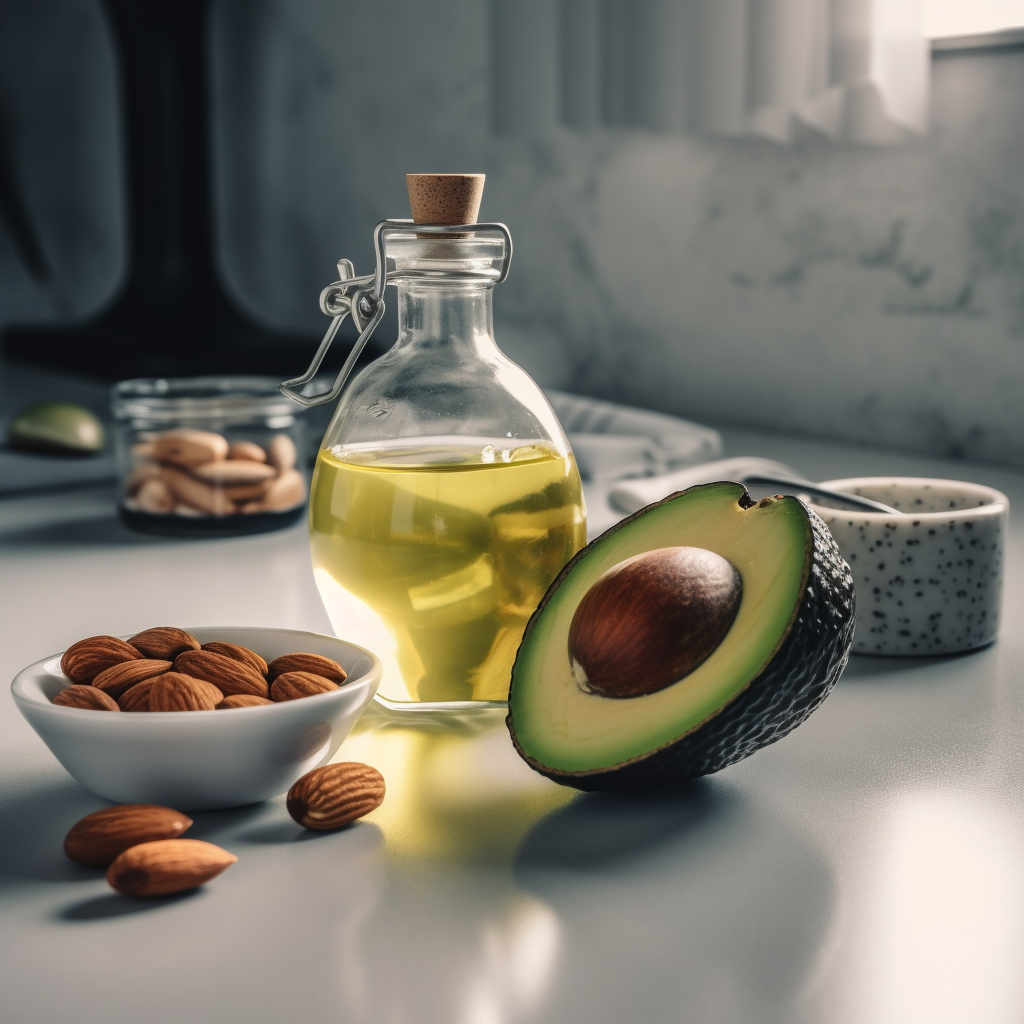
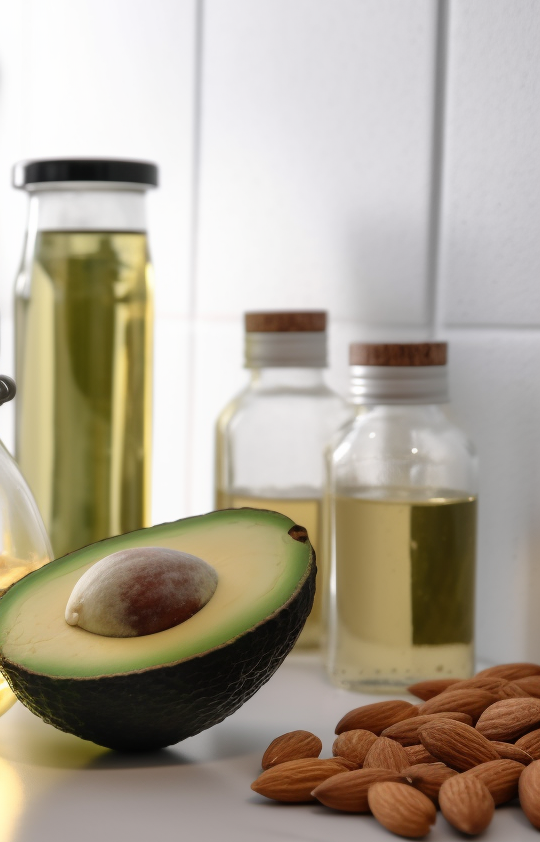
Nut Oils
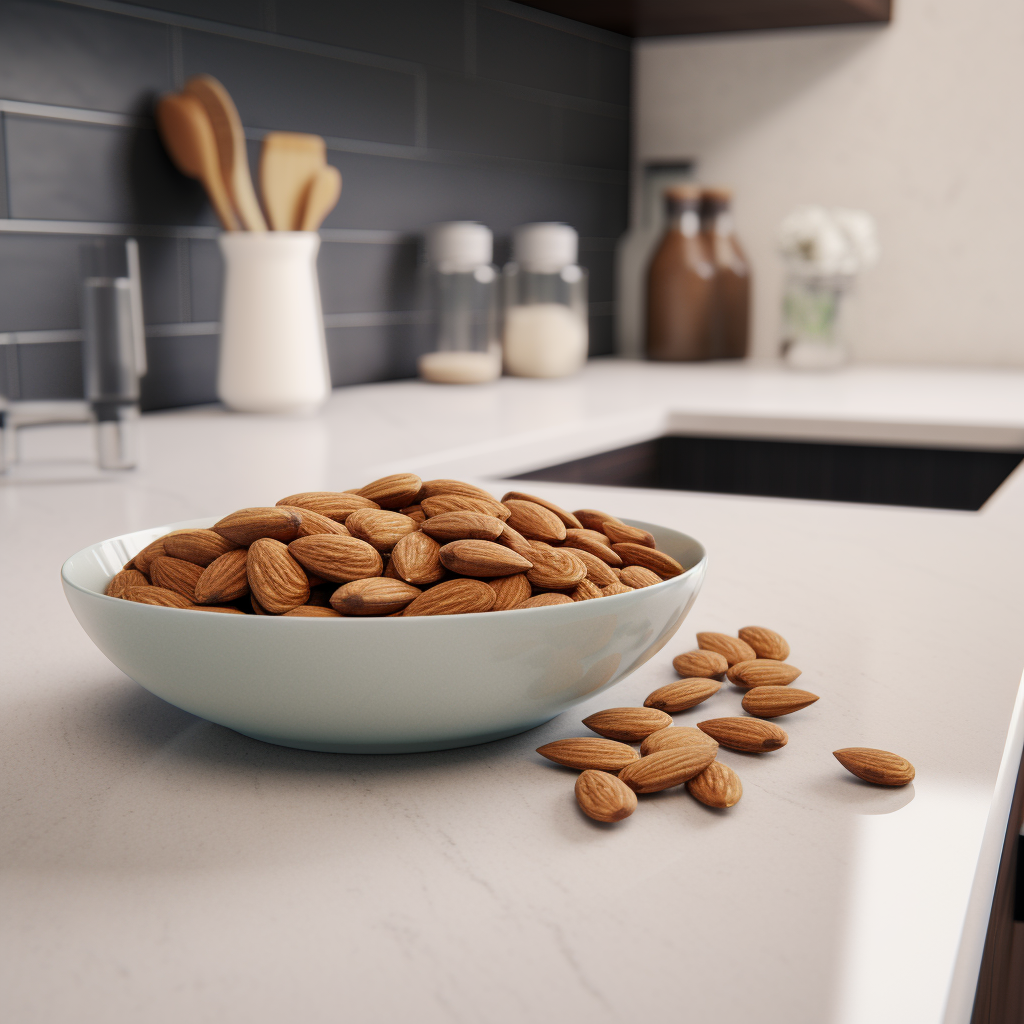
Nut oils often have richer flavors that bring an exotic touch to the table. Extracted from the heart of various nuts, such as almonds, hazelnuts, and walnuts, they not only enhance culinary dishes but also offer unique health benefits.
Here’s a list of some common nuts and seeds and their average oil content:
20 Percent Oil Content:
Tung nuts
30 Percent Oil Content:
Cottonseed
Safflower seed (can range up to 50 percent)’
Black oil sunflower (can range up to 55 percent)
40 Percent Oil Content:
Linseed
Olive
Rapeseed (used to produce canola oil)
Pumpkin (can range up to 60 percent)
50 Percent Oil Content:
Almond
Peanut
Poppy seed
Sesame seed
The provided list offers a general overview, but it’s important to note that the oil content in seeds and nuts can vary due to factors like growing conditions, variety, and extraction methods.
Seed Oils
Ranging from sunflower to sesame, seed oils have been in culinary use for centuries, praised for their delicate taste and nutritional content.
They are derived from various types of seeds, such as flaxseeds, pumpkin seeds, and sesame seeds. These oils are rich in omega-3 fatty acids, which are essential for maintaining good heart health.
Two Methods on How To Make Oil At Home: Cold-Pressing vs. Hot-Pressing
While there are multiple ways to extract oil, cold-pressing and hot-pressing stand out as the most traditional. Both methods have their merits, with distinct results in terms of flavor and nutritional value.
Cold-Pressing
The cold-pressing method is often seen as the purist’s choice as it retains most of the nutrients. By avoiding heat, it ensures that the oil remains in its most natural state.
Cold pressed oils are made by crushing seeds or nuts to release the oil, then pressing them using a hydraulic or screw press.
Cold-pressed oils keep more nutrients like antioxidants, vitamins, and minerals because they are not heated to high temperatures, which can destroy these important compounds.
Hot-Pressing
Hot-pressing uses heat to extract the oil from foods. Although using this method can lose some nutrients, it’s a faster process and produces a different flavor profile.
What You Need To Make Cooking Oil At Home
Making homemade cooking oil requires some essential tools and ingredients. From selecting the right seeds to using the correct equipment, preparation is crucial. Here are the things you need:
Oil Press: Choose between a manual or electric oil press based on your budget and quantity needs. This device extracts oil from seeds and nuts through pressing.
Strainer or Cheesecloth: This is used to filter out residues from the extracted oil, ensuring purity and clarity.
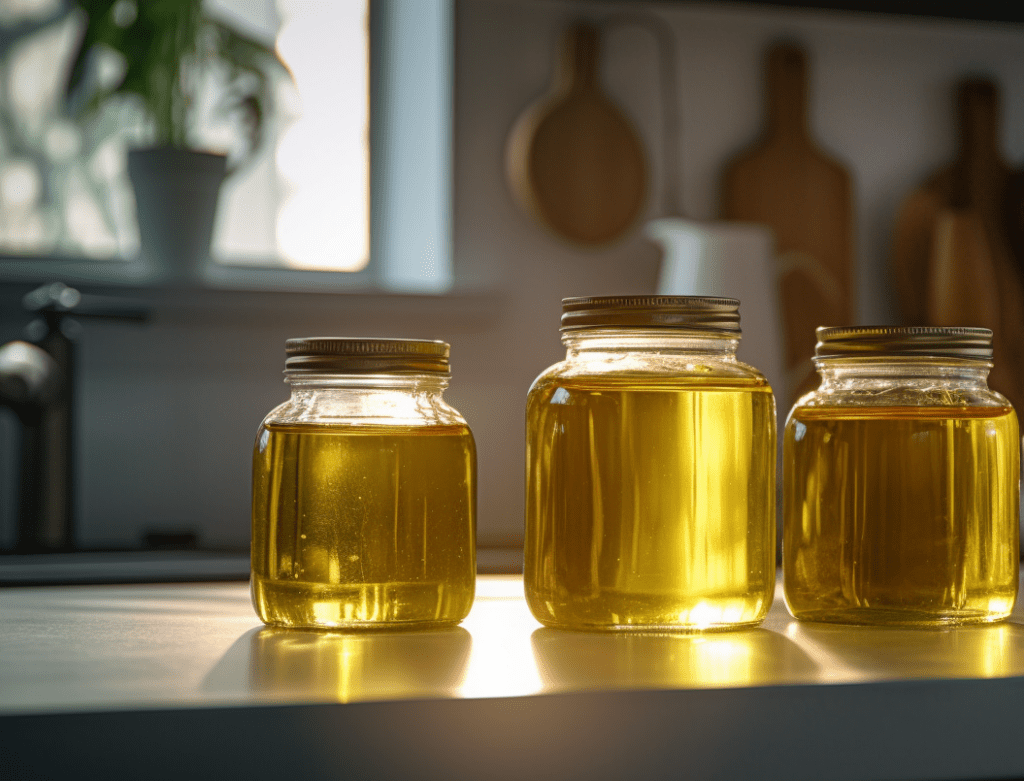
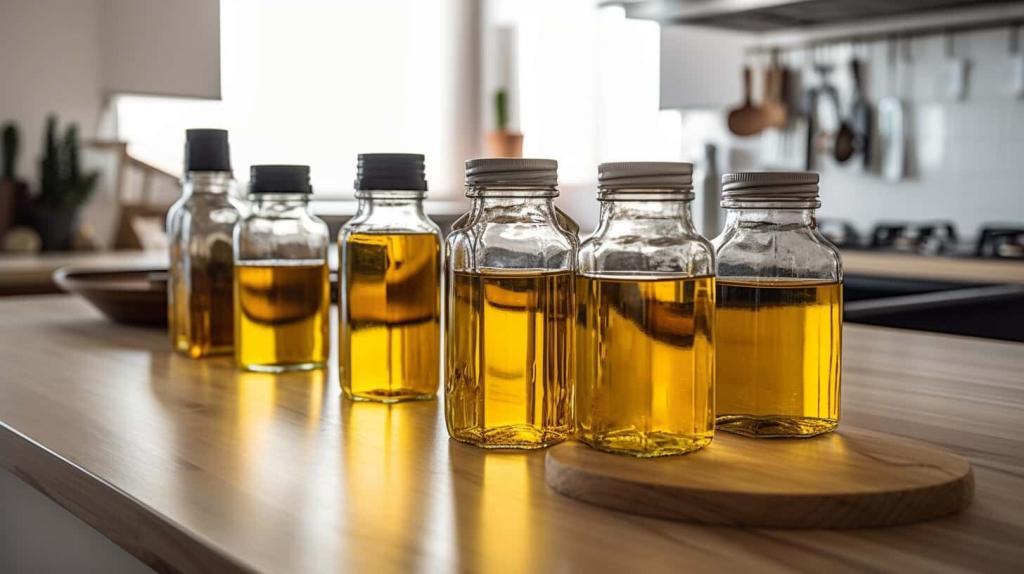
Storage Containers: Dark glass containers with tight seals are best to maintain the oil’s quality, protecting it from sunlight and contaminants.
How To Make Cooking Oil at Home
Now let’s dive into making your homemade cooking oil by gathering ingredients, choosing the method, and preparing to filter and store the cooking oil.
1. Gather Ingredients and Equipment
Before making your cooking oils, gather the ingredients, a press, a filter, and a container for storing the oil.
2. Prepare the Ingredients
Before you begin, carefully wash and dry all your ingredients. Try roasting or toasting them for a few minutes for added flavor and aroma. Also, make sure to dry them well before extraction.
3. Extract Oil using Cold-Pressing Method
To extract oil using the cold-pressing method, you will need to crush or grind the ingredients into a paste and then place the paste in a press. Apply pressure to the paste to extract the oil, and collect them in a container.
4. Extract Oil using Hot-Pressing Method
To extract oil using the hot-pressing method, you will need to heat the ingredients by roasting them before adding them to a press and then apply pressure to extract the oil.
5. Filter the Oil
After extracting the oil, you can filter your oil by straining it through a coffee filter to remove any remaining particles.
6. Store the Oil Properly
Store your homemade cooking oils in a cool and dark place, away from sunlight and heat. You can also add a natural preservative such as vitamin E to extend the shelf life of the oil.
How To Make Cooking Oil From Coconut
To make cooking oil from coconut, you will need fresh coconut meat, a blender, and a cheesecloth or press.
Remove the outer shell of the coconut and cut the meat into small pieces.
Blend the coconut meat in a blender with a small amount of water to create a paste.
Place the paste in a cheesecloth or press and squeeze out the oil.
Allow the oil to settle for a few hours, then carefully pour off the top layer of clear oil into a separate container.
Store the oil in a cool, dry place away from direct sunlight.
How To Make Cooking Oil From Sunflower Seeds
To make cooking oil from sunflower seeds, you will need a bag of sunflower seeds, a blender, and a cheesecloth or press. Sunflower seeds release a light oil perfect for a myriad of dishes.
Roast the sunflower seeds in the oven at 350°F for about 15 minutes or until golden brown.
Allow the seeds to cool and then blend them in a blender until you have a fine powder.
Add a small amount of warm water to the powder to create a paste.
Place the paste in a cheesecloth or press and squeeze out the oil.
Allow the oil to settle for a few hours, then carefully pour off the top layer of clear oil into a separate container.
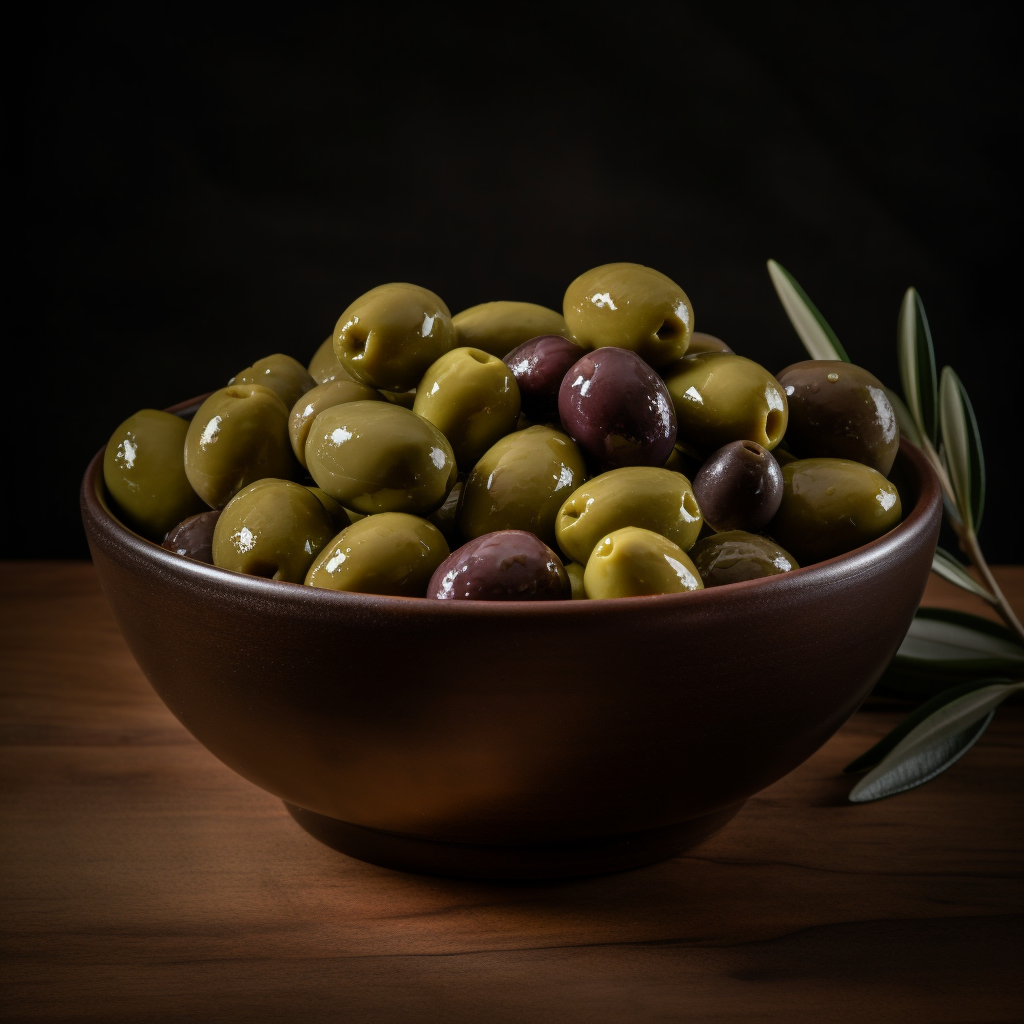
How To Make Cooking Oil From Olives
To extract olive oil, you will need fresh olives, a mechanical press or food processor, and a cheesecloth. Olives are one of the most sought-after oils, it is delicious and packed with health benefits.
Wash and remove the stems from the olives.
If using a mechanical press, crush the olives into a paste. If using a food processor, chop the olives into a fine paste.
Place the olive paste in cheesecloth and squeeze out the oil.
Allow the oil to settle for a few hours, then carefully pour off the top layer of clear oil into a separate container.
Store in a dark container.
You may choose green or black olives, but remember that green olives have a slightly bitter taste and yield less. On the other hand, black olives have a milder taste and produce a higher yield.
How To Make Seed Oils and Nut Oils
With the right methods, you can draw out seed and nut oils to get its unique flavor. Here’s how to do it:
You can use a variety of nuts and seeds to make oil, such as sunflower seeds, pumpkin seeds, almonds, walnuts, etc. Choose your preferred type of nut or seed and gather them in a bowl.
Spread them evenly on a baking tray and roast them in the oven at 350°F for about 10-15 minutes or until they turn golden brown. Roasting will help to release the oils from the nuts or seeds.
Allow them to cool down completely before transferring them to a blender or food processor.
Grind the nuts or seeds in a blender or food processor until they form a fine powder. Be careful not to over-blend as this can cause the mixture to become sticky.
Add a small amount of neutral-flavored oil, such as grapeseed oil or sunflower oil, to the ground nuts or seeds. This will help to make the mixture smoother and easier to extract oil from.
Use a cheesecloth or a fine mesh strainer to extract the oil from the nut or seed mixture. Squeeze the mixture well to ensure that all of the oil is extracted.
Pour it into a sterilized glass jar with a lid. Store it in a cool, dark place and use it within a few weeks.
How to Make Your Own Avocado Oil
Avocado is a rich oil ideal for both culinary and cosmetic uses. When extracted, this oil carries the avocado’s health benefits in a concentrated form. Heres how to extract it:
1. Start by gathering ripe avocados. The number you need depends on how much oil you want, but 5-10 is a good starting point for a decent yield.
2. Wash the avocados thoroughly, halve them, and remove the pits. Scoop out the flesh and place it in a bowl.
3. Mash the avocado flesh using a fork or potato masher until you get a smooth paste. This will increase the oil yield.
4. Transfer the mashed avocado into an ovenproof dish. Preheat your oven to its lowest setting (around 150°F or 65°C) and allow the avocado to heat slowly for about 5-6 hours. This helps the oil seep out.
5. After heating, remove the dish from the oven and let it cool. Place a strainer over a jar and line it with cheesecloth. Pour the heated avocado mixture into the strainer, allowing the oil to drip into the jar. Squeeze the cheesecloth to extract more oil.
6. Seal the jar tightly and store it in a cool, dark place. It’s best to use the oil within a few days for freshness.
Remember, the resulting oil will have a strong avocado flavor, perfect for salads or dishes where the avocado taste is desired. For clearer oil, more refinement and filtration would be necessary. Always use ripe, high-quality avocados for the best results.
How To Make Vegetable Oil From Palm Oil
Learn the step-by-step process of converting palm oil into versatile vegetable oil. Palm oil, though controversial, remains a staple in many kitchens. By creating it at home, you can ensure a more sustainable and ethical approach to its production.
Here’s a simple method on how make it:
1. Harvest and prepare the palm fruits. They will have a reddish-orange hue.
2. Place the fruits in a pot, cover them with water, and boil for 30-60 minutes until they become soft and the skin starts to come off.
3. Once cooled, mash the fruits manually to separate the pulp from the kernels and the outer husk. Traditional methods involve pounding the fruits in large wooden mortars. You can also use a hand press or any device that can apply pressure.
4. Add a little warm water to the mashed pulp and mix. The oil will begin to surface. You can then start scooping it out or pour the mixture through a sieve or cloth to separate the oil.
5. Place the collected oil in a pot and boil for about 10-15 minutes. This will help to separate any remaining water and contaminants from the oil. Once boiled, allow it to cool, and you will notice the oil will come to the surface while impurities settle at the bottom.
6. Skim off the pure oil from the top, ensuring not to collect the settled impurities. Transfer the oil to a clean, dry container and store it in a cool, dry place.
Keep in mind that this is a basic and traditional method. Large-scale production and refining processes are more complex and require more equipment.
If sourcing palm fruits, ensure they come from sustainable and responsible sources to mitigate environmental and ethical concerns.
How To Make Cooking Oil From Animal Fat
Turning to traditional methods, animal fats like lard and tallow can be transformed into cooking oils. These fats, when rendered, offer rich flavors reminiscent of age-old culinary traditions. Here’s a simple guide on how to render animal fat into oil:
1. Start by trimming any meat residues from the fat. This is important because meat can cause the fat to spoil or impart undesired flavors to the oil.
2. Cut the fat into small pieces, or even better, grind it. The smaller the pieces, the quicker and more efficiently the fat will render.
3. Melt the fat. Here are two ways on how to do it:
Using a pot: Place the chopped fat into a large pot. Heat on the lowest setting. This process needs to be slow to ensure that the fat doesn’t burn. Stir occasionally.
Using a slow cooker: If you have a slow cooker, it’s ideal for this purpose. Place the chopped fat in the cooker, set it on low, and let it melt slowly for several hours.
4. Allow the fat to simmer gently. As it renders, you’ll notice clear oil separating from the solid bits. This process can take several hours. Ensure that it doesn’t reach a boiling point to avoid burning the fat.
5. Once the fat is fully rendered (you’ll be left with clear oil and crispy solid bits known as “cracklings”), carefully strain the oil through a sieve or cheesecloth into your chosen container or jar, leaving the solids behind.
6. Allow the oil to cool down. Once cooled, it will solidify somewhat, especially if made from pork or beef fat. Store it in a cool, dry place or refrigerate. It can last for a long time if stored correctly.
Note:
Beef fat, when rendered, is often referred to as “tallow.”
Pork fat, when rendered, is called “lard.”
Chicken fat is sometimes called “schmaltz,” especially in Jewish cuisine.
Remember to source your animal fats from trustworthy sources, preferably from pasture-raised animals, to ensure the best quality and flavor.
How to Refine Cooking Oil at Home
By understanding simple refining techniques, you can enhance the quality of your homemade oils, ensuring they remain fresh for longer. Refining oil can also elevate its purity.
Pour the oil through a coffee filter or a cheesecloth to remove any impurities or debris.
Add a small amount of citric acid to the oil and mix it thoroughly to neutralize it. Let the mixture sit for a few hours until the acid has neutralized any remaining free fatty acids.
Carefully pour the oil into a clean container, leaving any sediment or impurities behind.
Mix the oil with a small amount of activated charcoal or clay and heat it to about 120°C (248°F) for 20-30 minutes. This process will remove any remaining impurities and lighten the color of the oil.
Heat the oil to about 220°C (428°F) for 30 minutes to remove any remaining odor or flavor.
Allow the oil to cool and then filter it through a clean cheesecloth or coffee filter to remove any remaining impurities.
Transfer it to a clean, airtight container and store it in a cool, dark place.
Be cautious when heating oil as it can be dangerous. Always use appropriate safety measures and equipment.
Tips and Tricks for Making Cooking Oils from Scratch
From choosing the right ingredients to mastering the extraction process, these tips and tricks will elevate your culinary game to the next level.
Choose high-quality seeds, nuts, or fruits. Experiment with different ingredients to create unique flavors and aromas.
Try roasting or toasting the seeds or nuts to bring out their flavor.
Use high-quality ingredients for the best results.
Use a cold-press method to extract the oil, as it preserves the nutrients and flavor.
Use a filter to remove any unwanted particles or debris and a clean, dry container to prevent contamination.
Store the oil in a dark, cool place to keep it fresh.
H/T to @SSLFamilyDad for their video: Making Cooking Oil at Home
Reusing and Repurposing Your Cooking Oil
By understanding how to properly store and reuse your oils, you not only save resources but also maintain the integrity of your oil.
If you’ve ever thought about reusing that homemade cooking oil, here’s a quick tip: once it’s cooled, just strain out the food bits using something like a fine-mesh strainer or even a cheesecloth.
But remember, try not to reuse it more than 2-3 times. If it starts smoking quickly or smells off, it’s time to let it go. And if you want to give it a little aroma boost, throw in some ginger or dry curry leaves. Though, when in doubt, start fresh for your next dish.
FAQs on How to Make Cooking Oils from Scratch
Do I need any special equipment to make cooking oil from scratch?
You will need an oil press or oil expeller to extract the oil from the seeds or nuts. You can buy these online or from specialty kitchen stores.
Can I store homemade cooking oil for a long time?
Yes, homemade cooking oil can be stored in a cool, dark place for several months. Always use a clean and dry container with an airtight seal to prevent spoilage.
Is homemade cooking oil healthier than store-bought options?
Homemade oils can be a healthier option because you control the ingredients and the extraction process. However, remember that all oils are energy-dense, so moderately incorporate them into a balanced diet.
Can I use homemade cooking oil for high-heat cooking?
It depends on the type of oil you make. Some oils, such as coconut oil, are better suited for high-heat cooking, while others, such as flaxseed oil, are best used in salad dressings or for drizzling over foods.
Be sure to research the smoke point of your chosen oil before using it for cooking.
How do I know when the oil is ready to be extracted?
The oil will start to separate from the paste or seeds during the pressing process.
Can I use a blender to make the paste for cold-pressing?
Yes, you can use a blender to make the paste for cold-pressing, but be careful not to over-blend, as it can affect the quality of the oil.
Key Takeaways of How To Make Cooking Oils At Home
Making your own cooking oil at home is rewarding, allowing you to explore the rich flavors of ingredients like sunflower, coconut, avocado, and various seeds and nuts.
By understanding the nuances of cold and hot pressing methods, you can tailor the extraction process to achieve the desired taste and nutrient profile. Each type of oil brings its unique essence to your culinary creations.
Empowering yourself with this knowledge not only enriches your cooking experience but also ensures a healthier and more authentic touch to your dishes.
The process can be a bit time-consuming, but the result is worth it, especially if you’re in a pinch. Learning how to make cooking oil at home can give you greater control over your food supply and ensure that you have the resources you need to thrive in any situation.